Kitchen and Plumbing
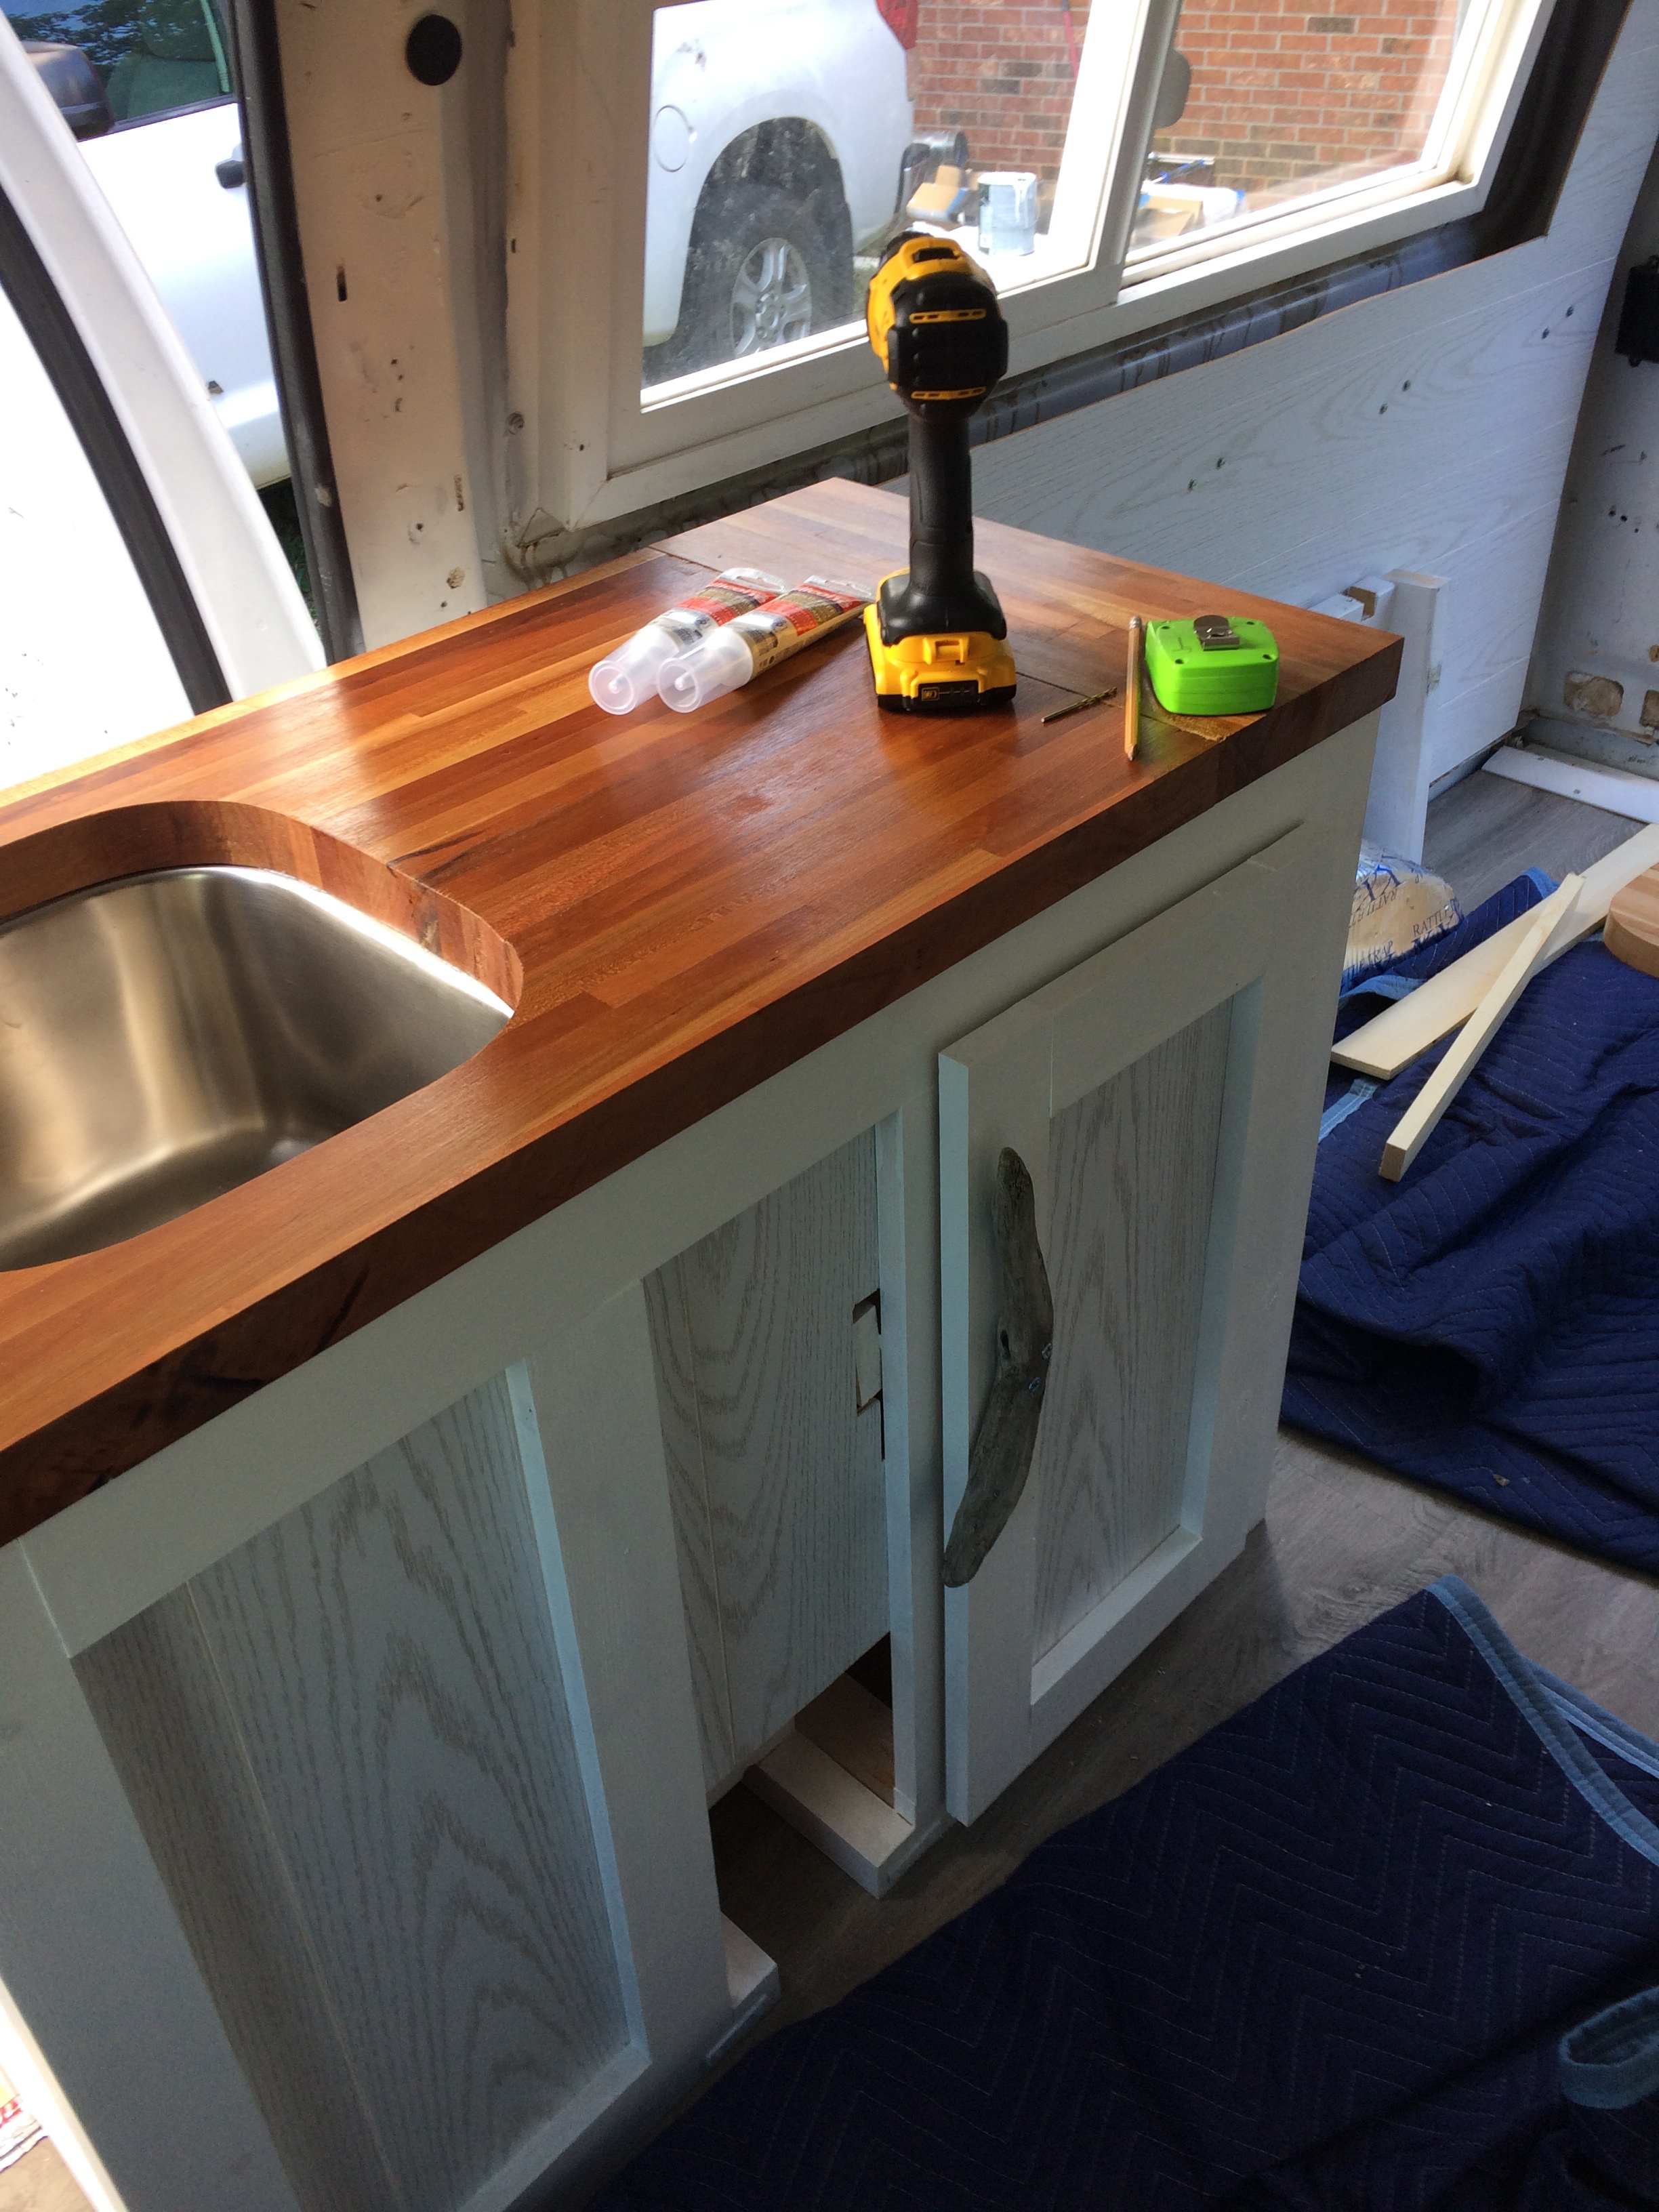
That’s the kitchen cabinet, plumbing, water storage, stove and all!
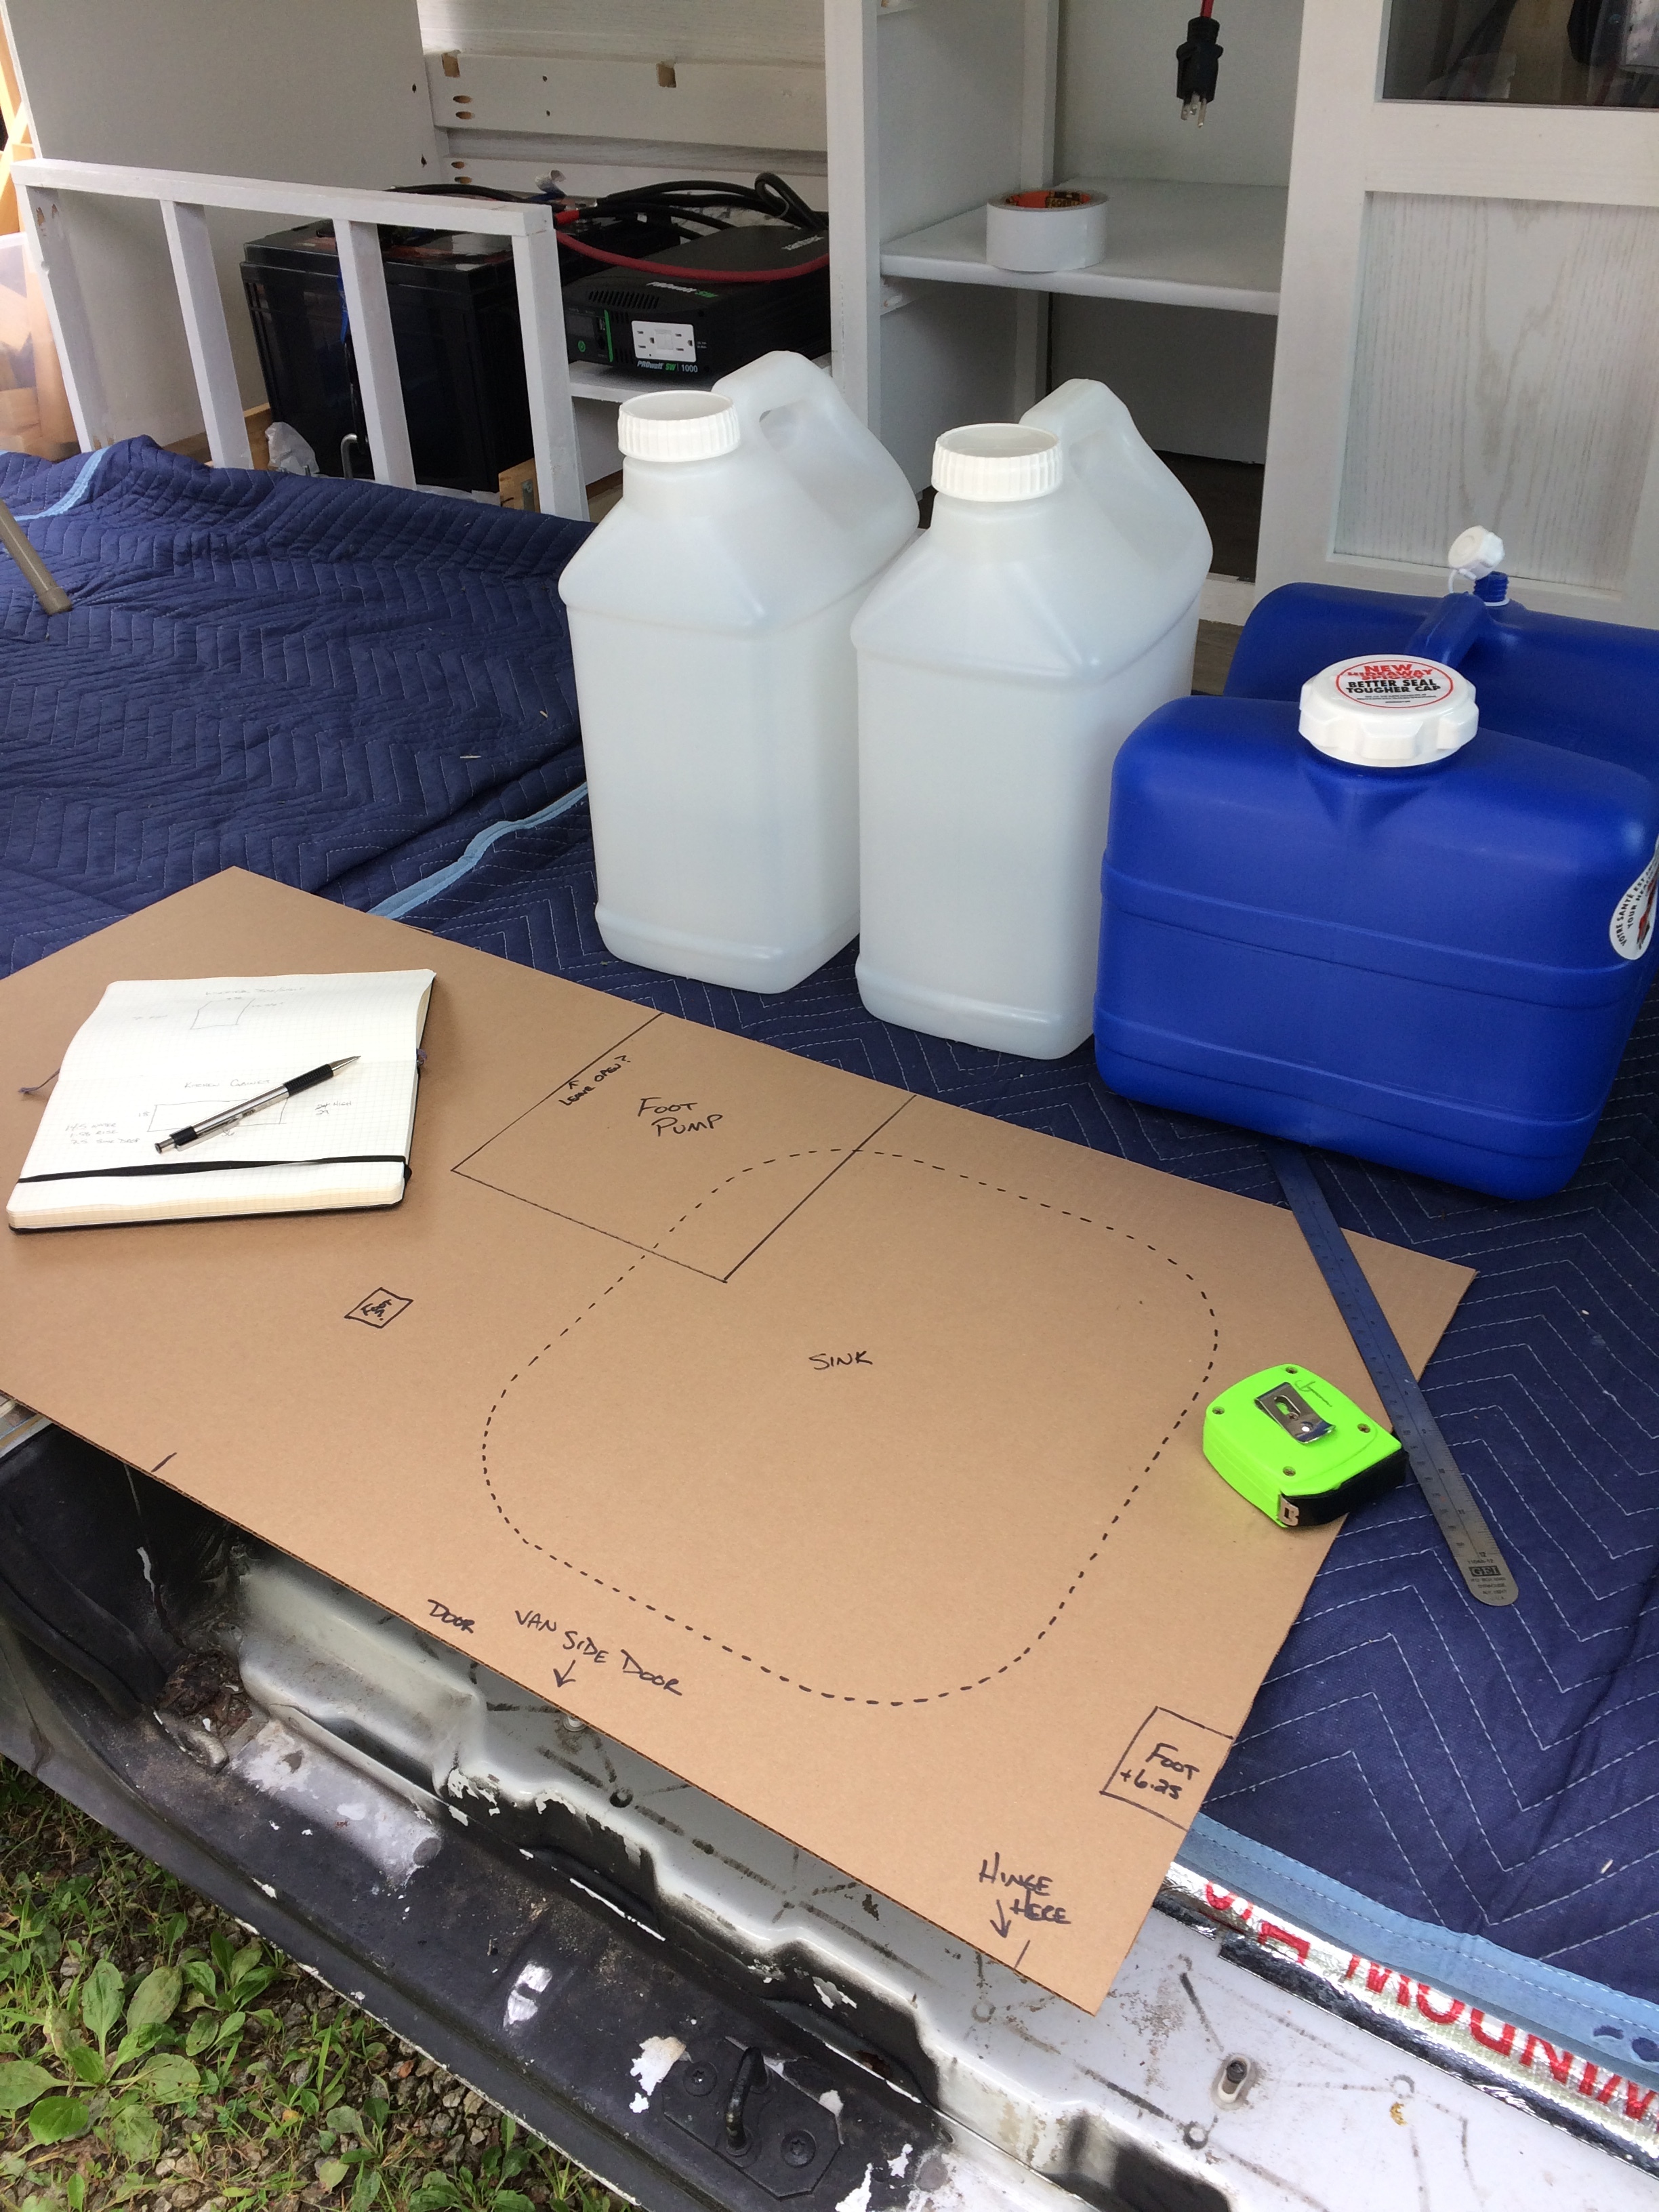
When I was in the planning stages I determined that I needed a real sink, big enough to brush my teeth and do dishes. And I wanted running water but I did not want to have to have electricity for it. I have seen plenty of people use a hand pump, they are inexpensive and simple to install. But if you have ever used one (they are often on sailboats) they are annoying in practice. Having to have one hand on the pump 2/3 of the time you use it makes things like washing your hands or dishes more complicated than you might think. Ultimately I decided to install a foot pump instead (also common on sailboats) so that I could have running water without electricity and I can use both hands!
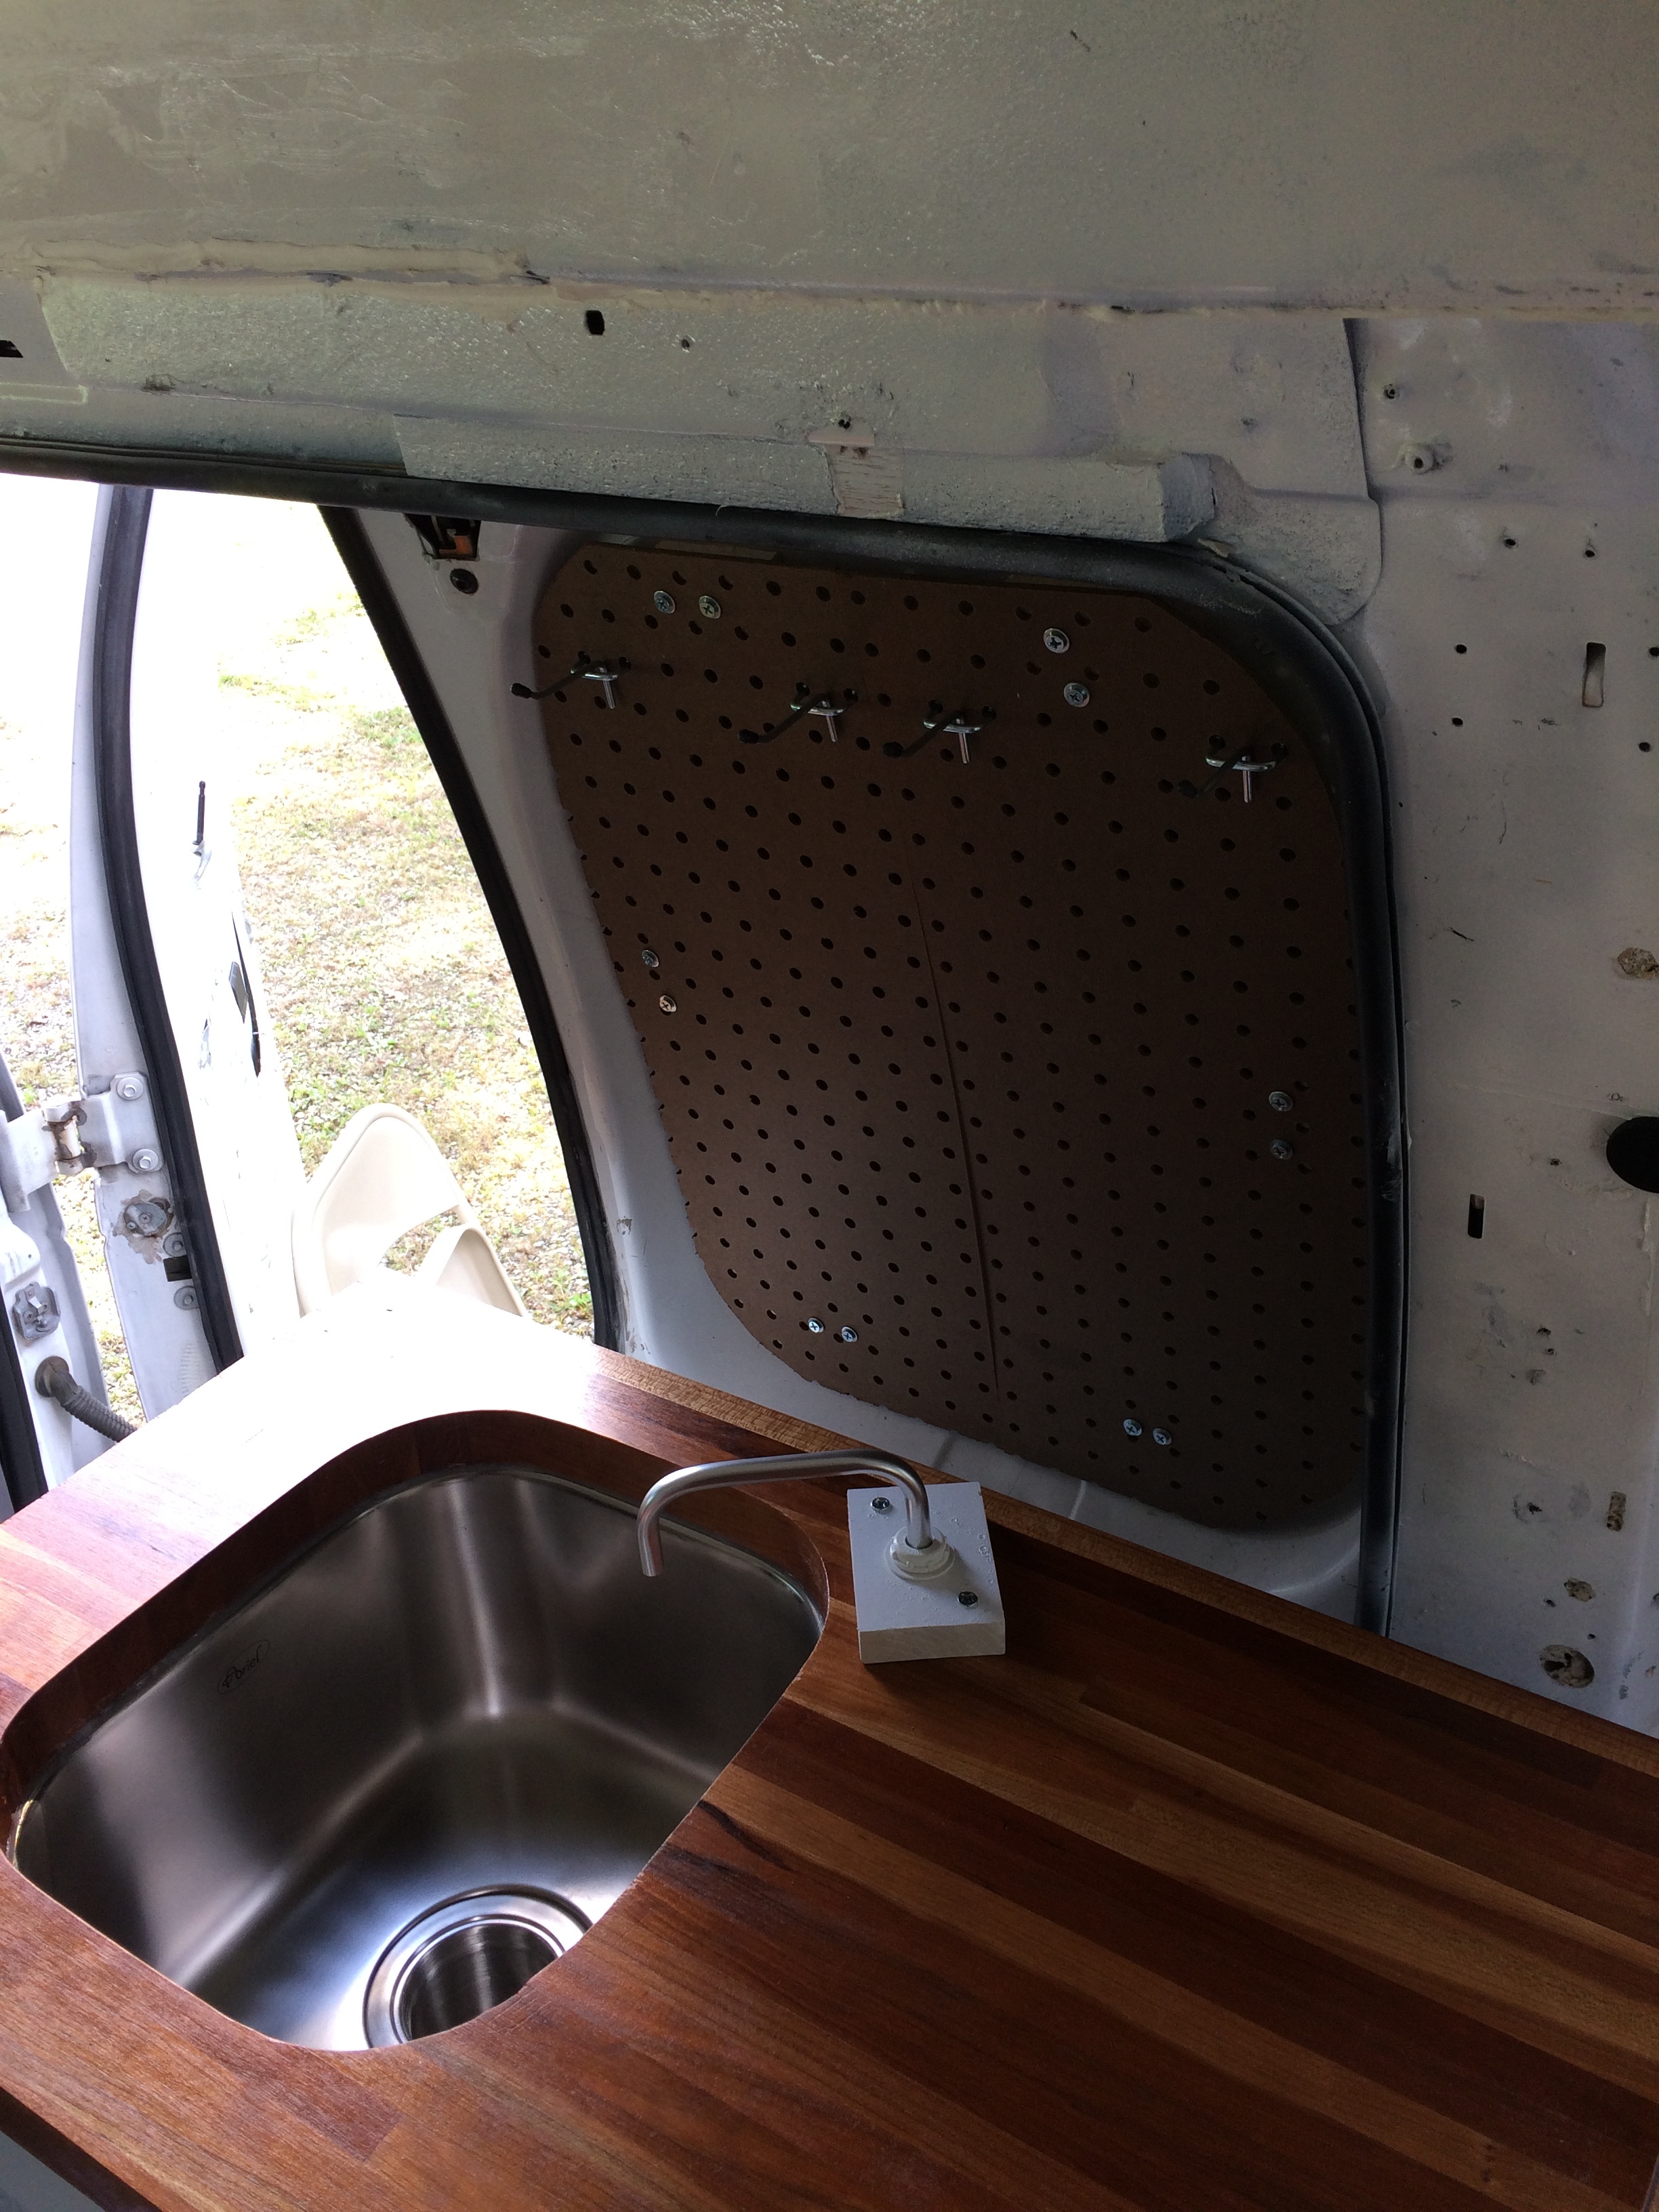
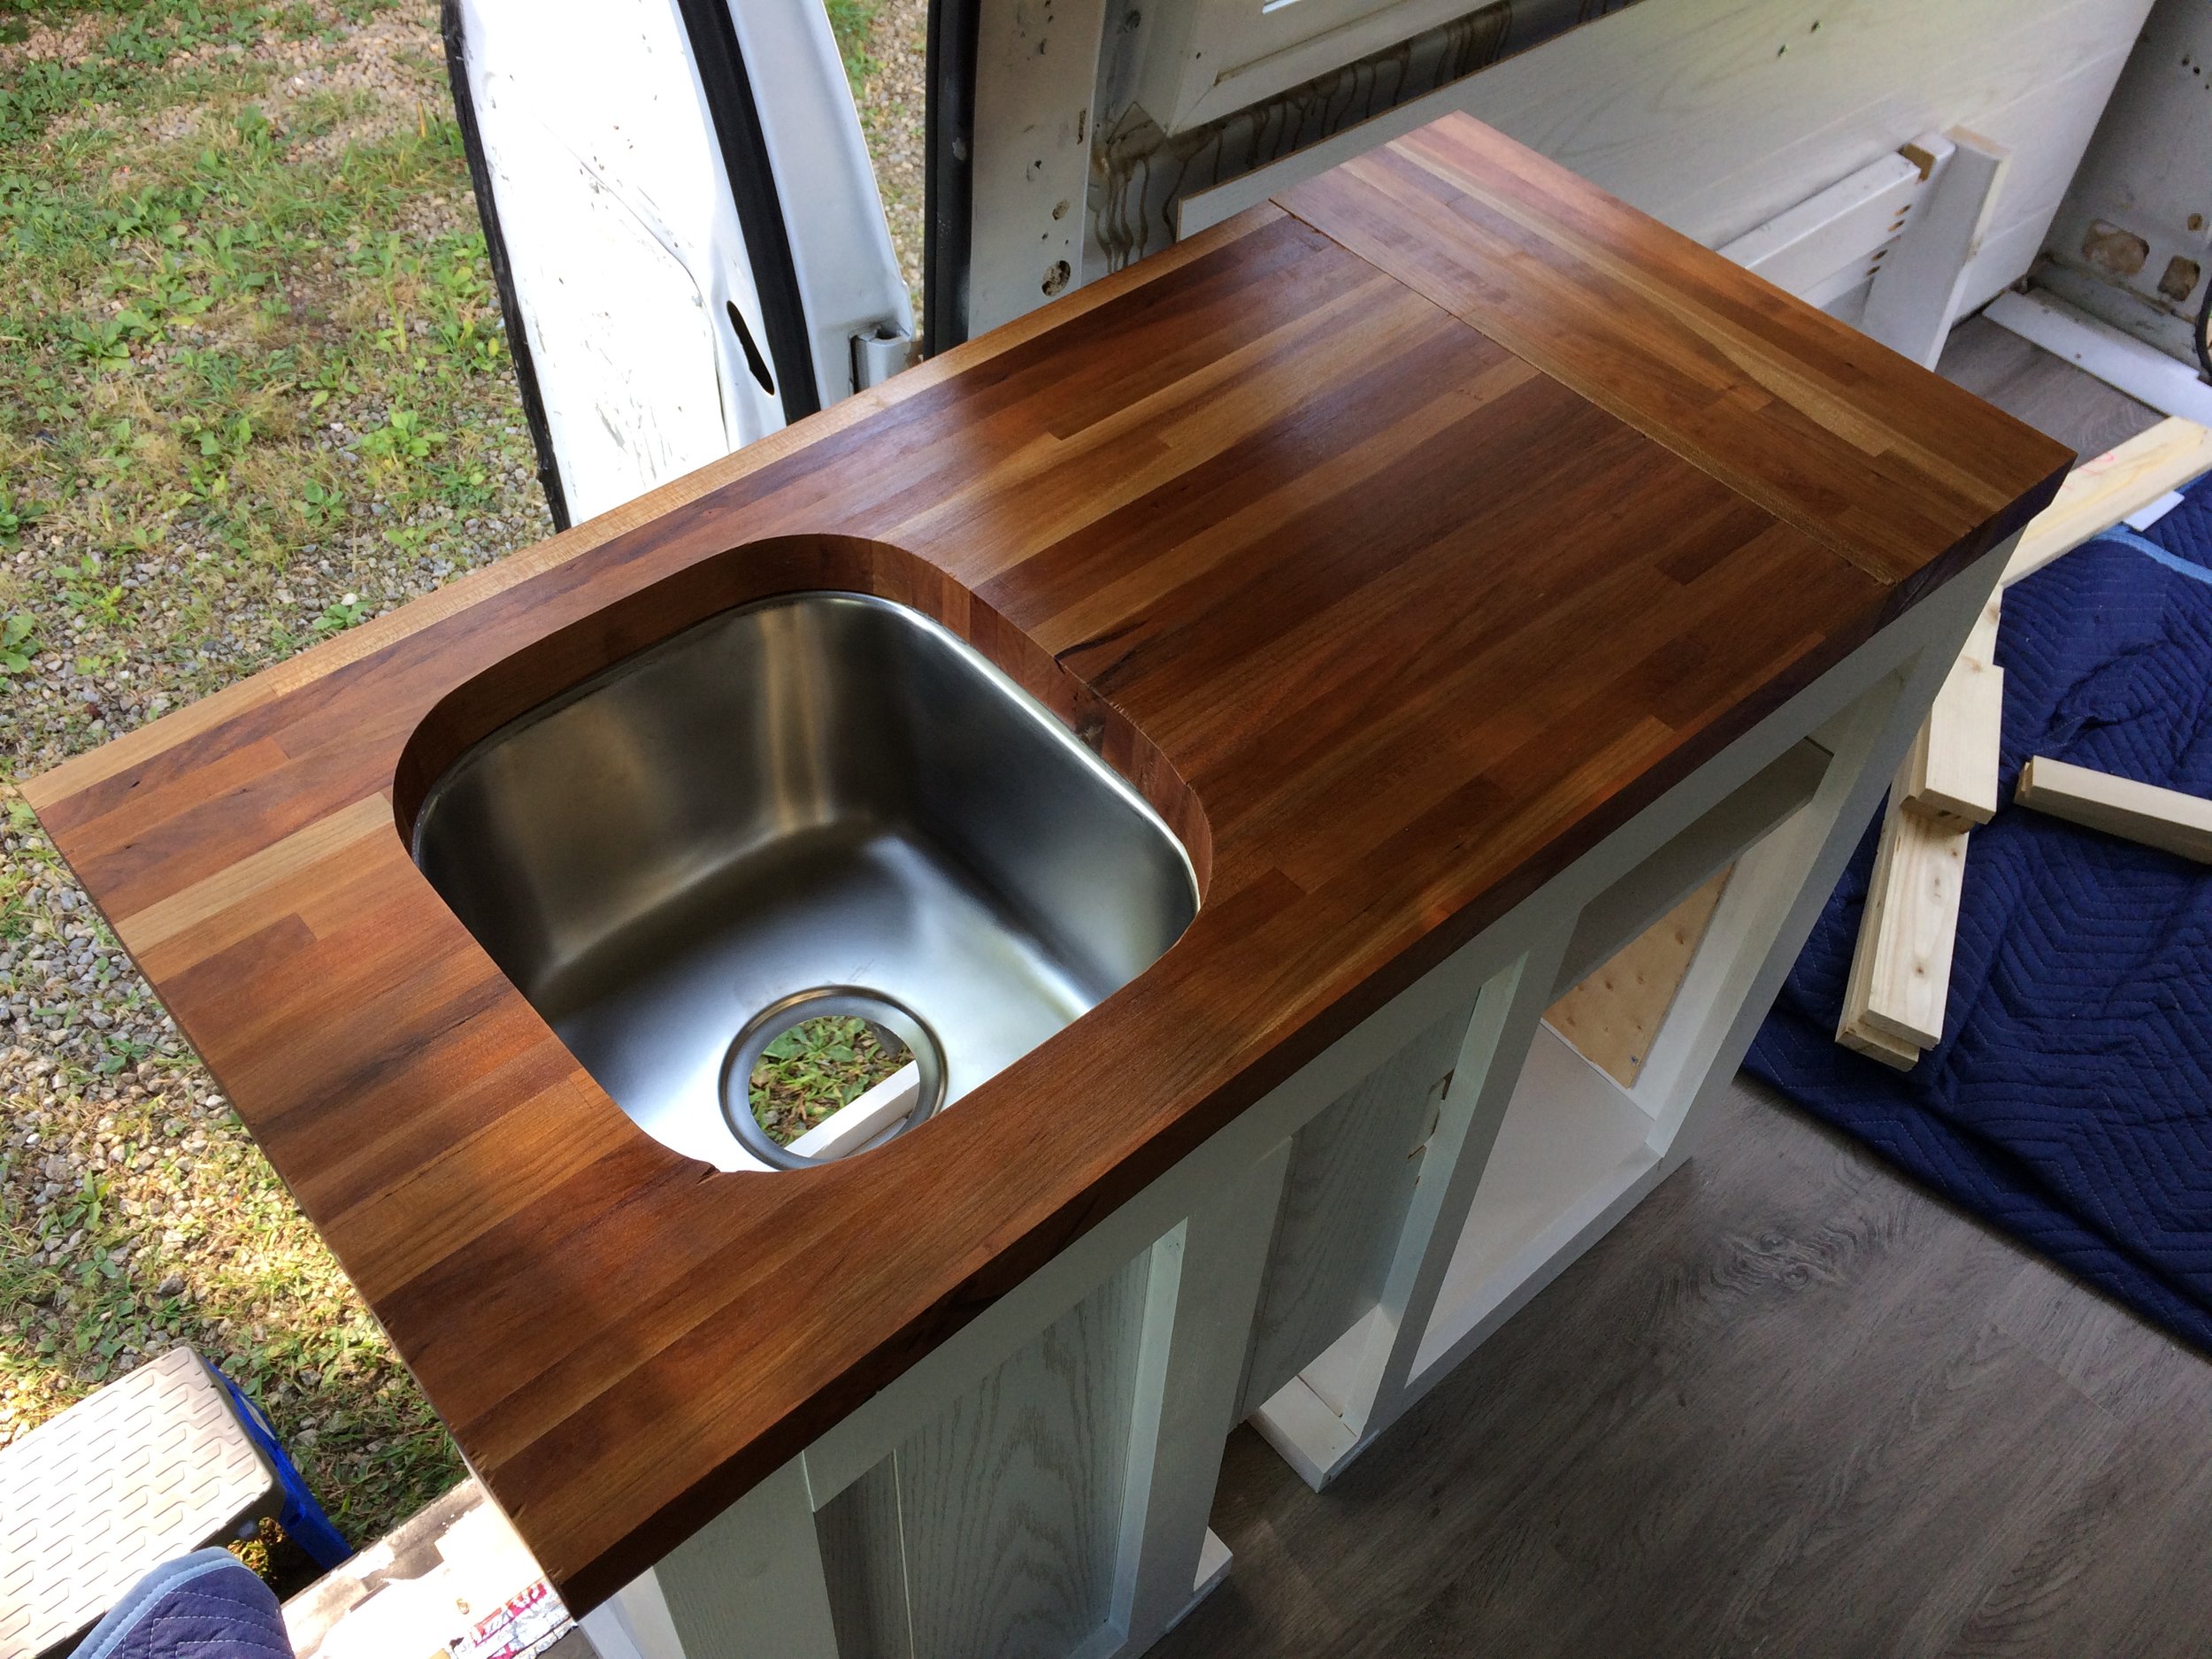
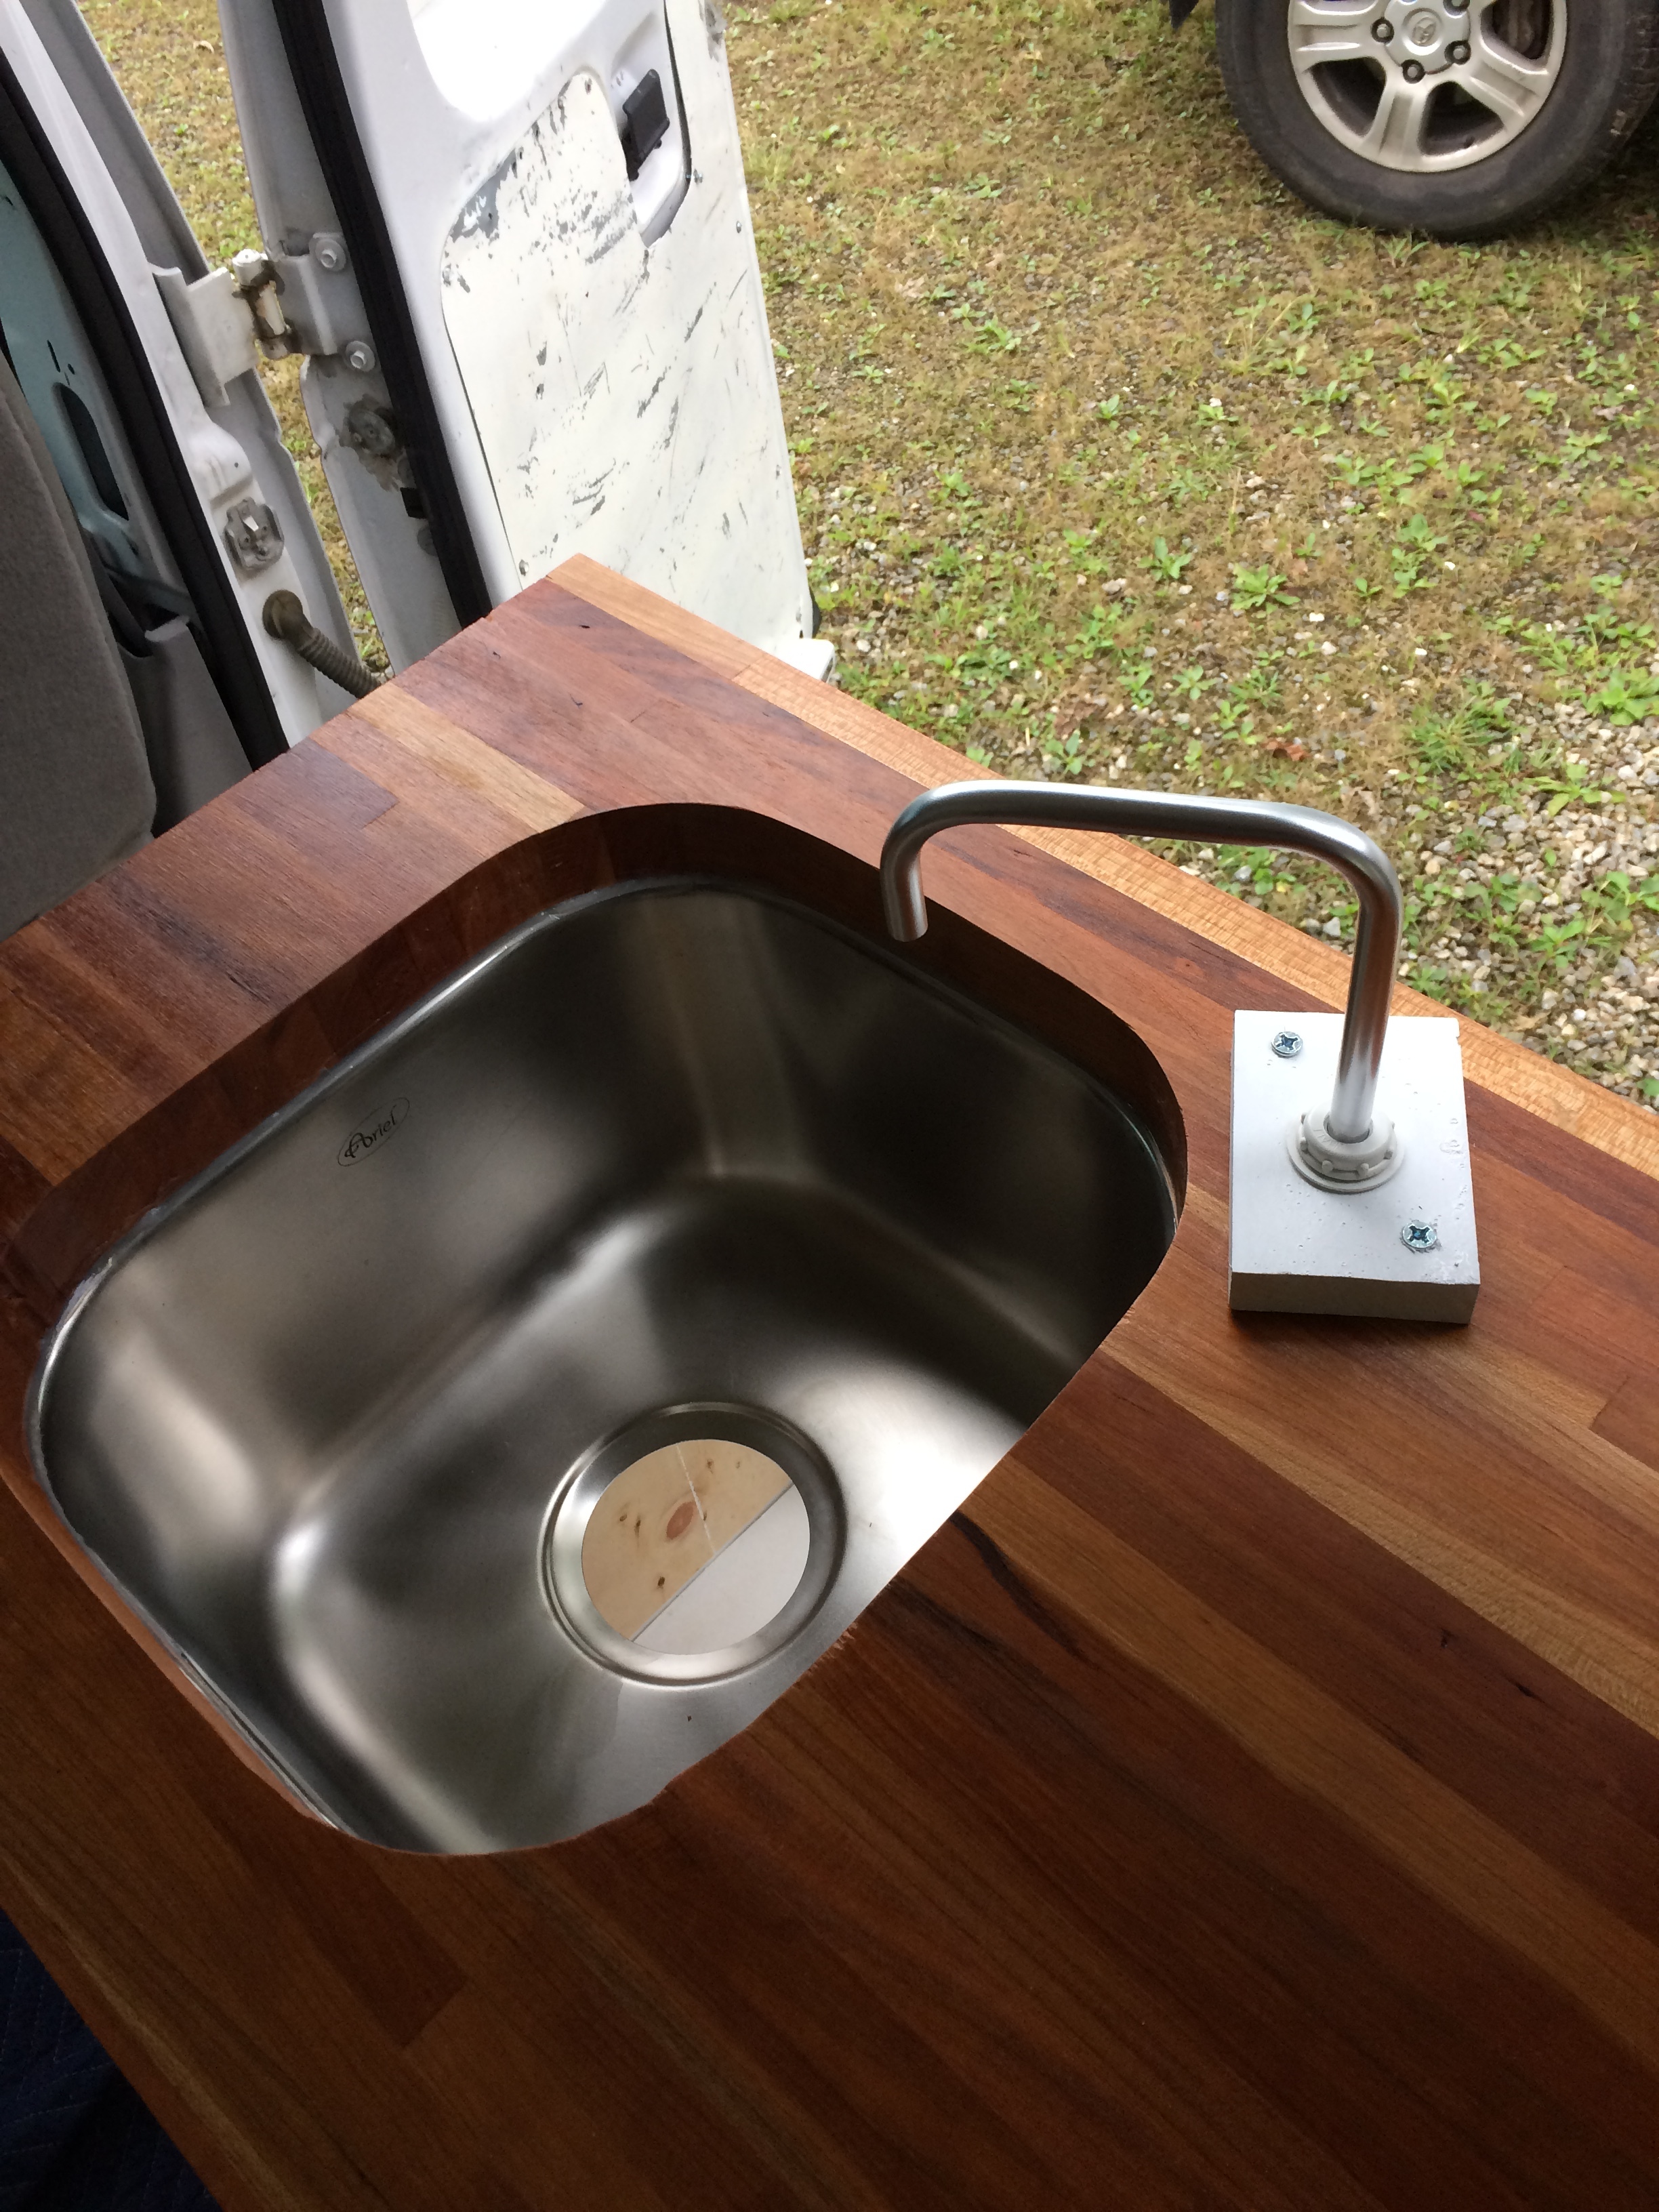
The cabinet is not large, so finding a sink that was deep enough to wash my 3 pans but not to big to fit in the cabinet was a challenge. Bar/prep sinks were the ticket, although an expensive ticket! This is the one I used after several months of searching. It was pricey but it has performed very well.
The cabinet top is cherry butcher block, it was a gift from a dear friend who had just remodeled her kitchen. She had some leftover pieces which she offered me for free!
This is how I did it:
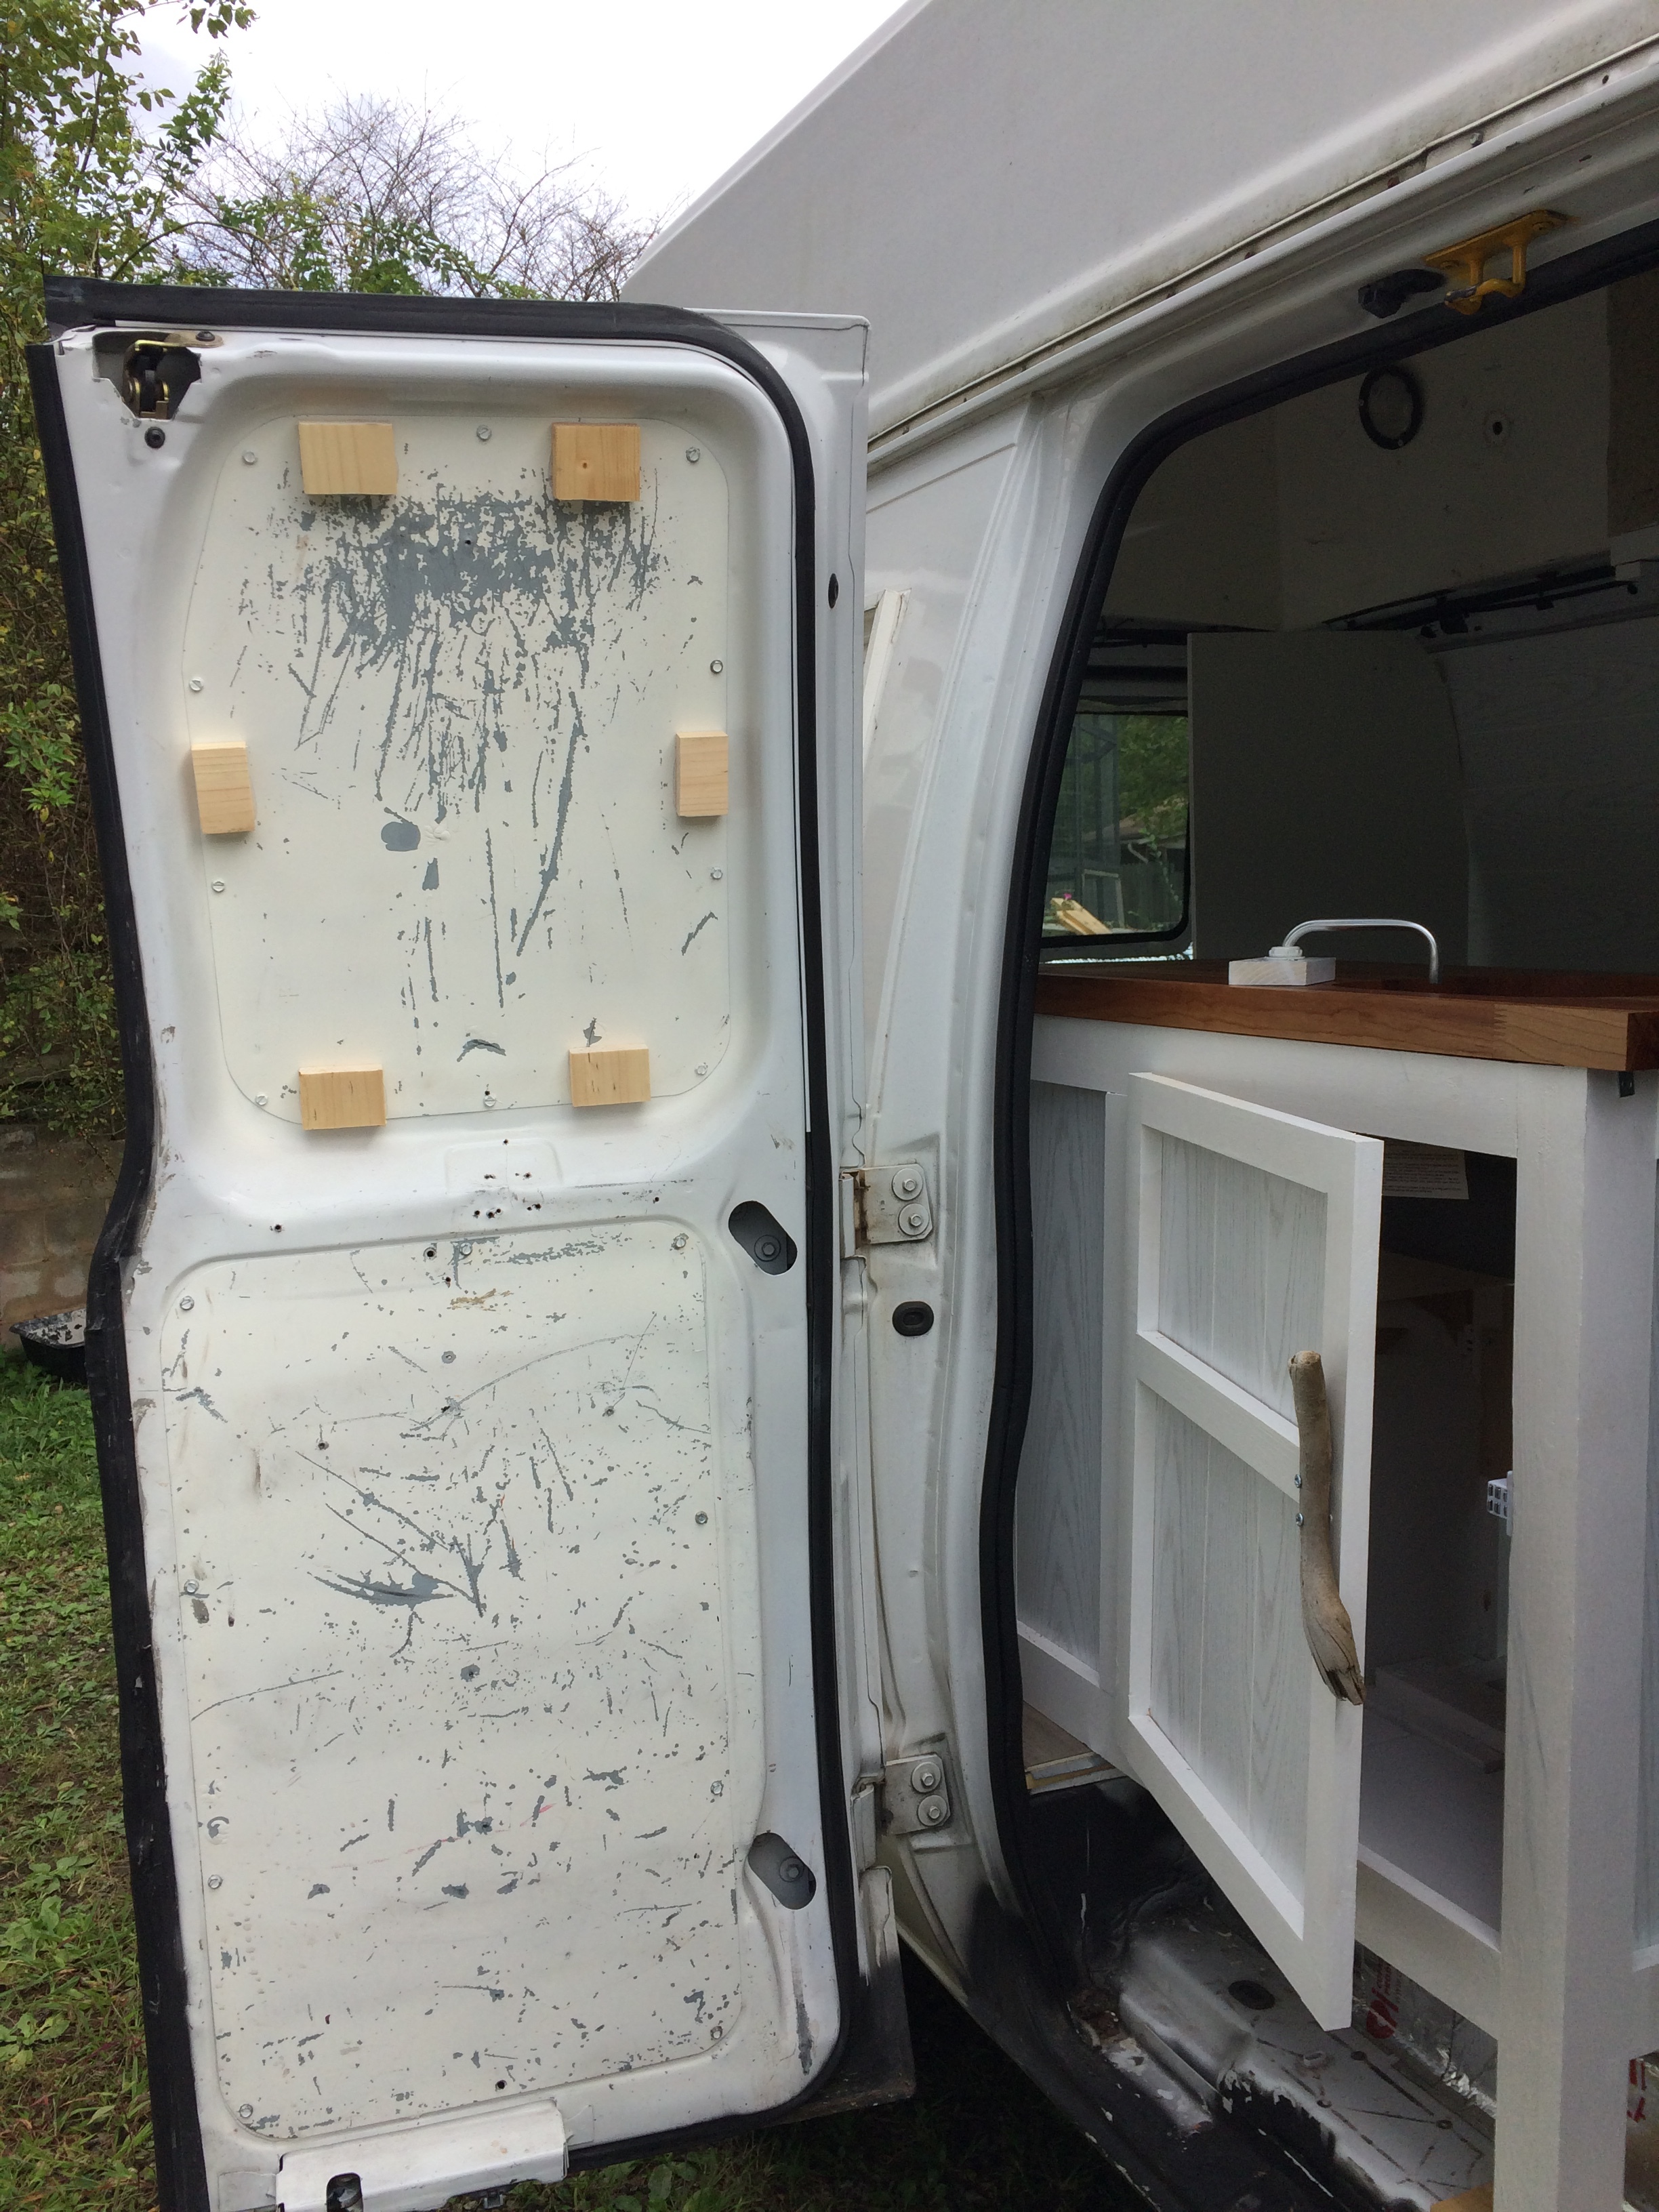
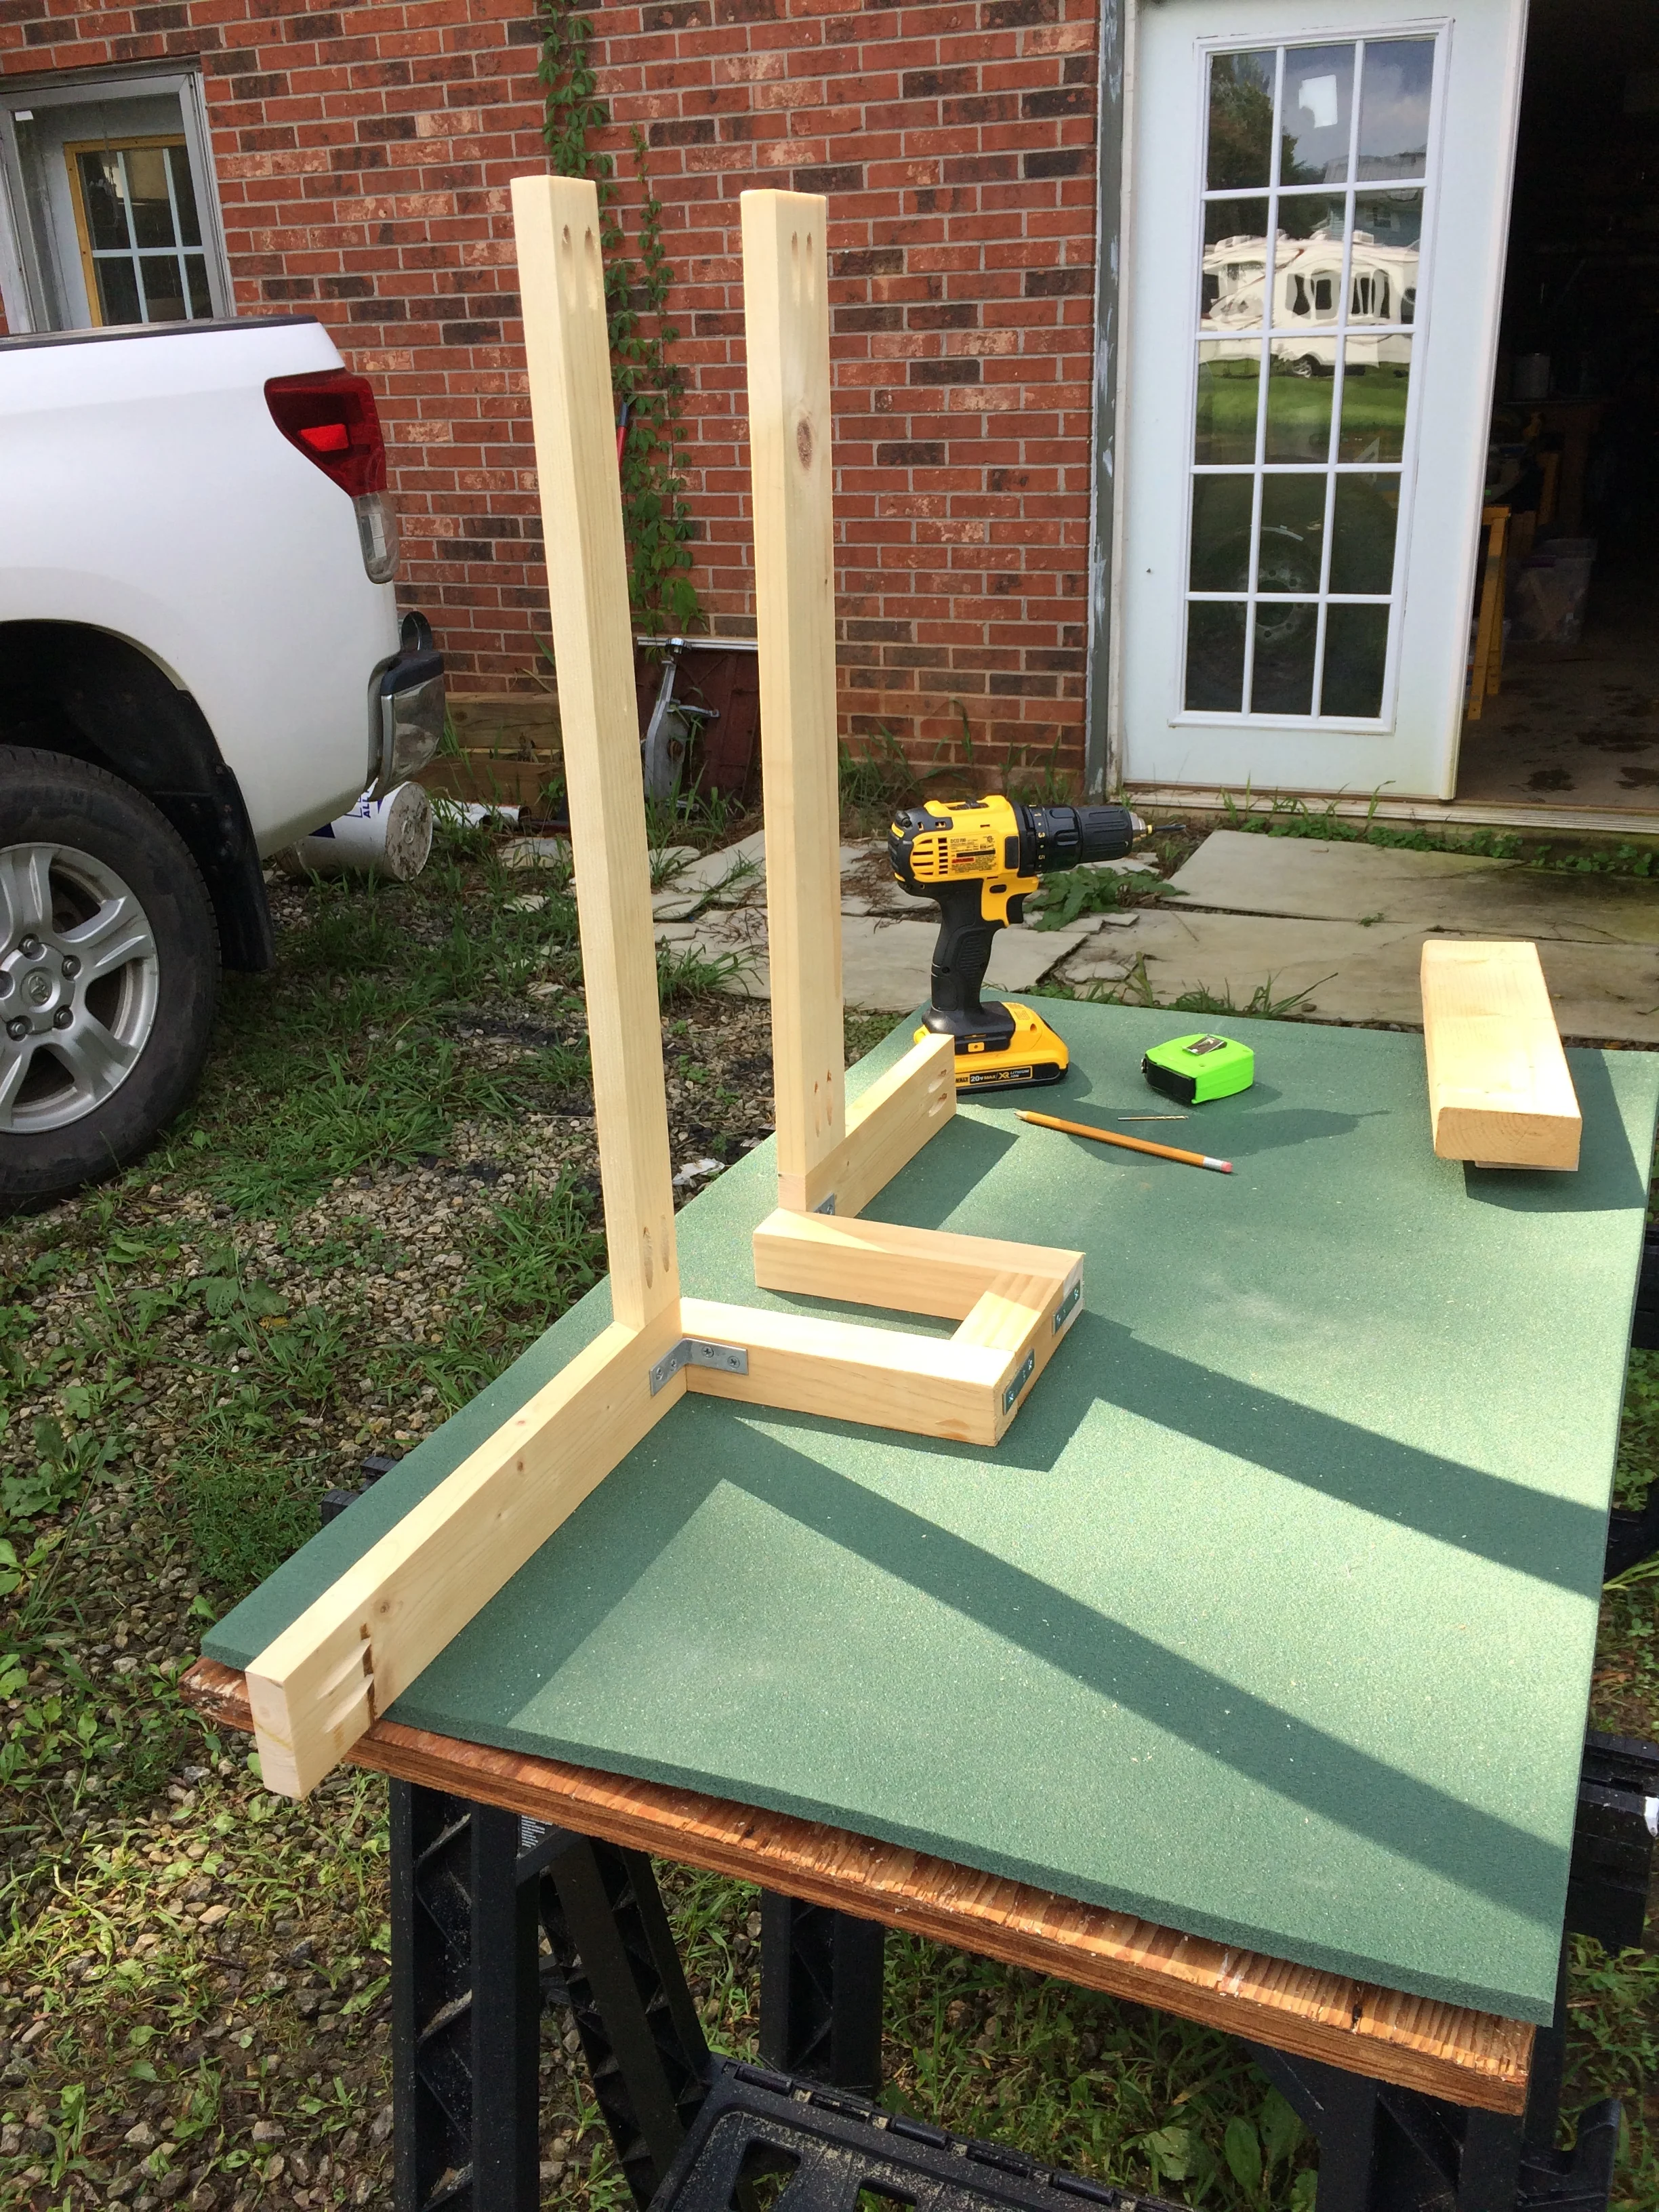
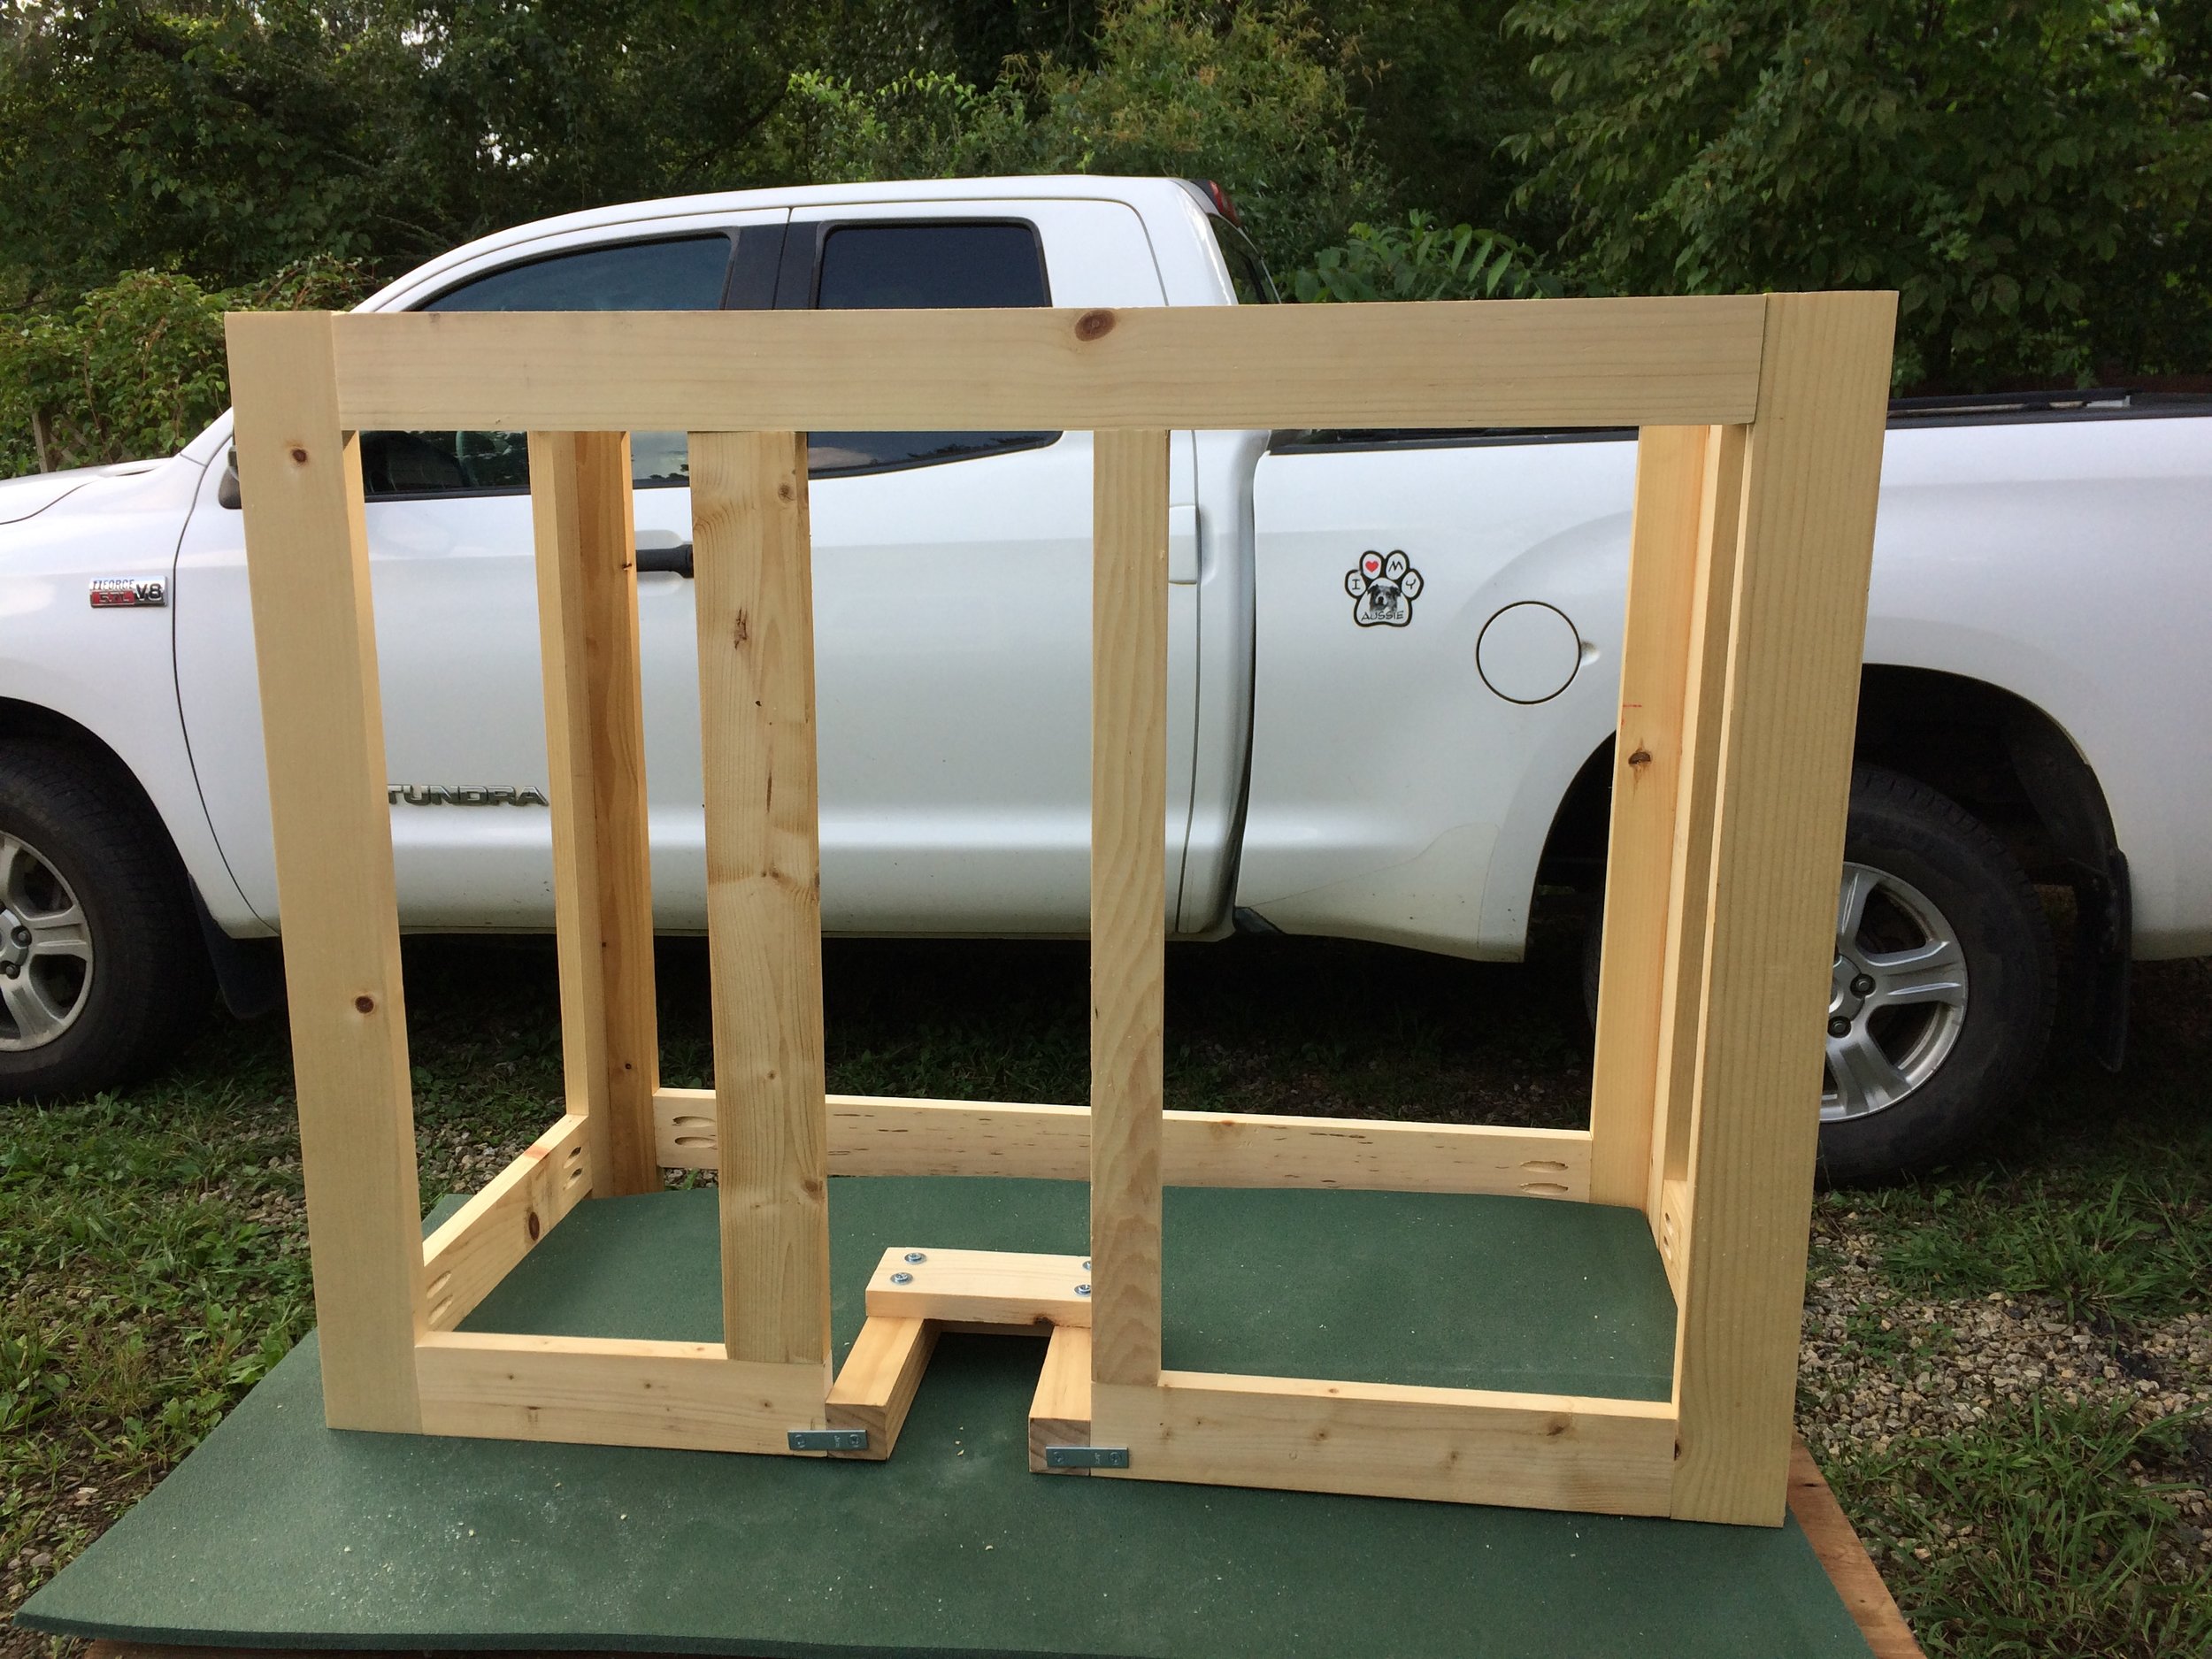
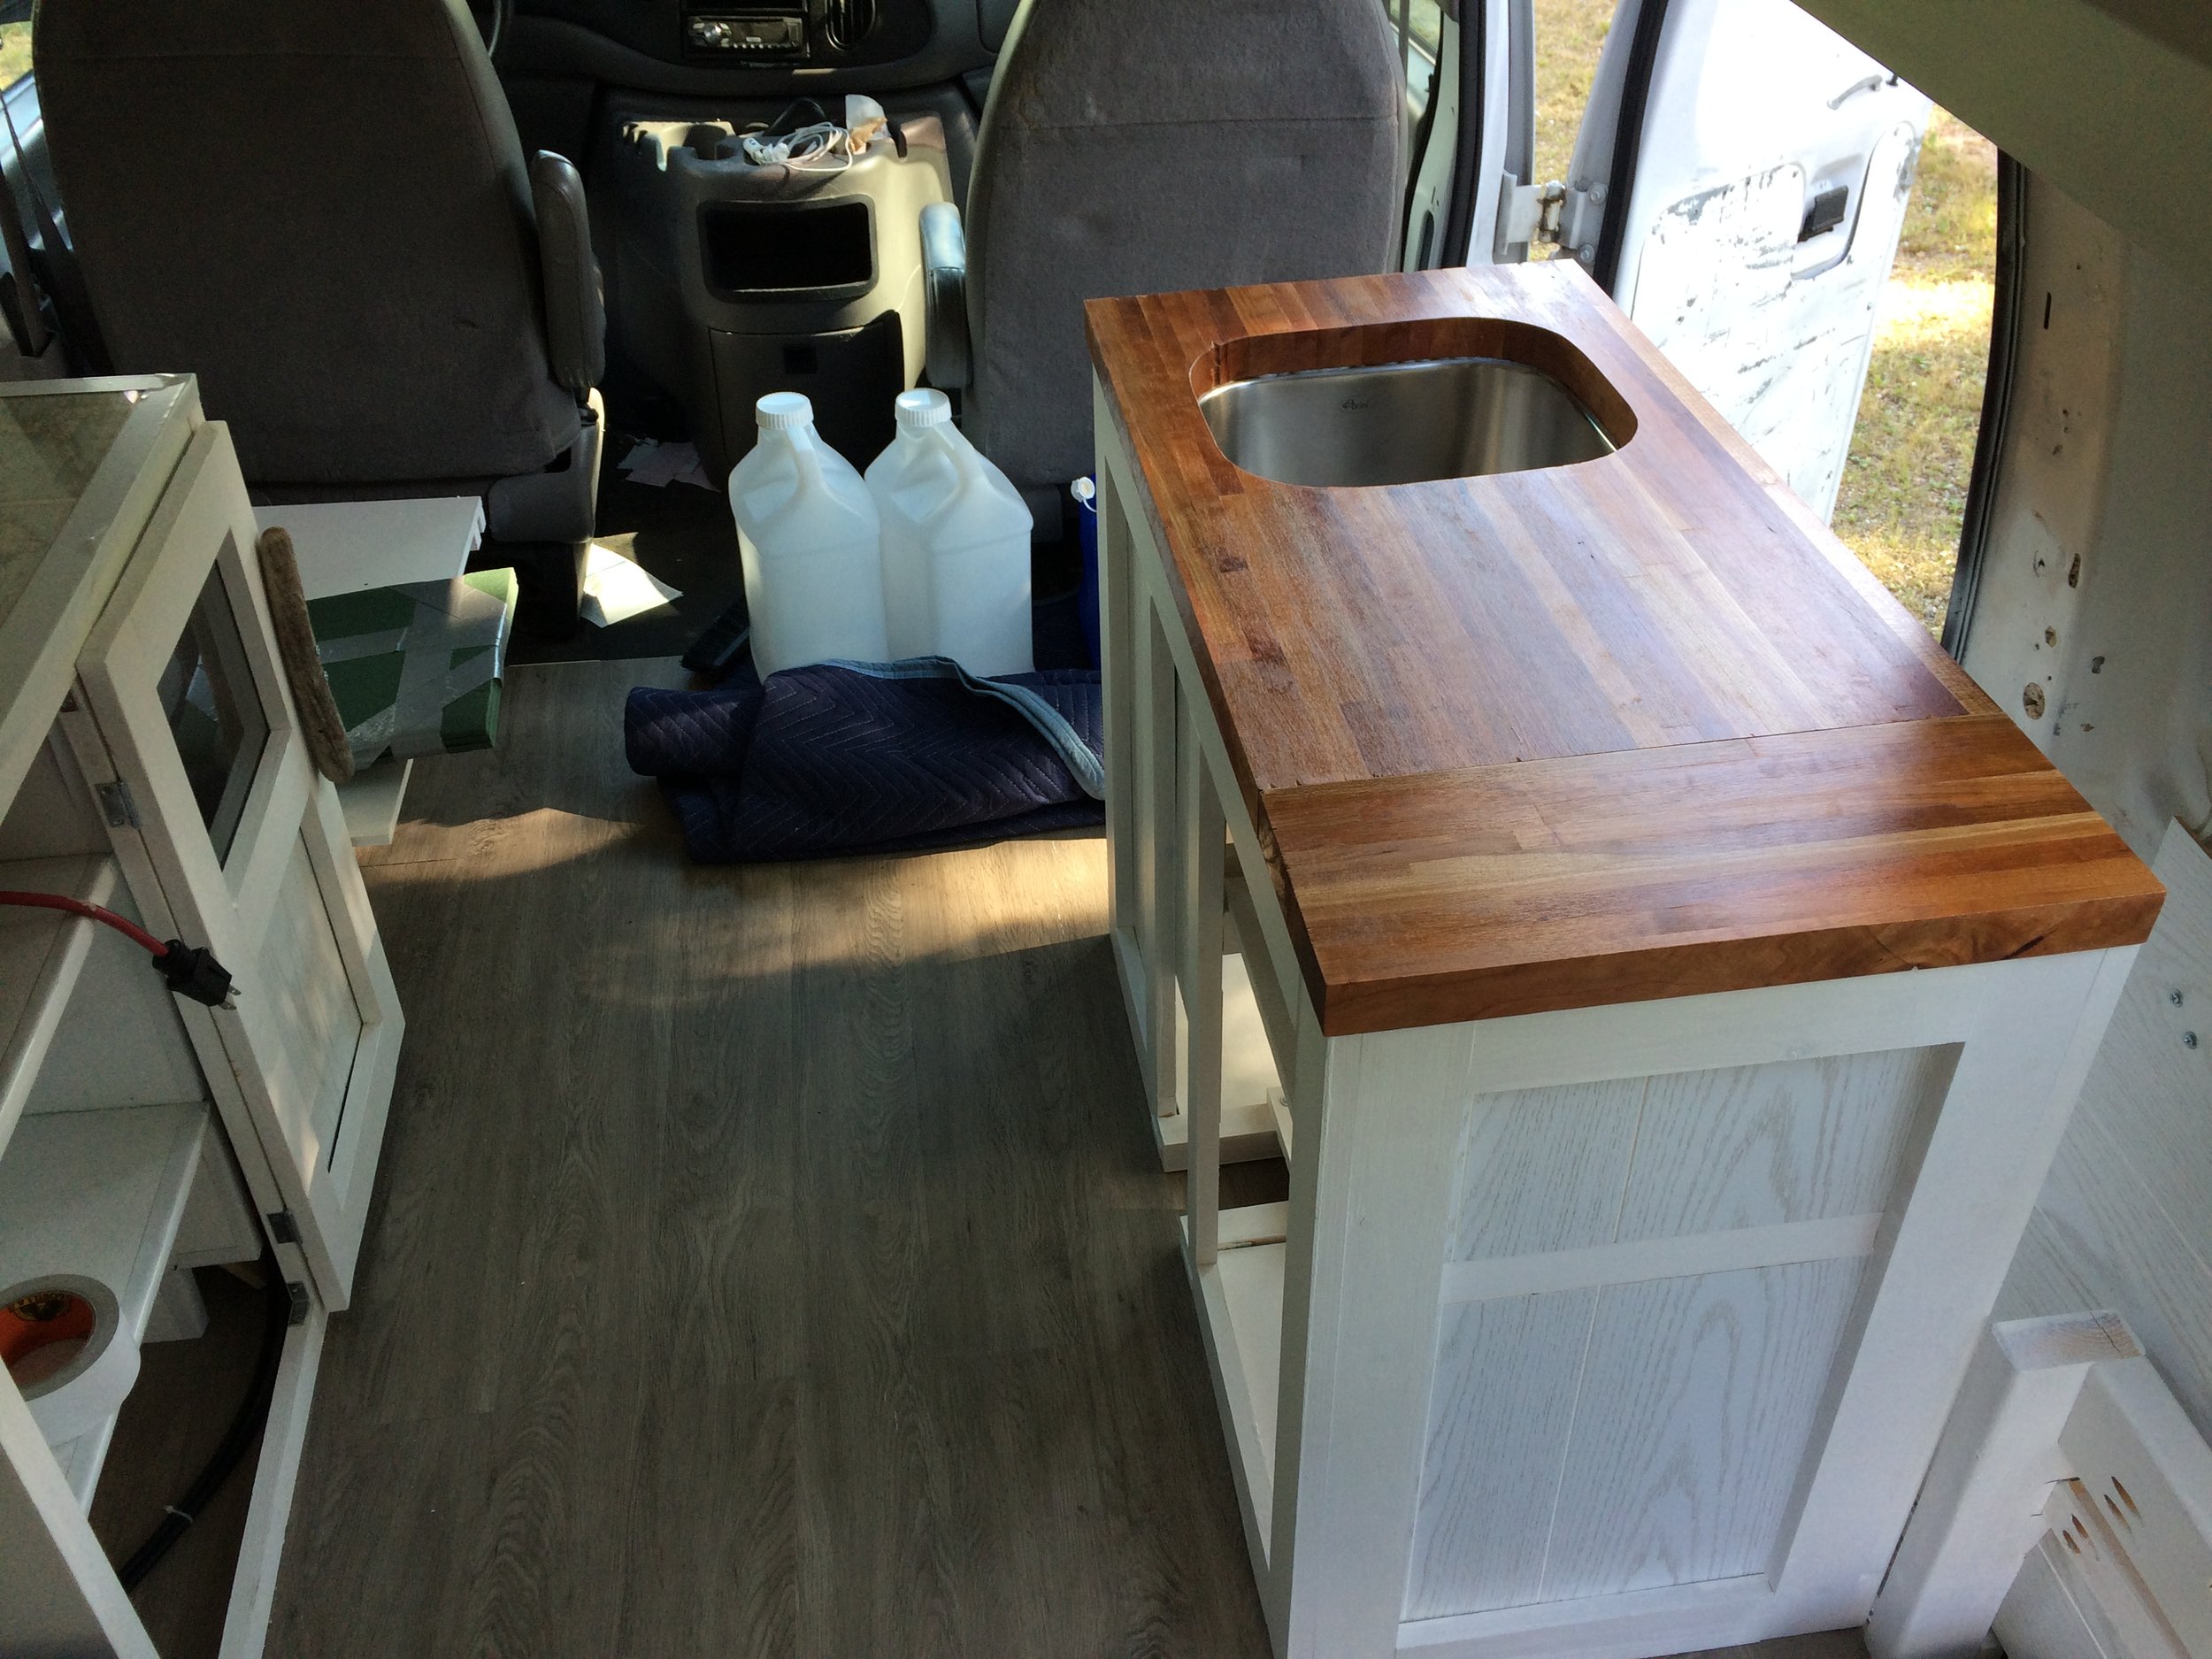
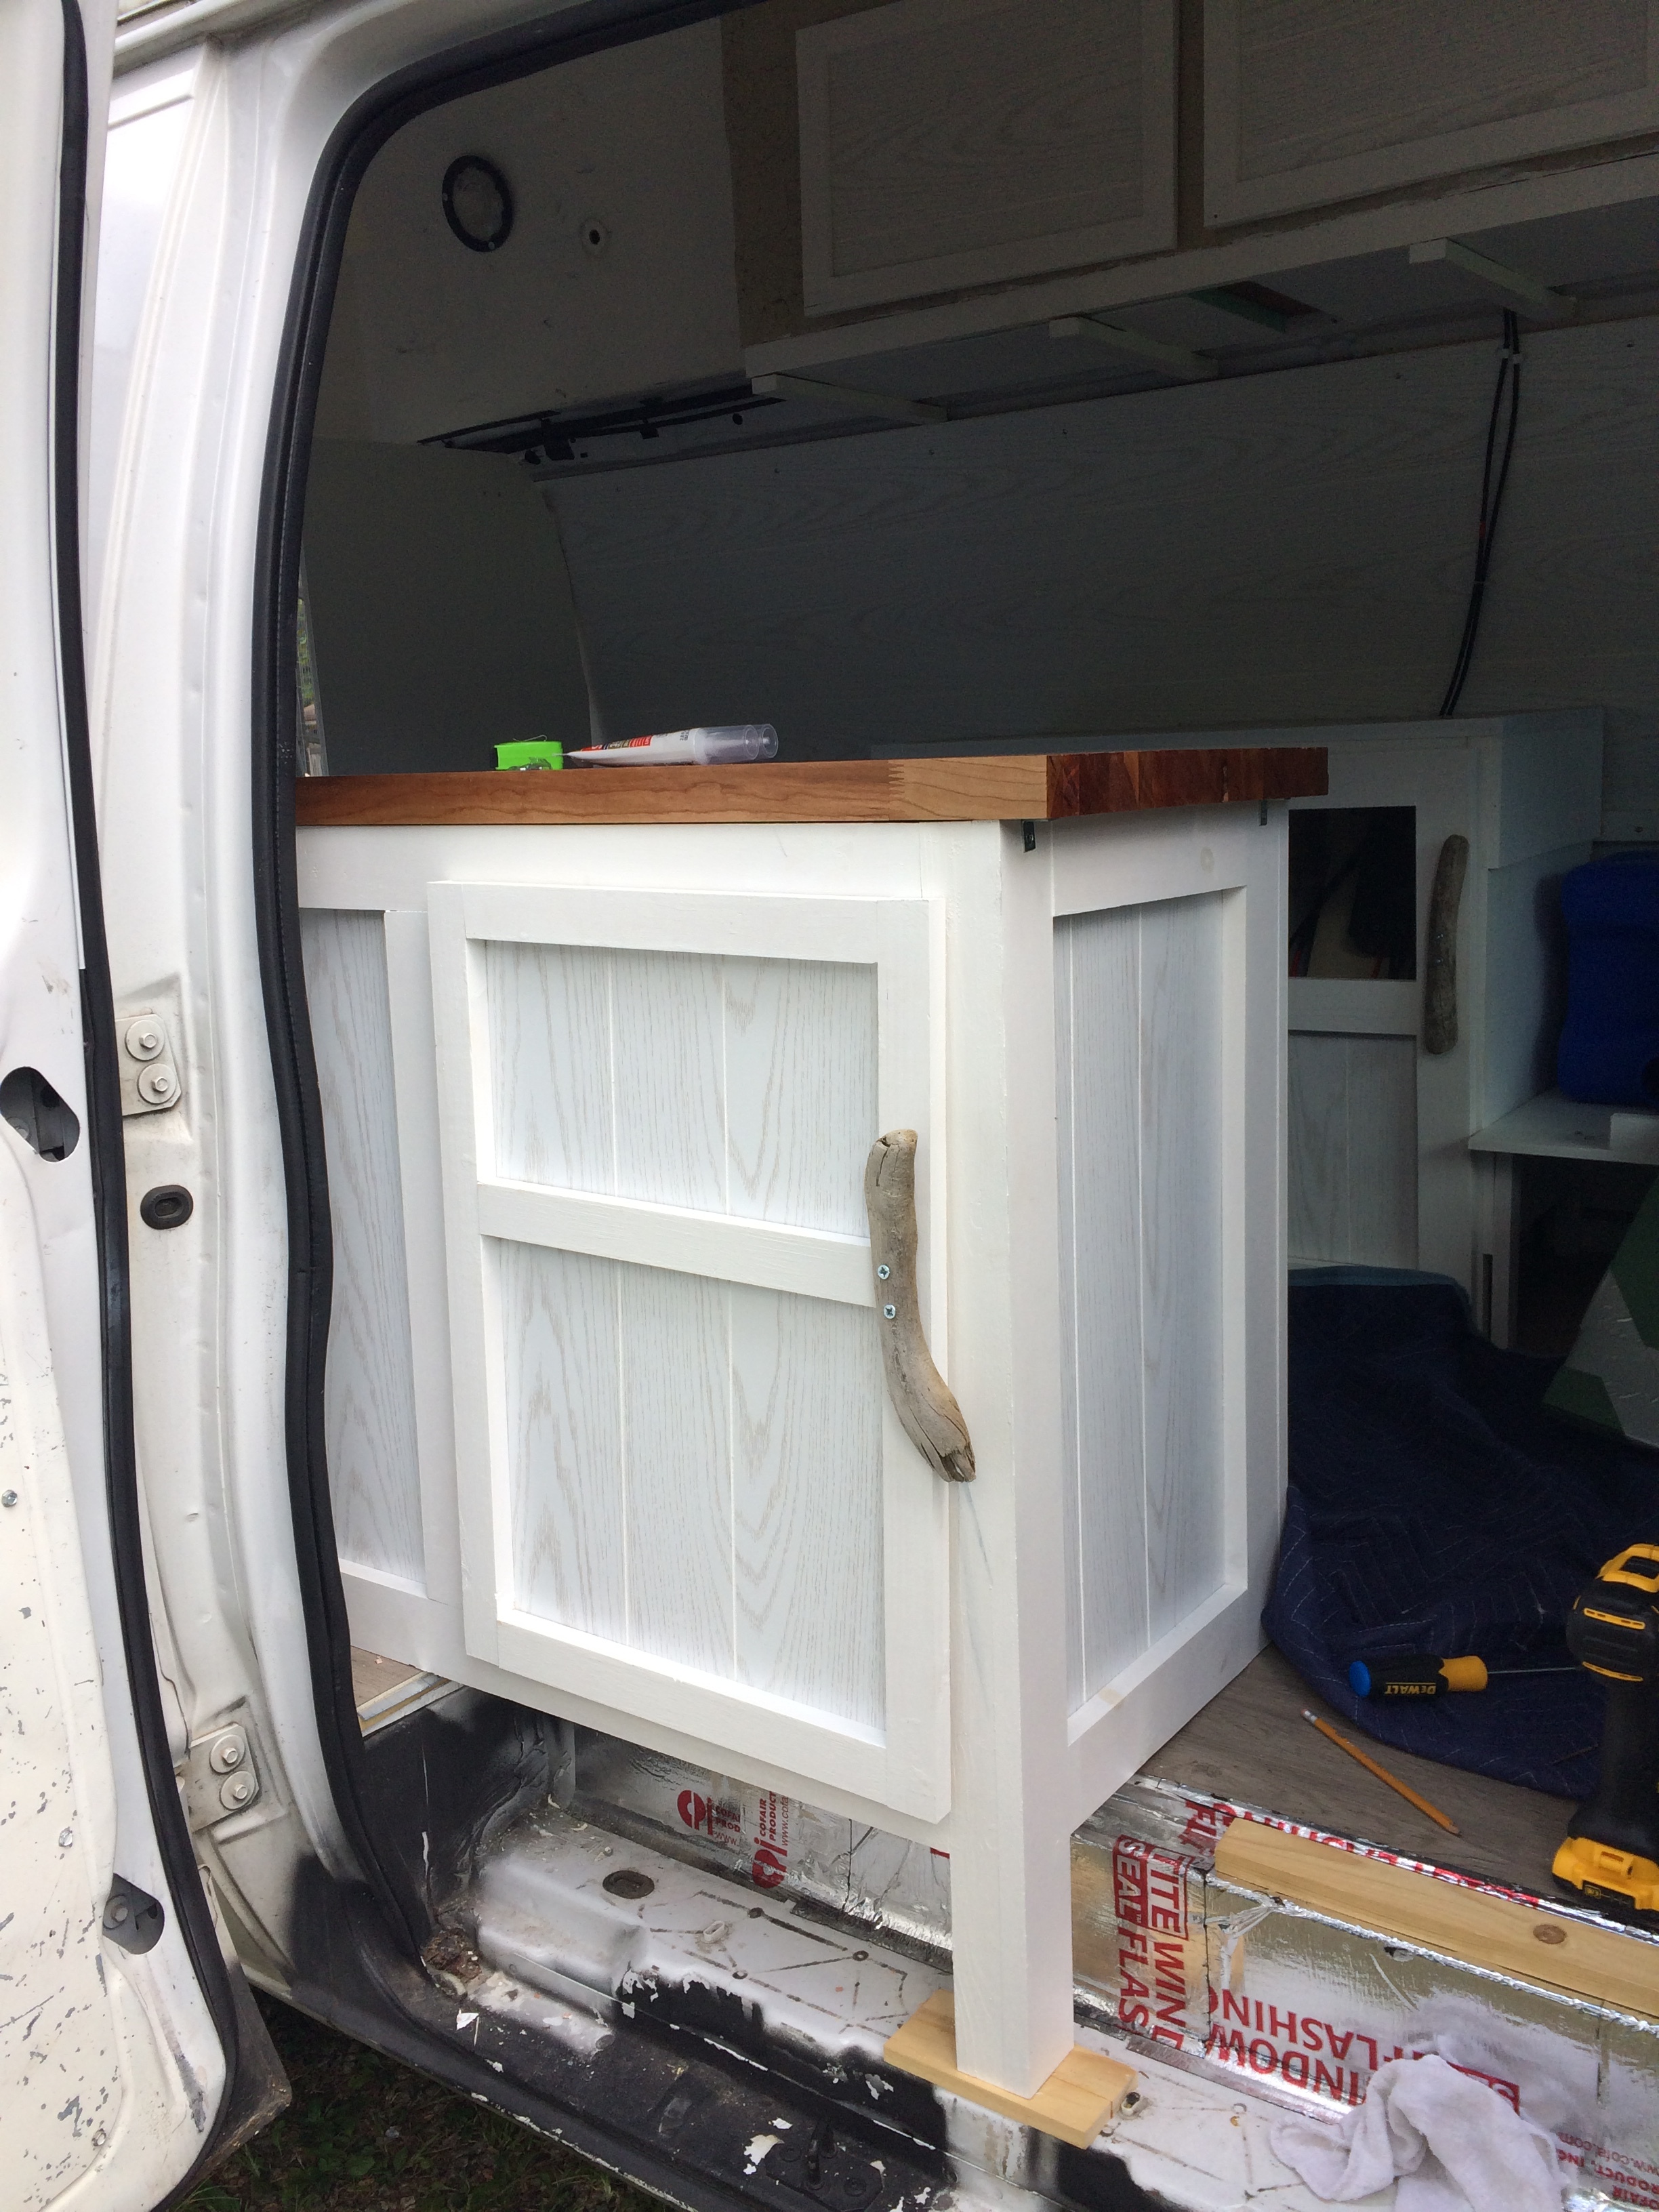
I decided for space reasons (there isn’t much) that this cabinet would block one of the two side doors of the van. For those who wonder this has not ended up bothering me in the slightest. I go in and out of the one side door multiple times a day without feeling cramped in the slightest. When I give the “Five Step Tour” of the van (two steps up, three steps to the back) no one has trouble getting in and out. The blocked door does still open, I use it when I am emptying the grey water tank as well as when I want a view while I cook in nice weather. The tricky thing was that the cabinet needed just one foot since it overhangs the step well.
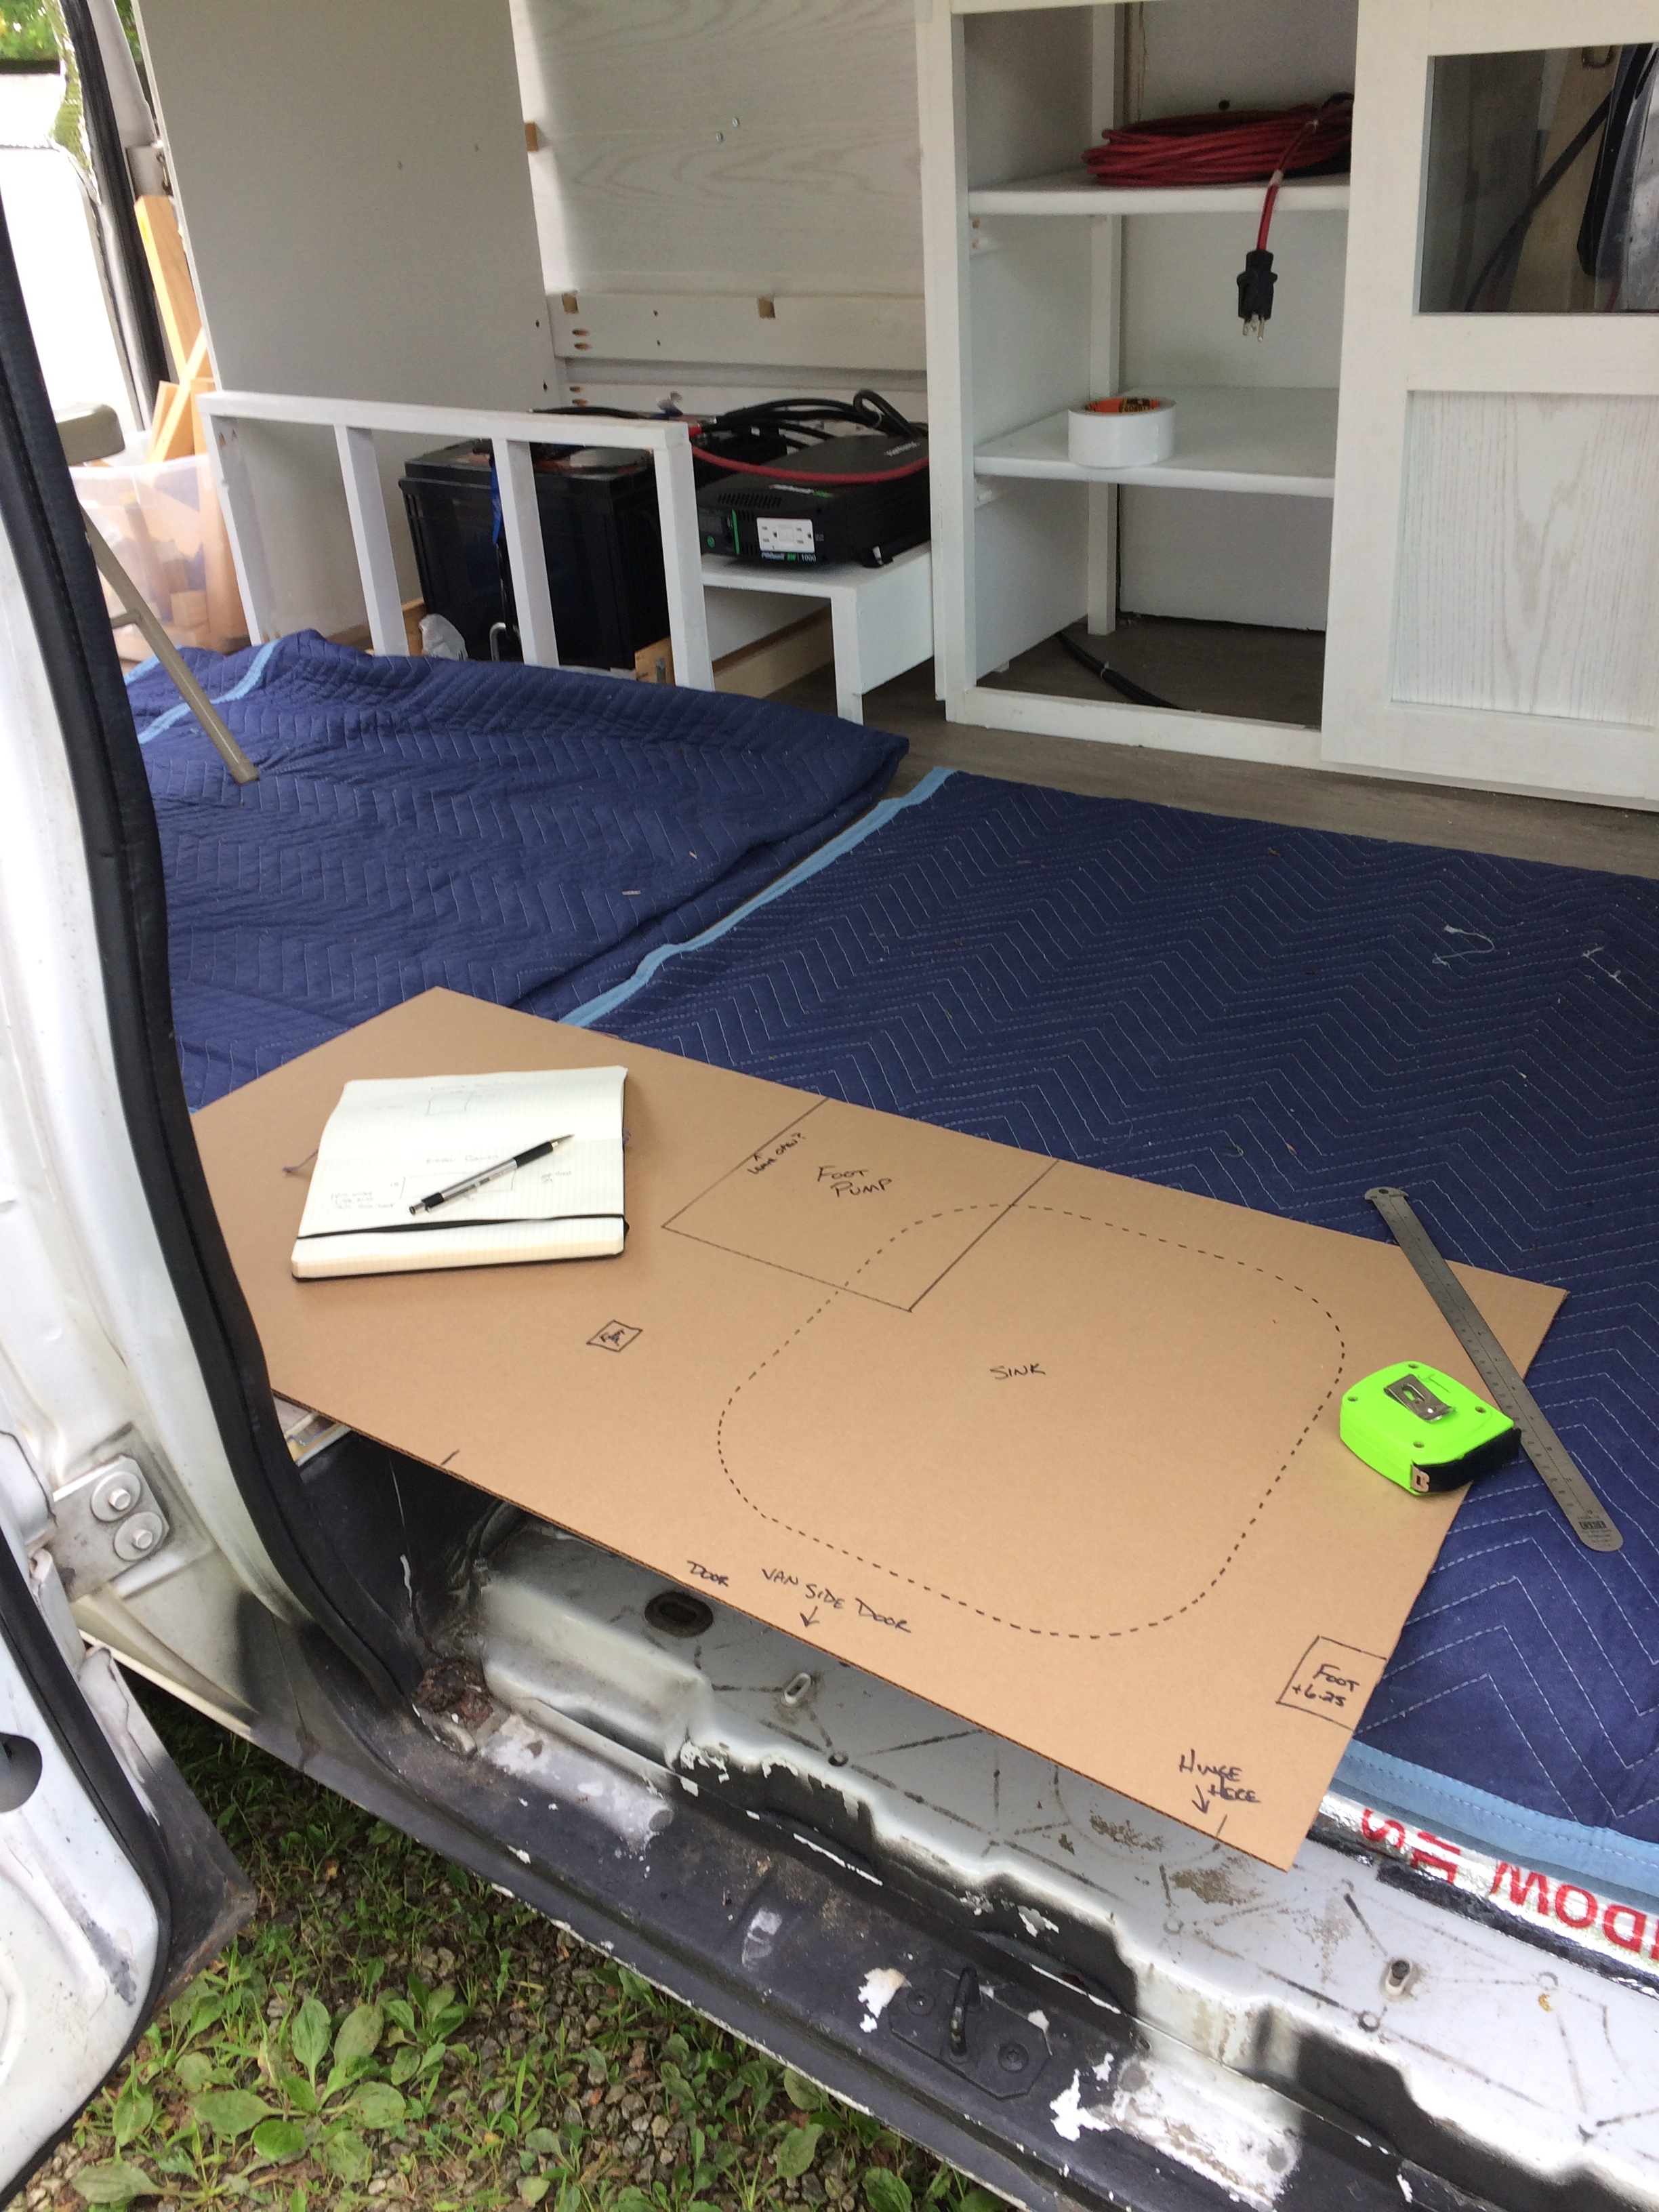
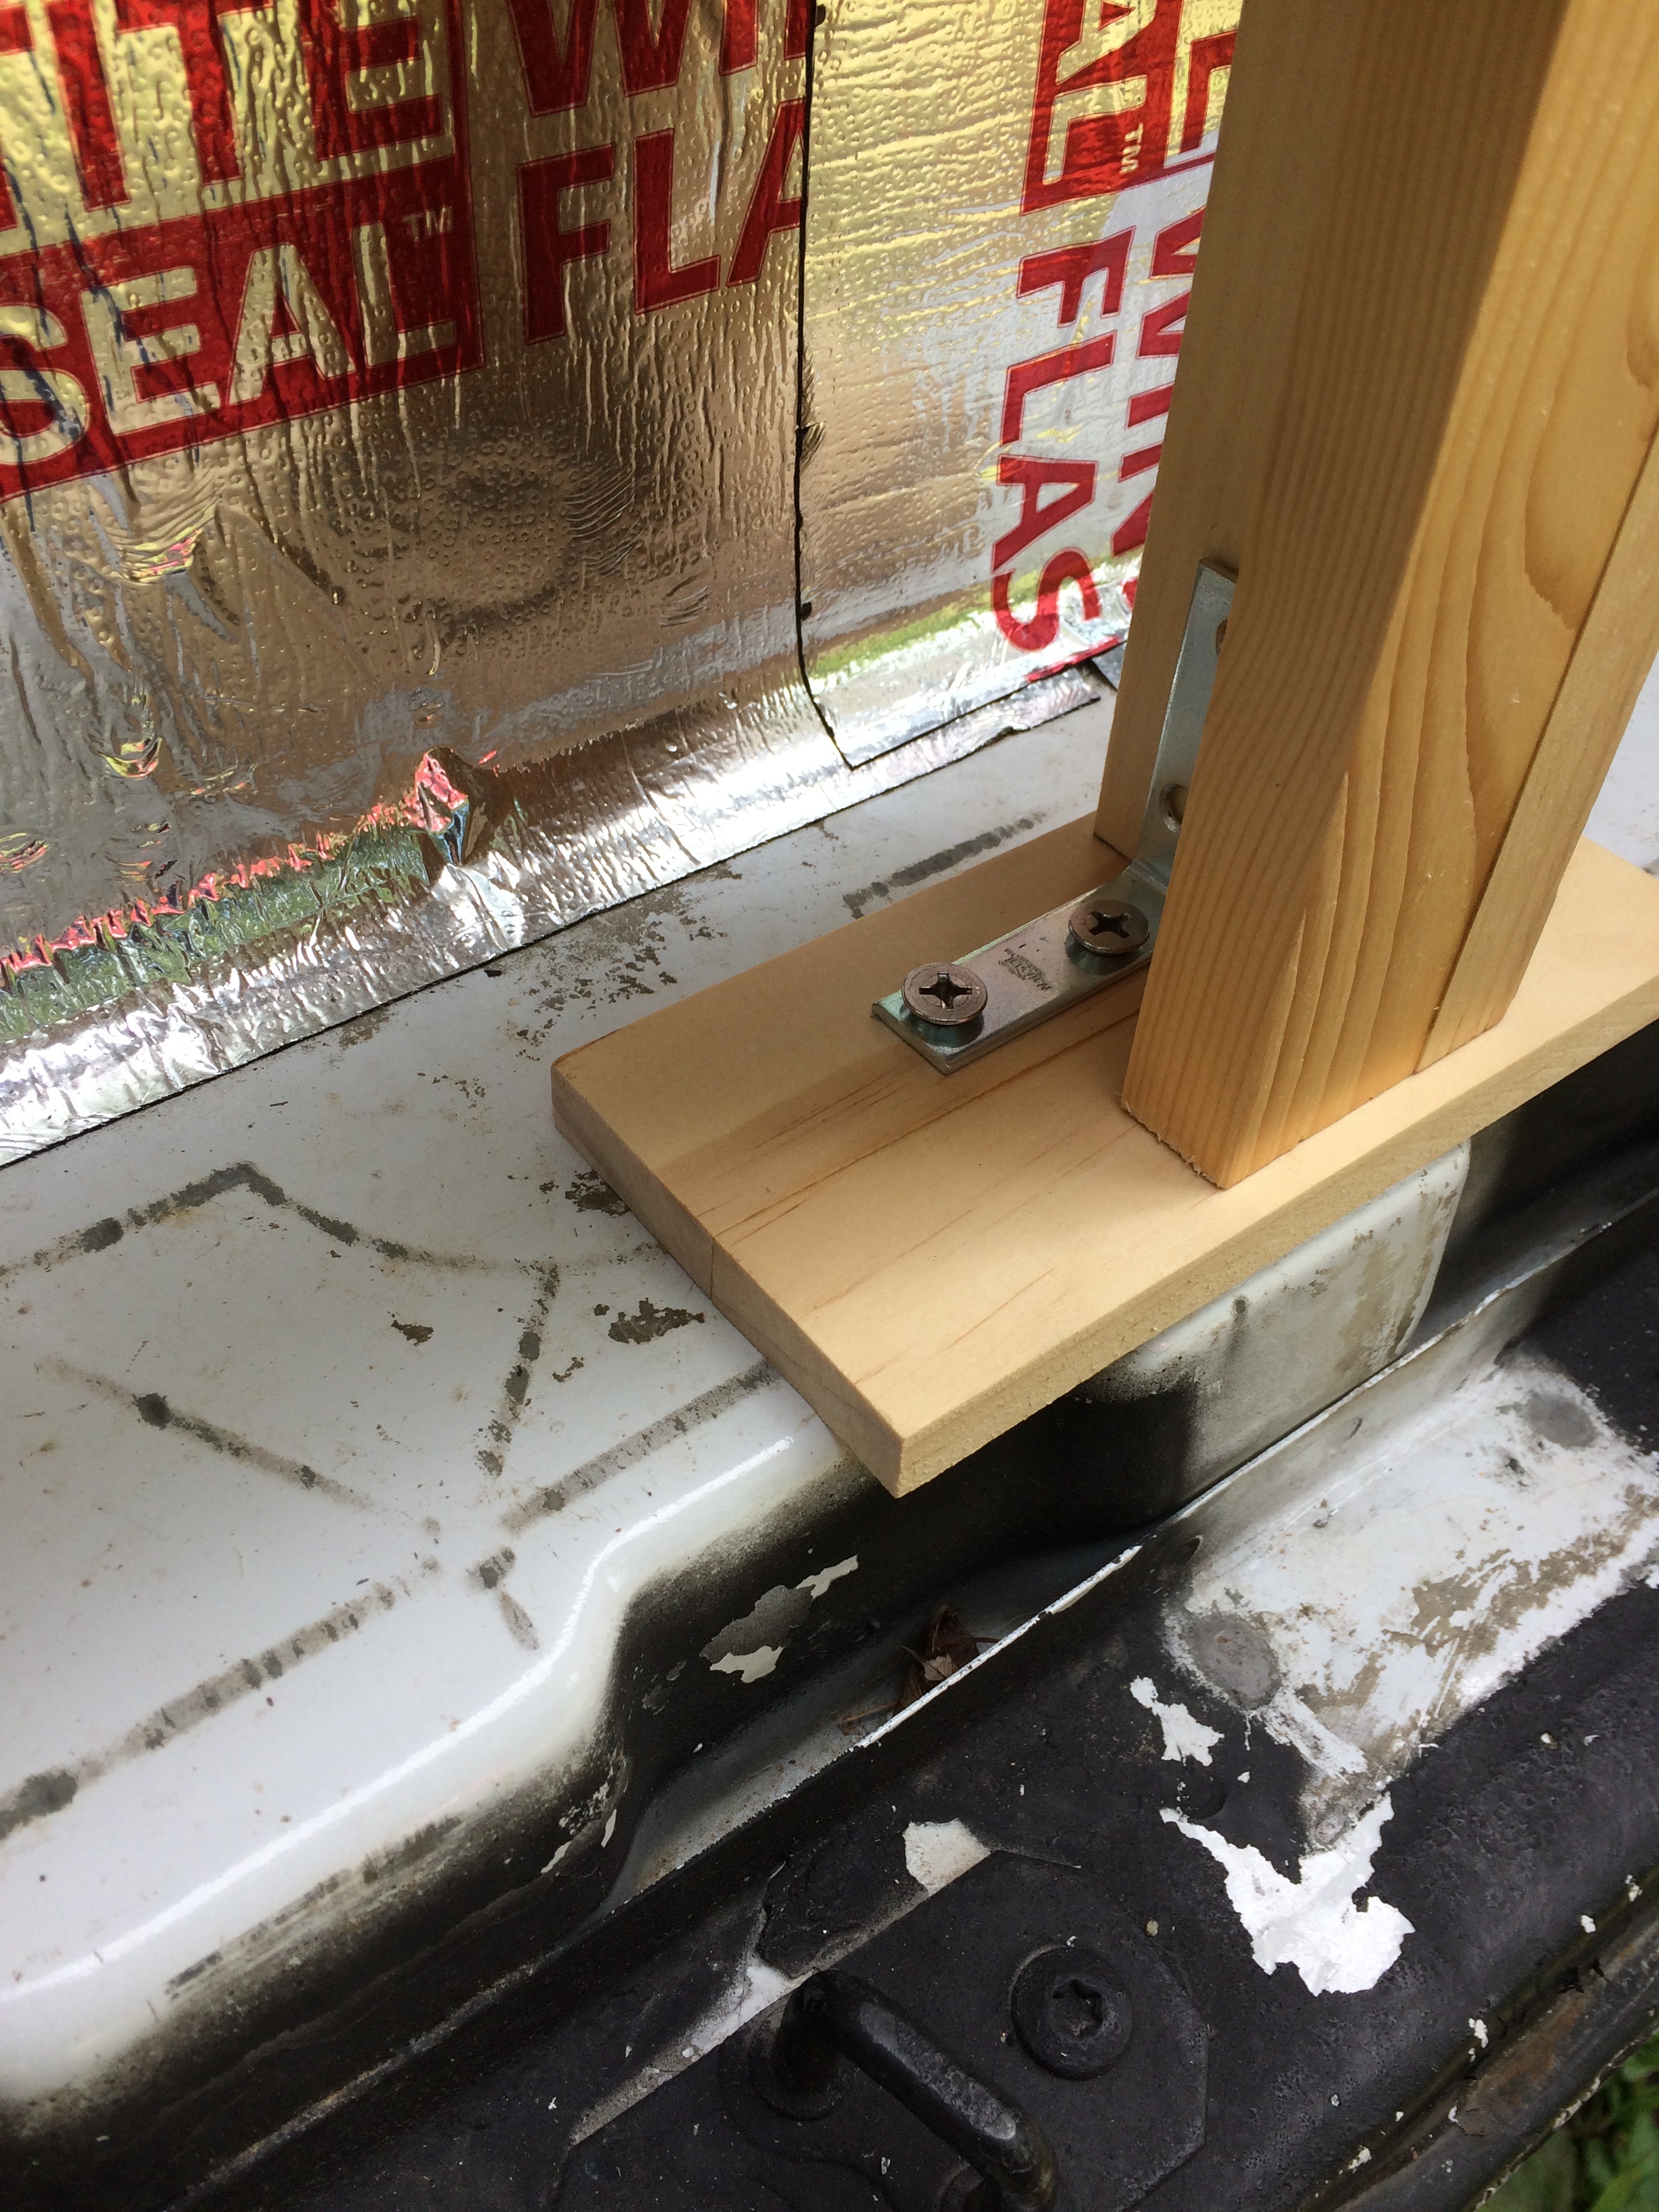
The second tricky thing was mounting the foot pump. It’s a marine foot pump, meant to be bolted through a hull. While I did bolt the cabinet itself through the floor of the van, I tried to avoid any unnecessary holes through the floor since it’s a prime spot for rust to start. But the foot pump, because it’s generating your water pressure, has to be very firmly mounted (you are stepping on it over and over again as well) but still be accessible for maintenance. Several schematic drawings were involved before I came up with something workable and sturdy enough:
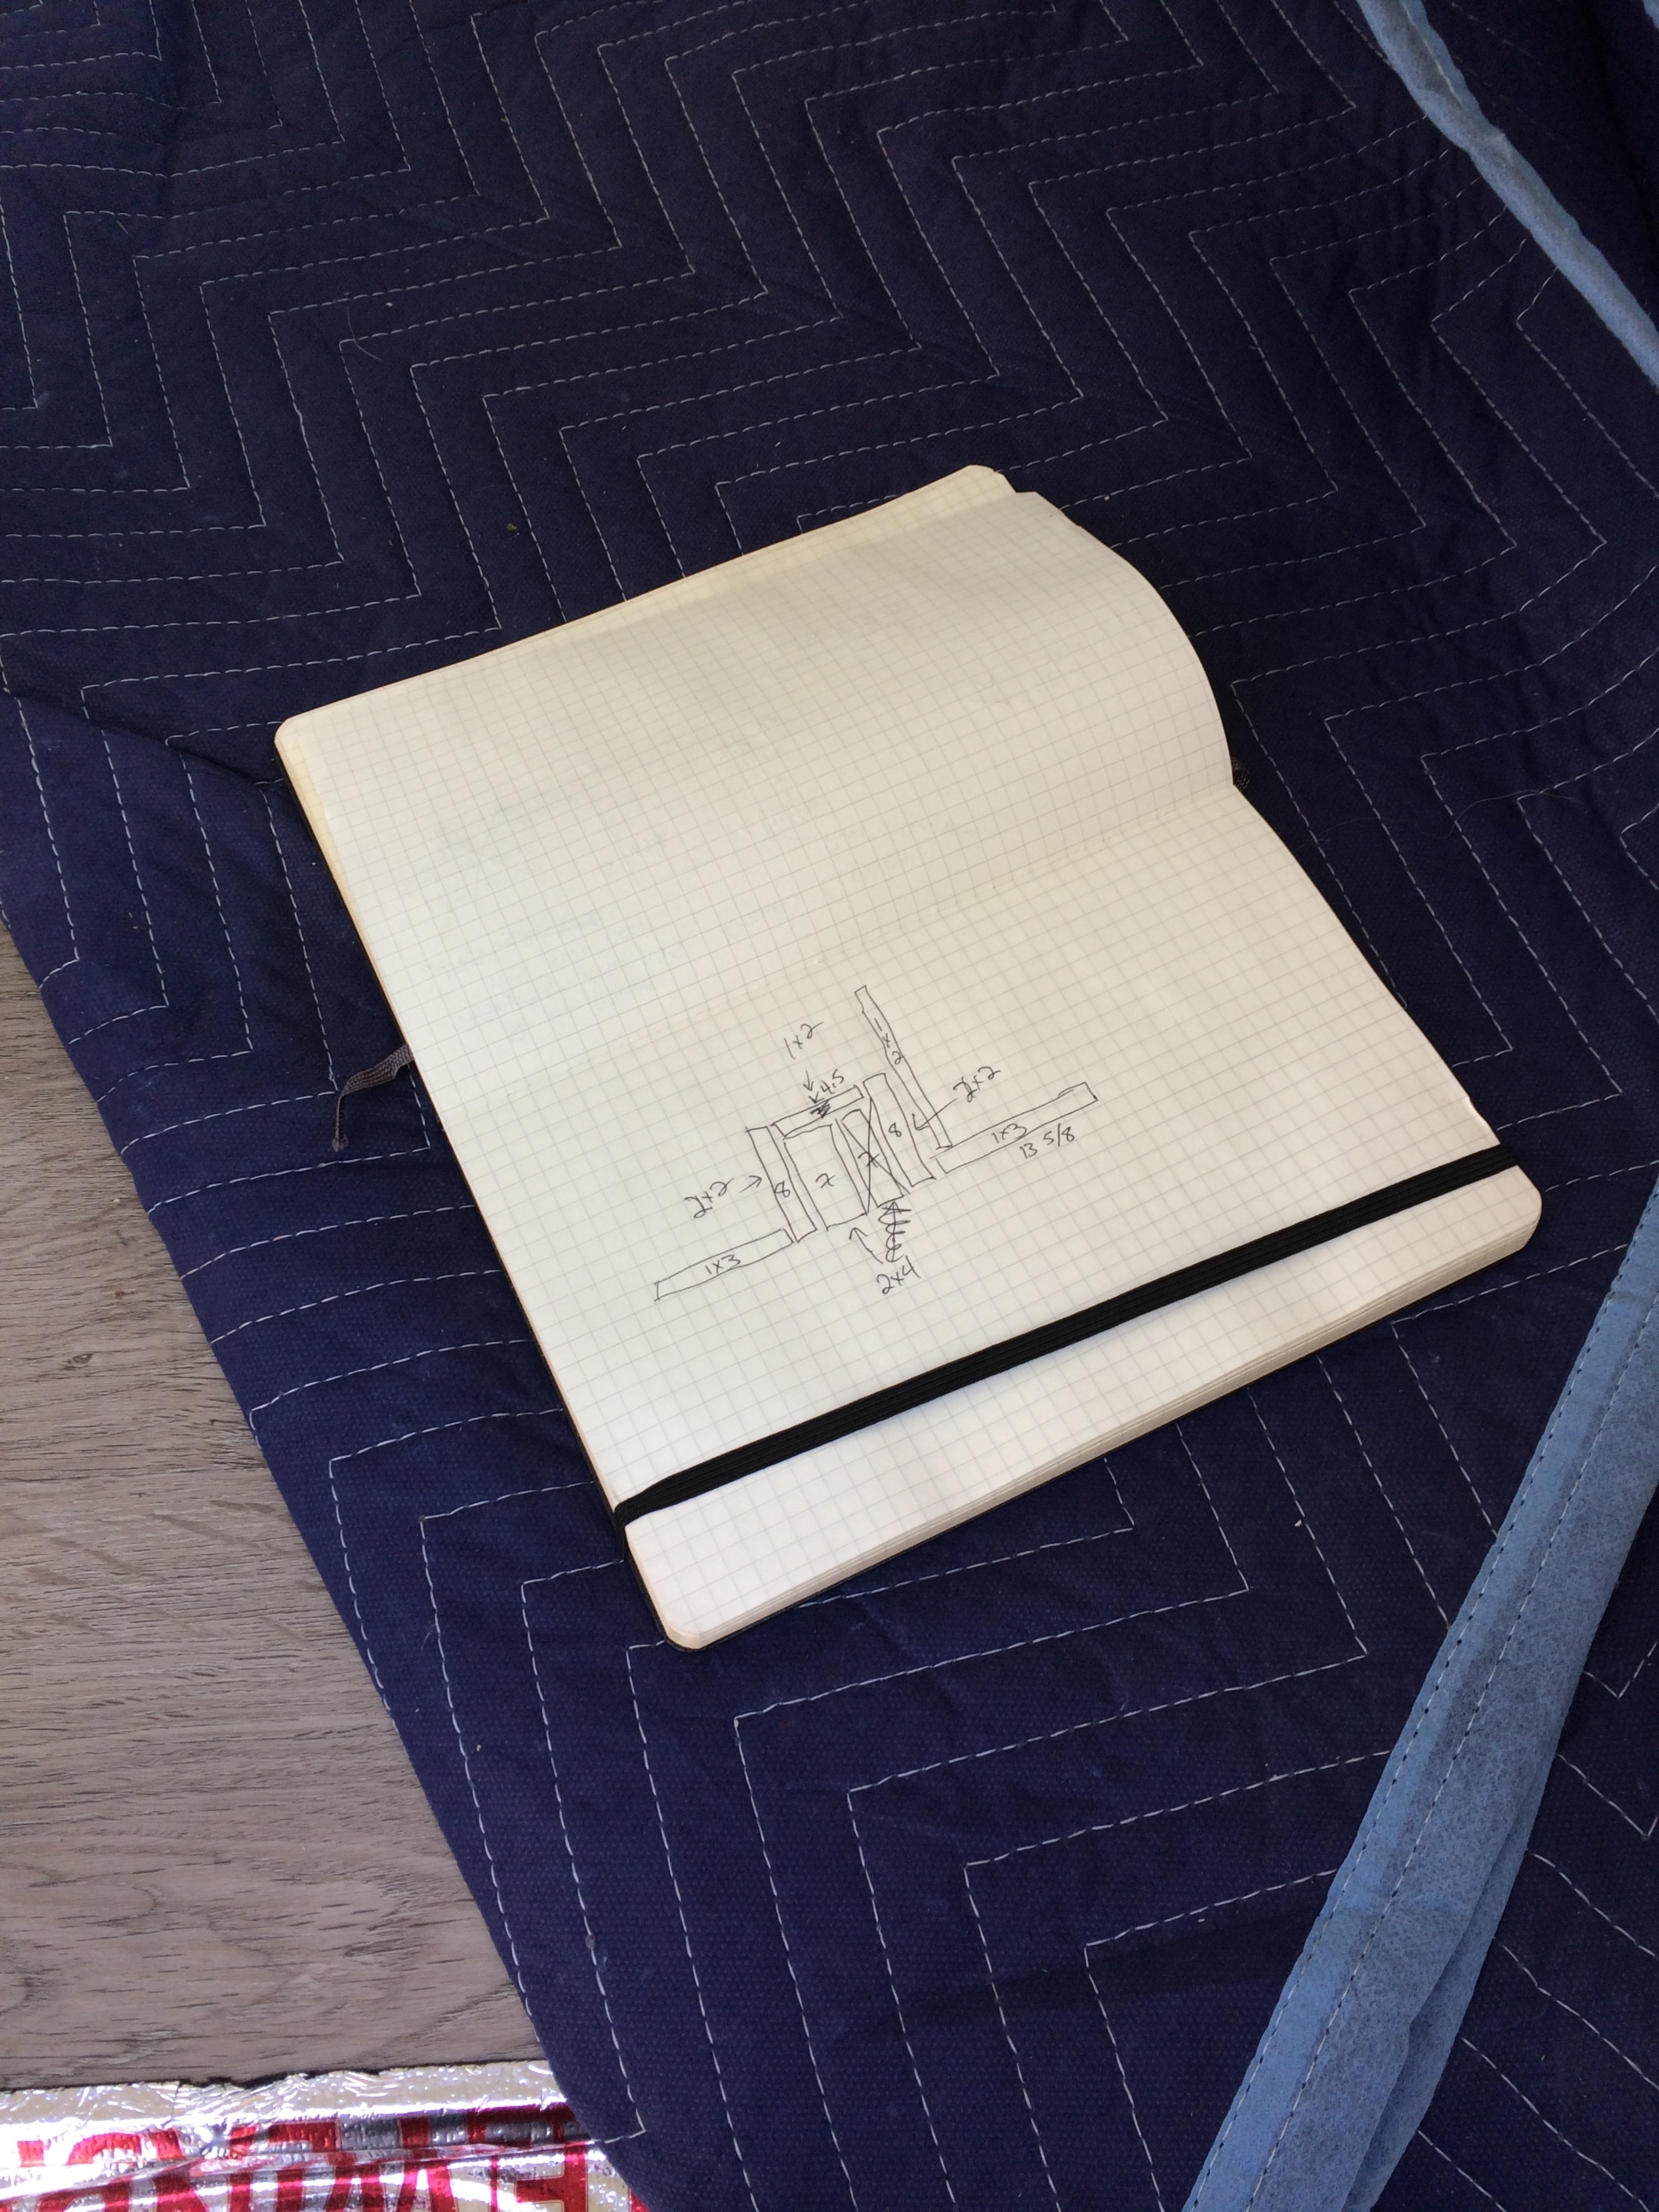
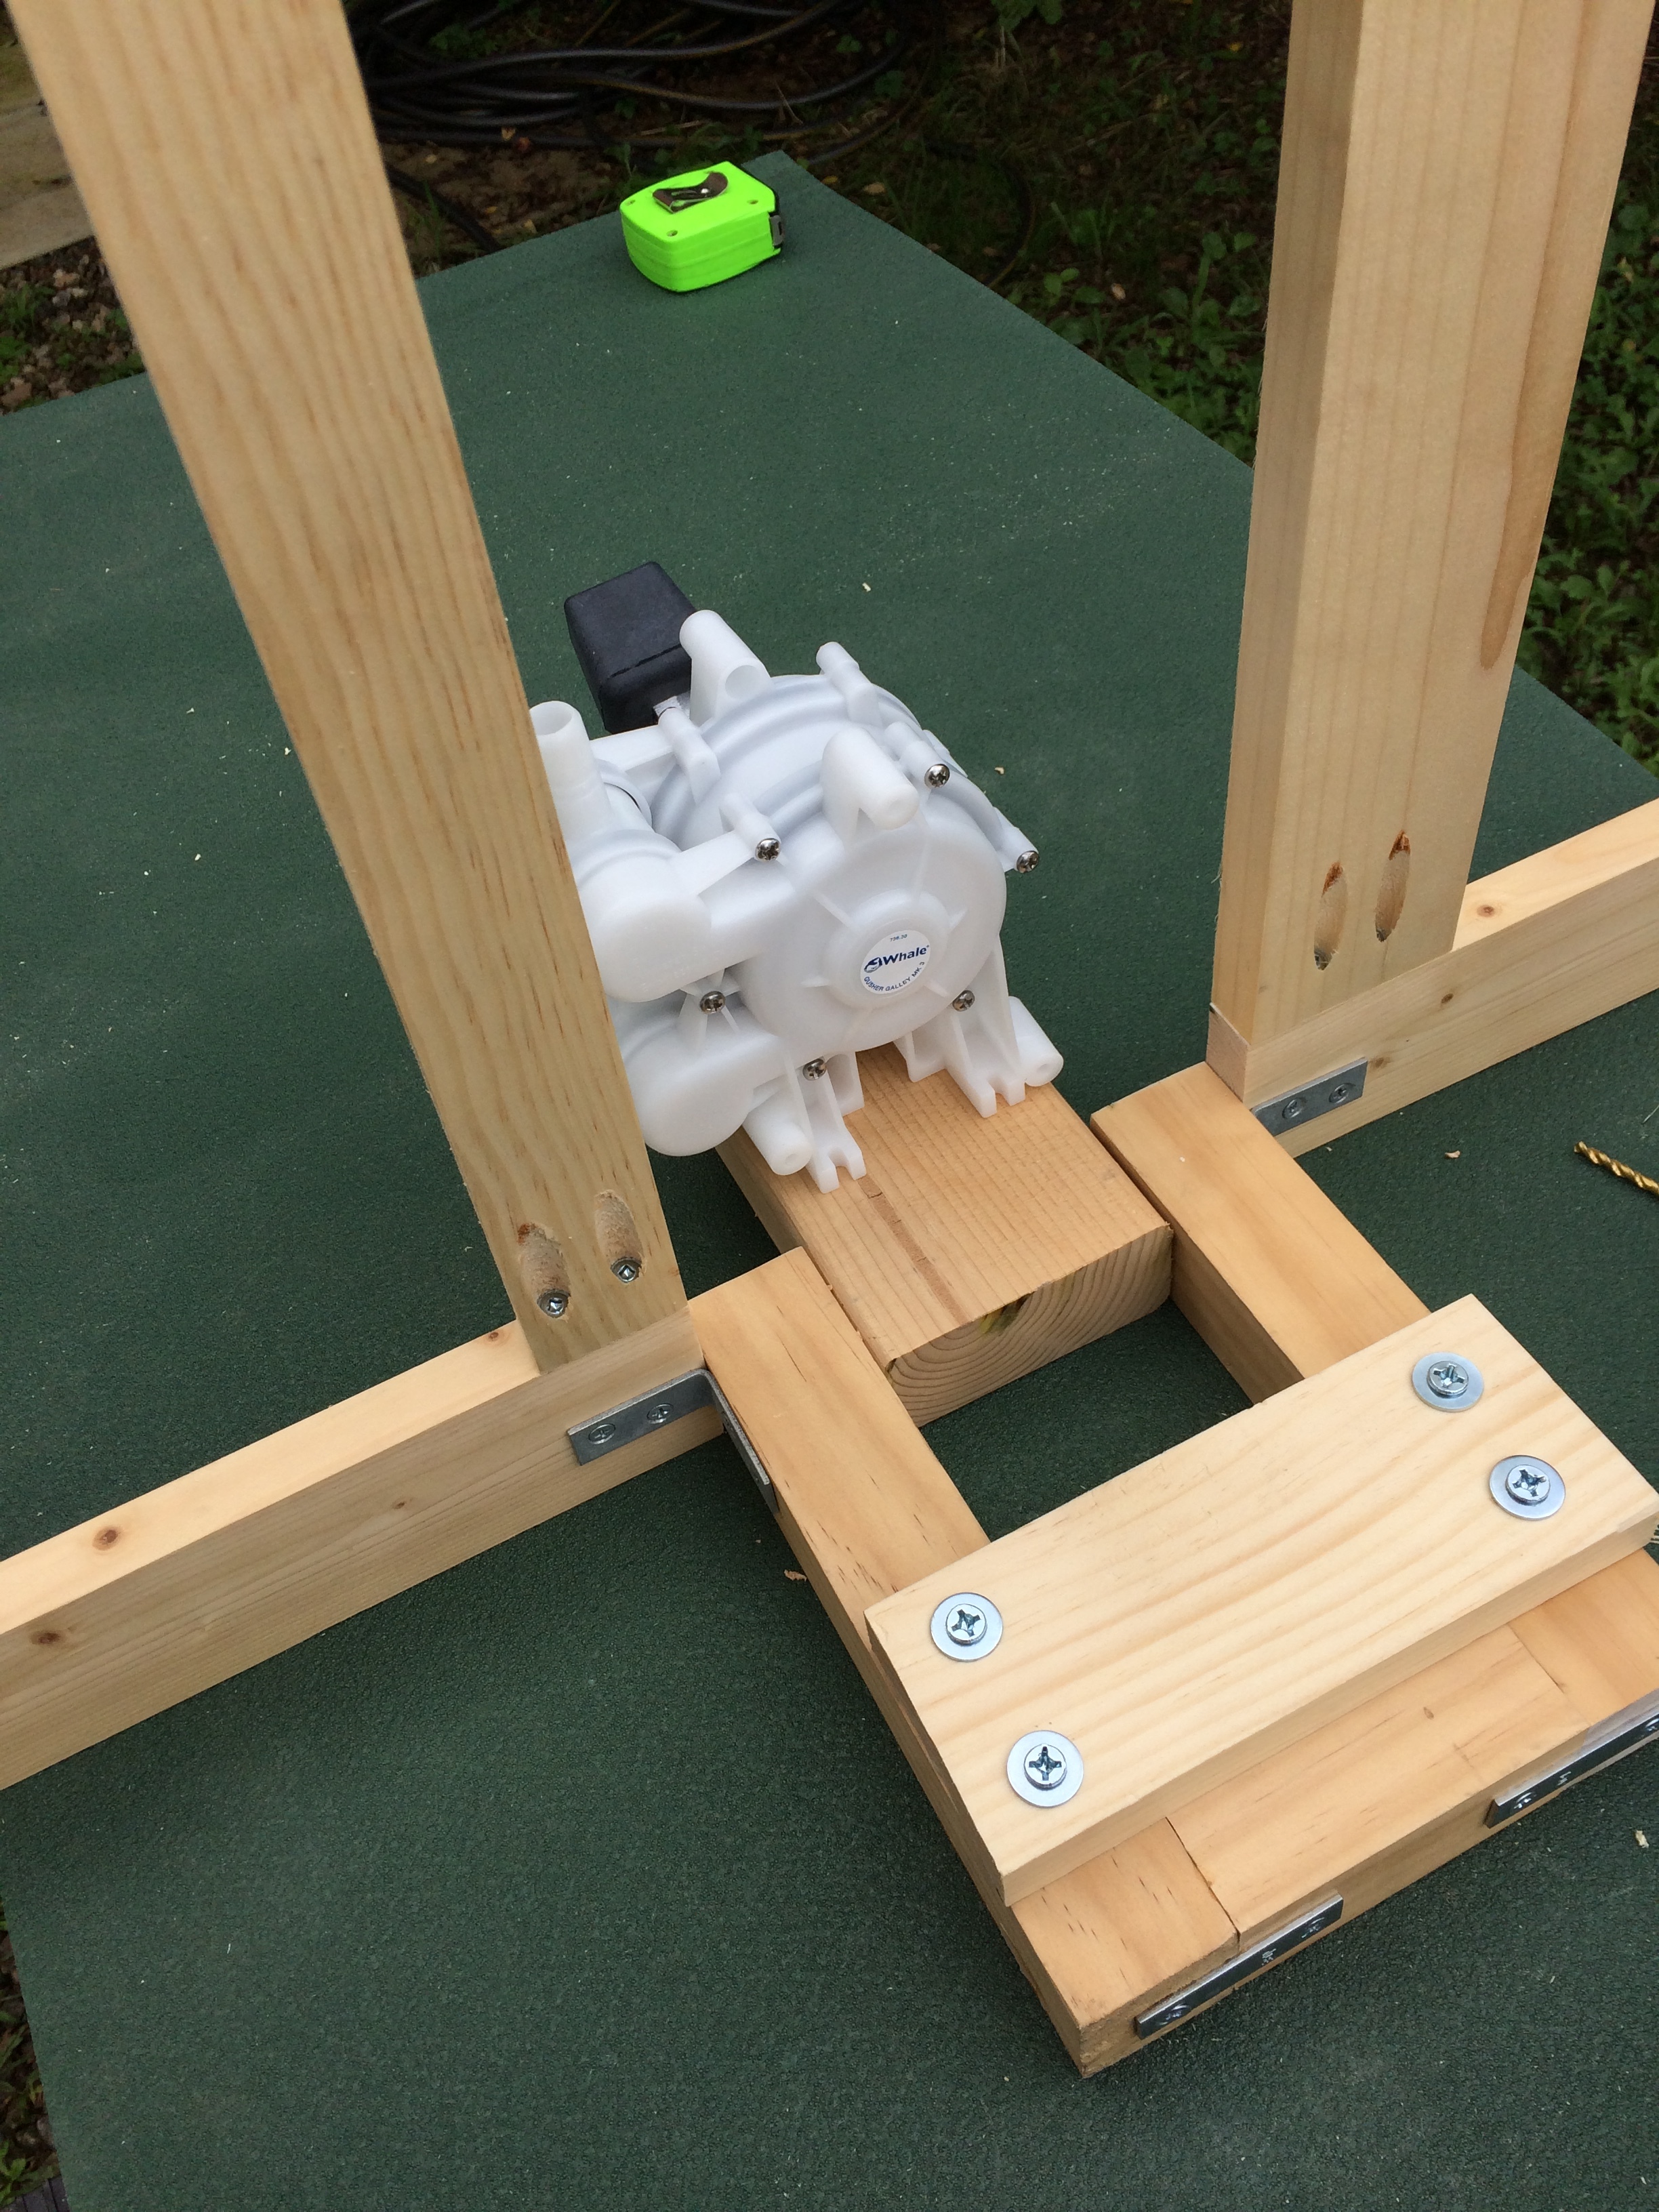
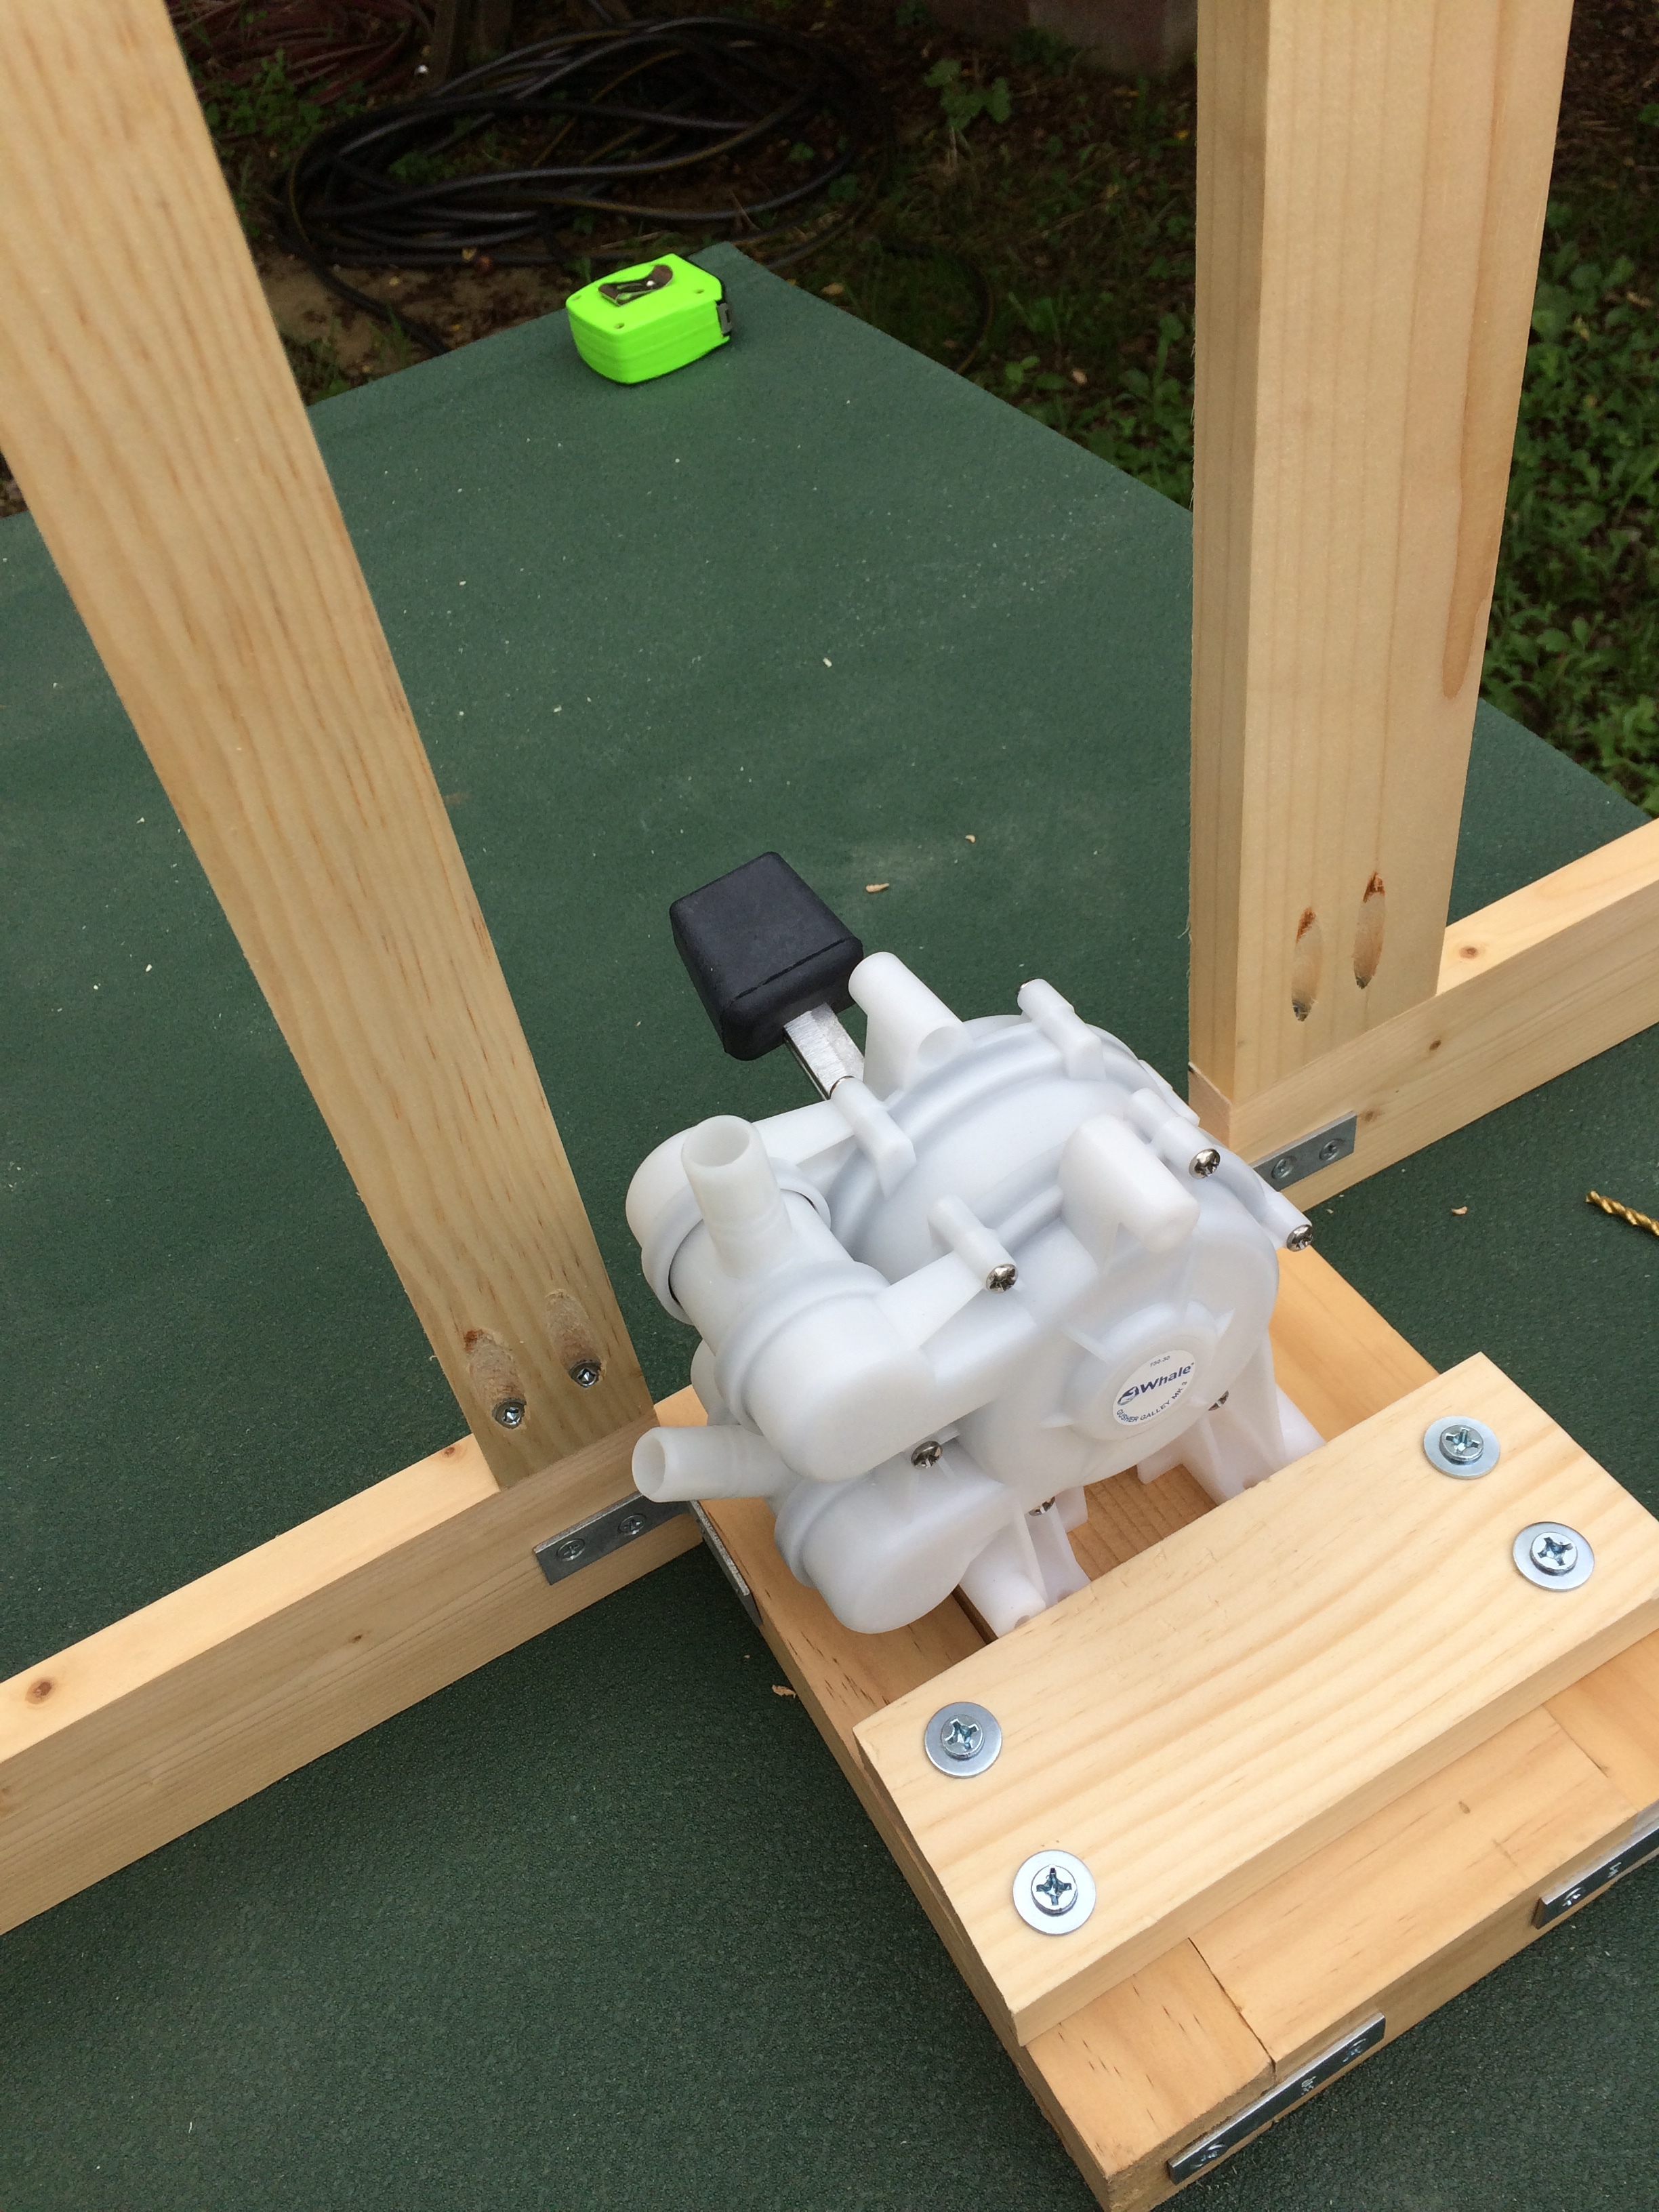
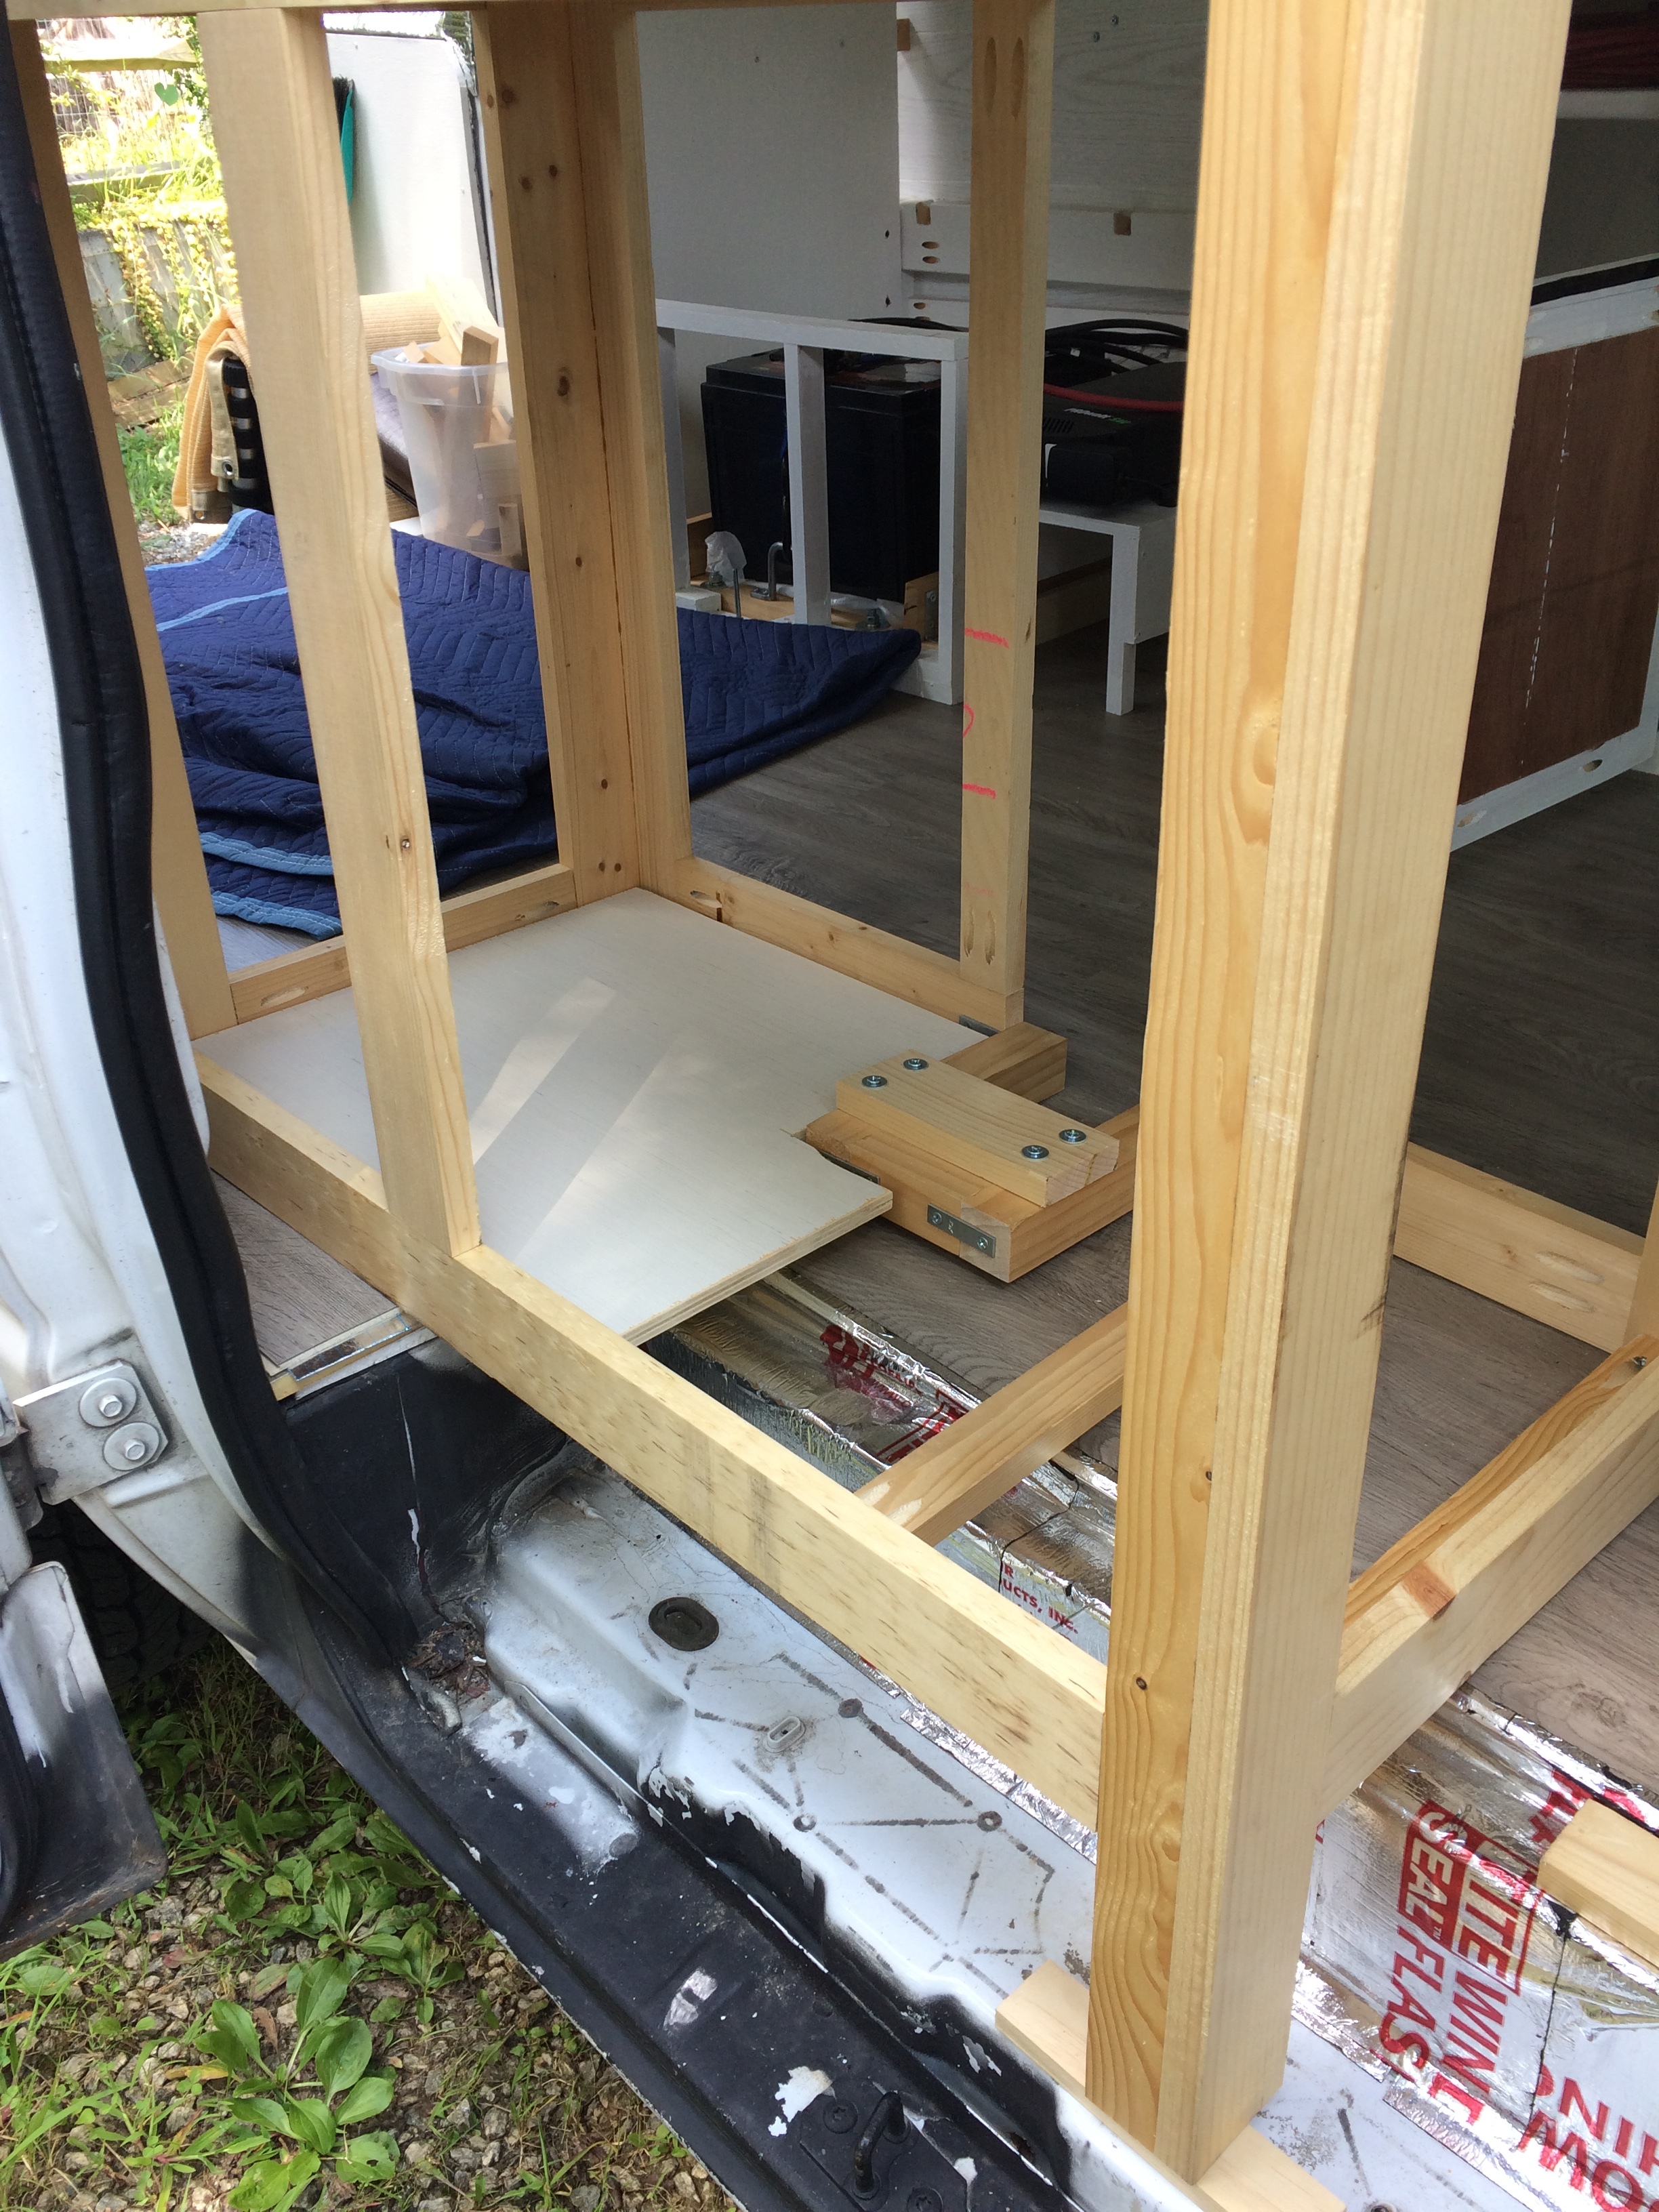
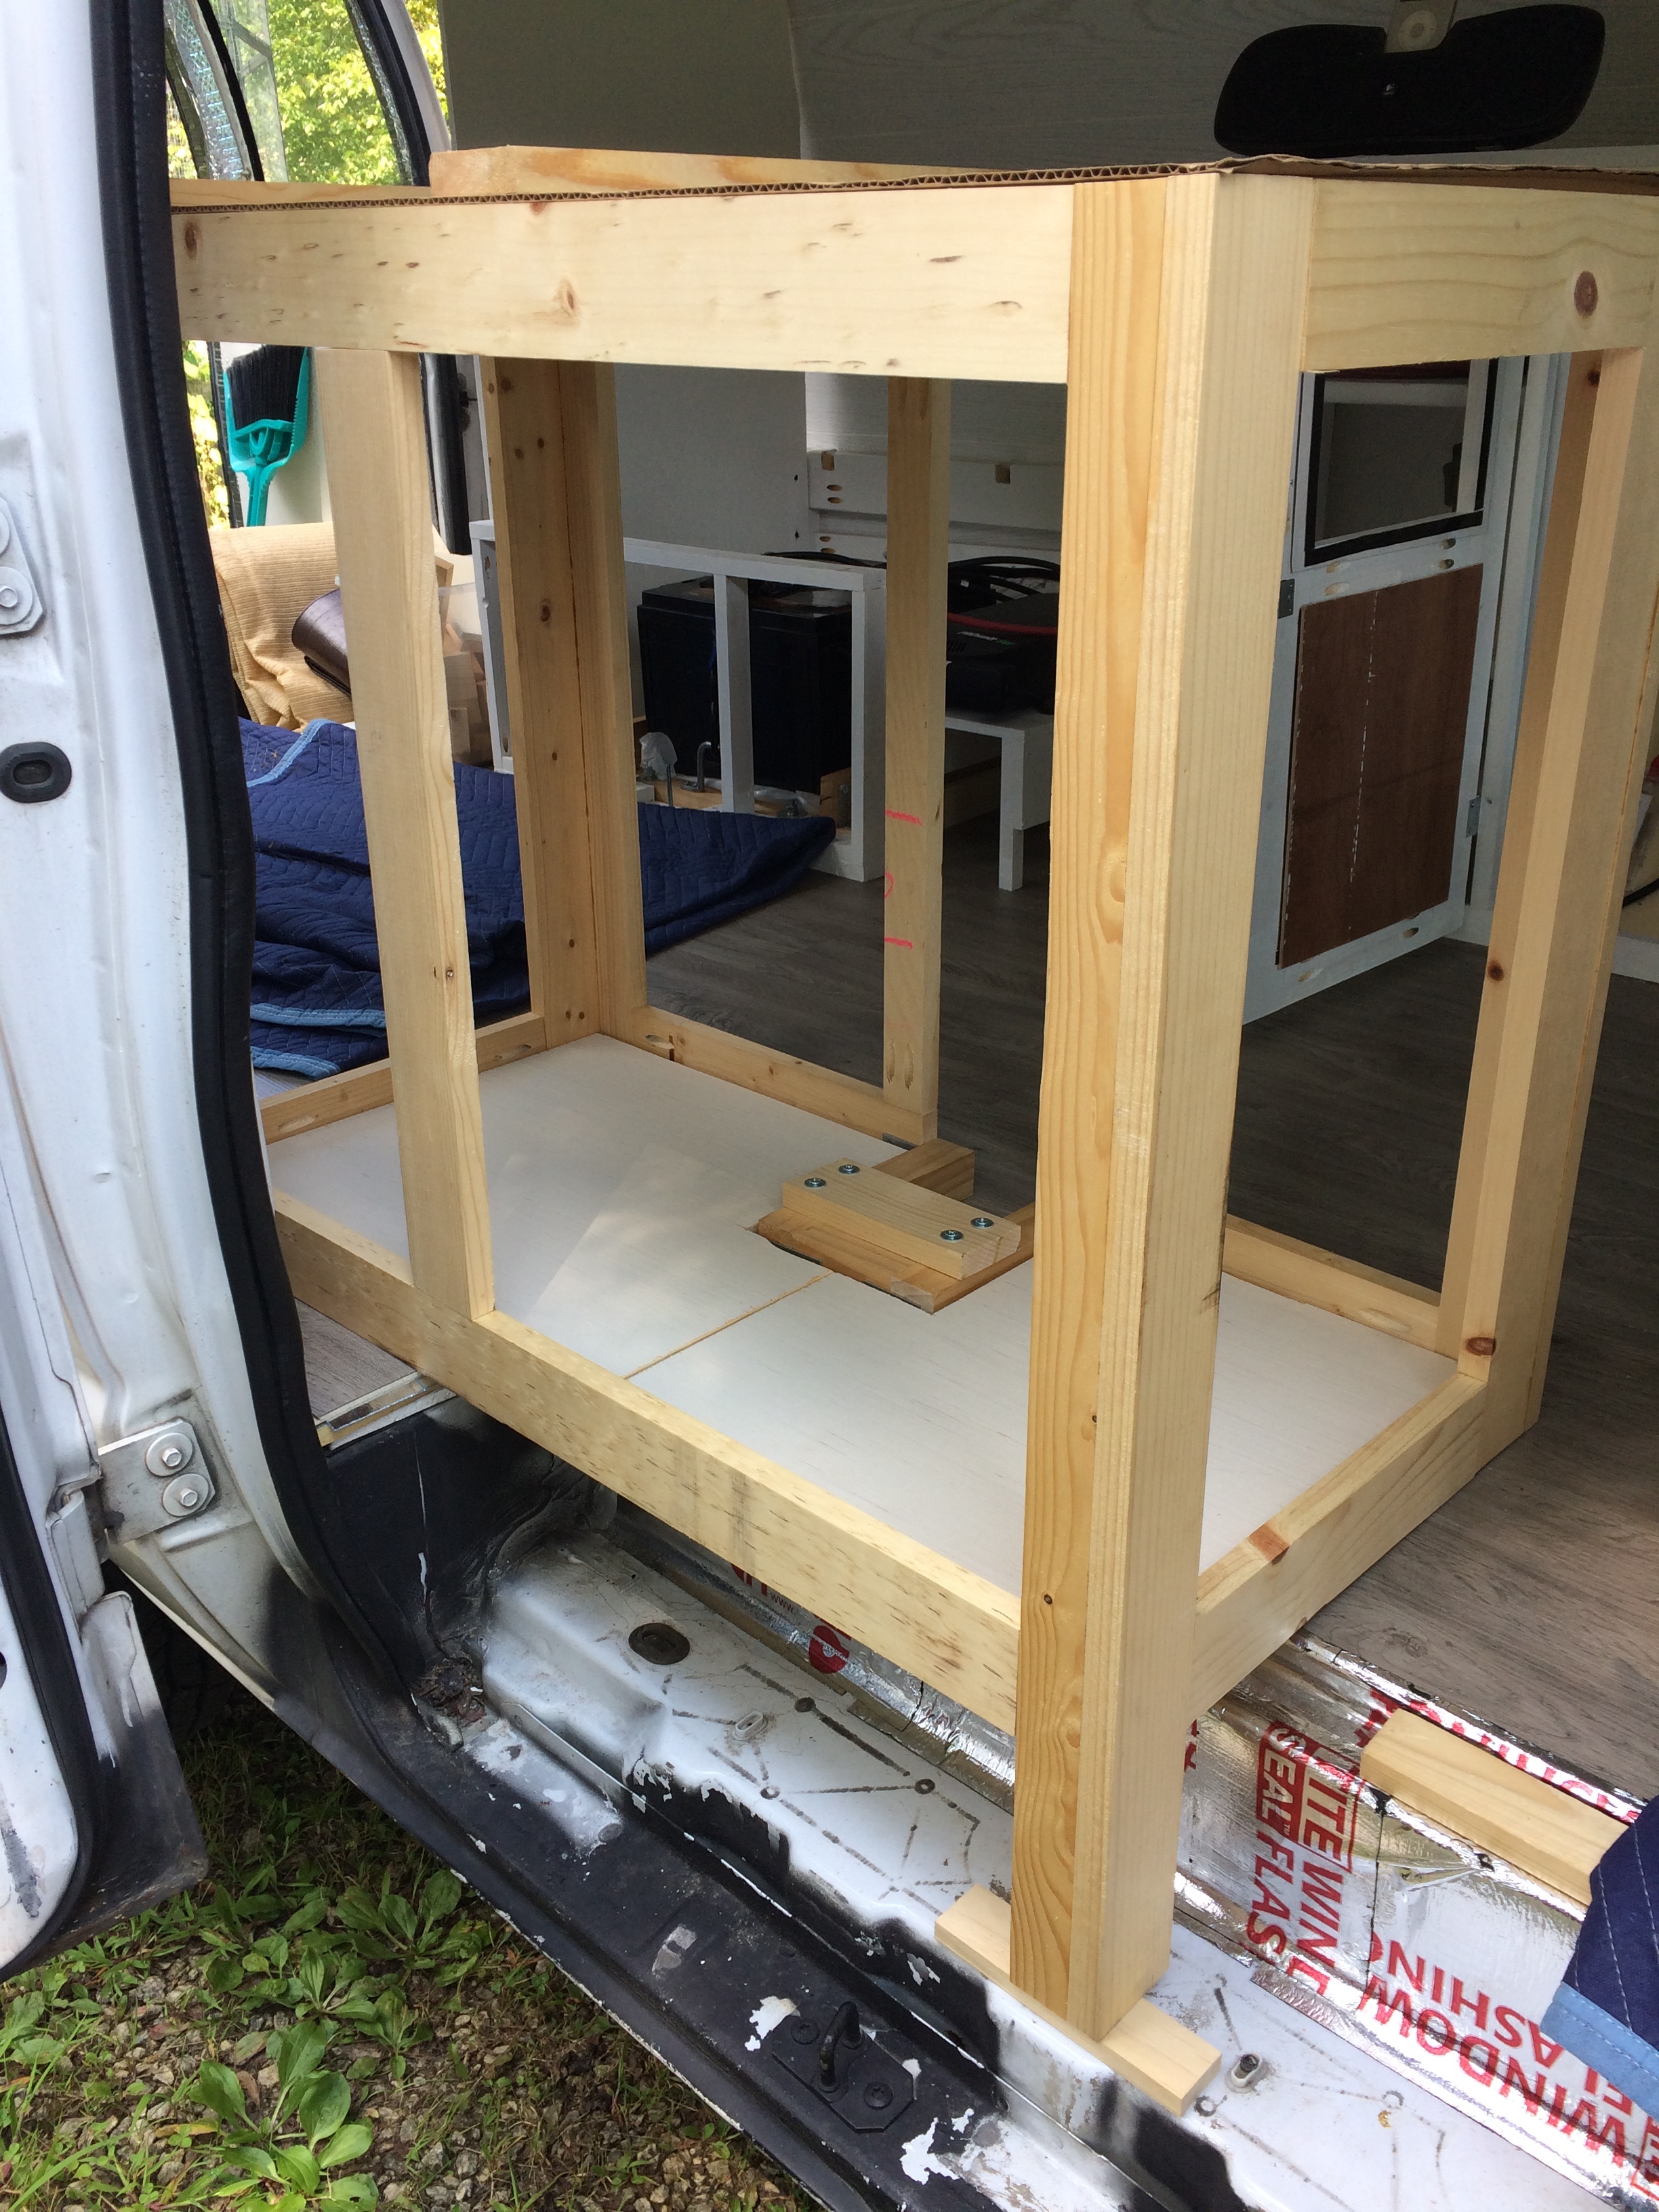
The pump is actually bolted to a piece of 2x4 which can be slid in and out of the restraining structure for maintenance.
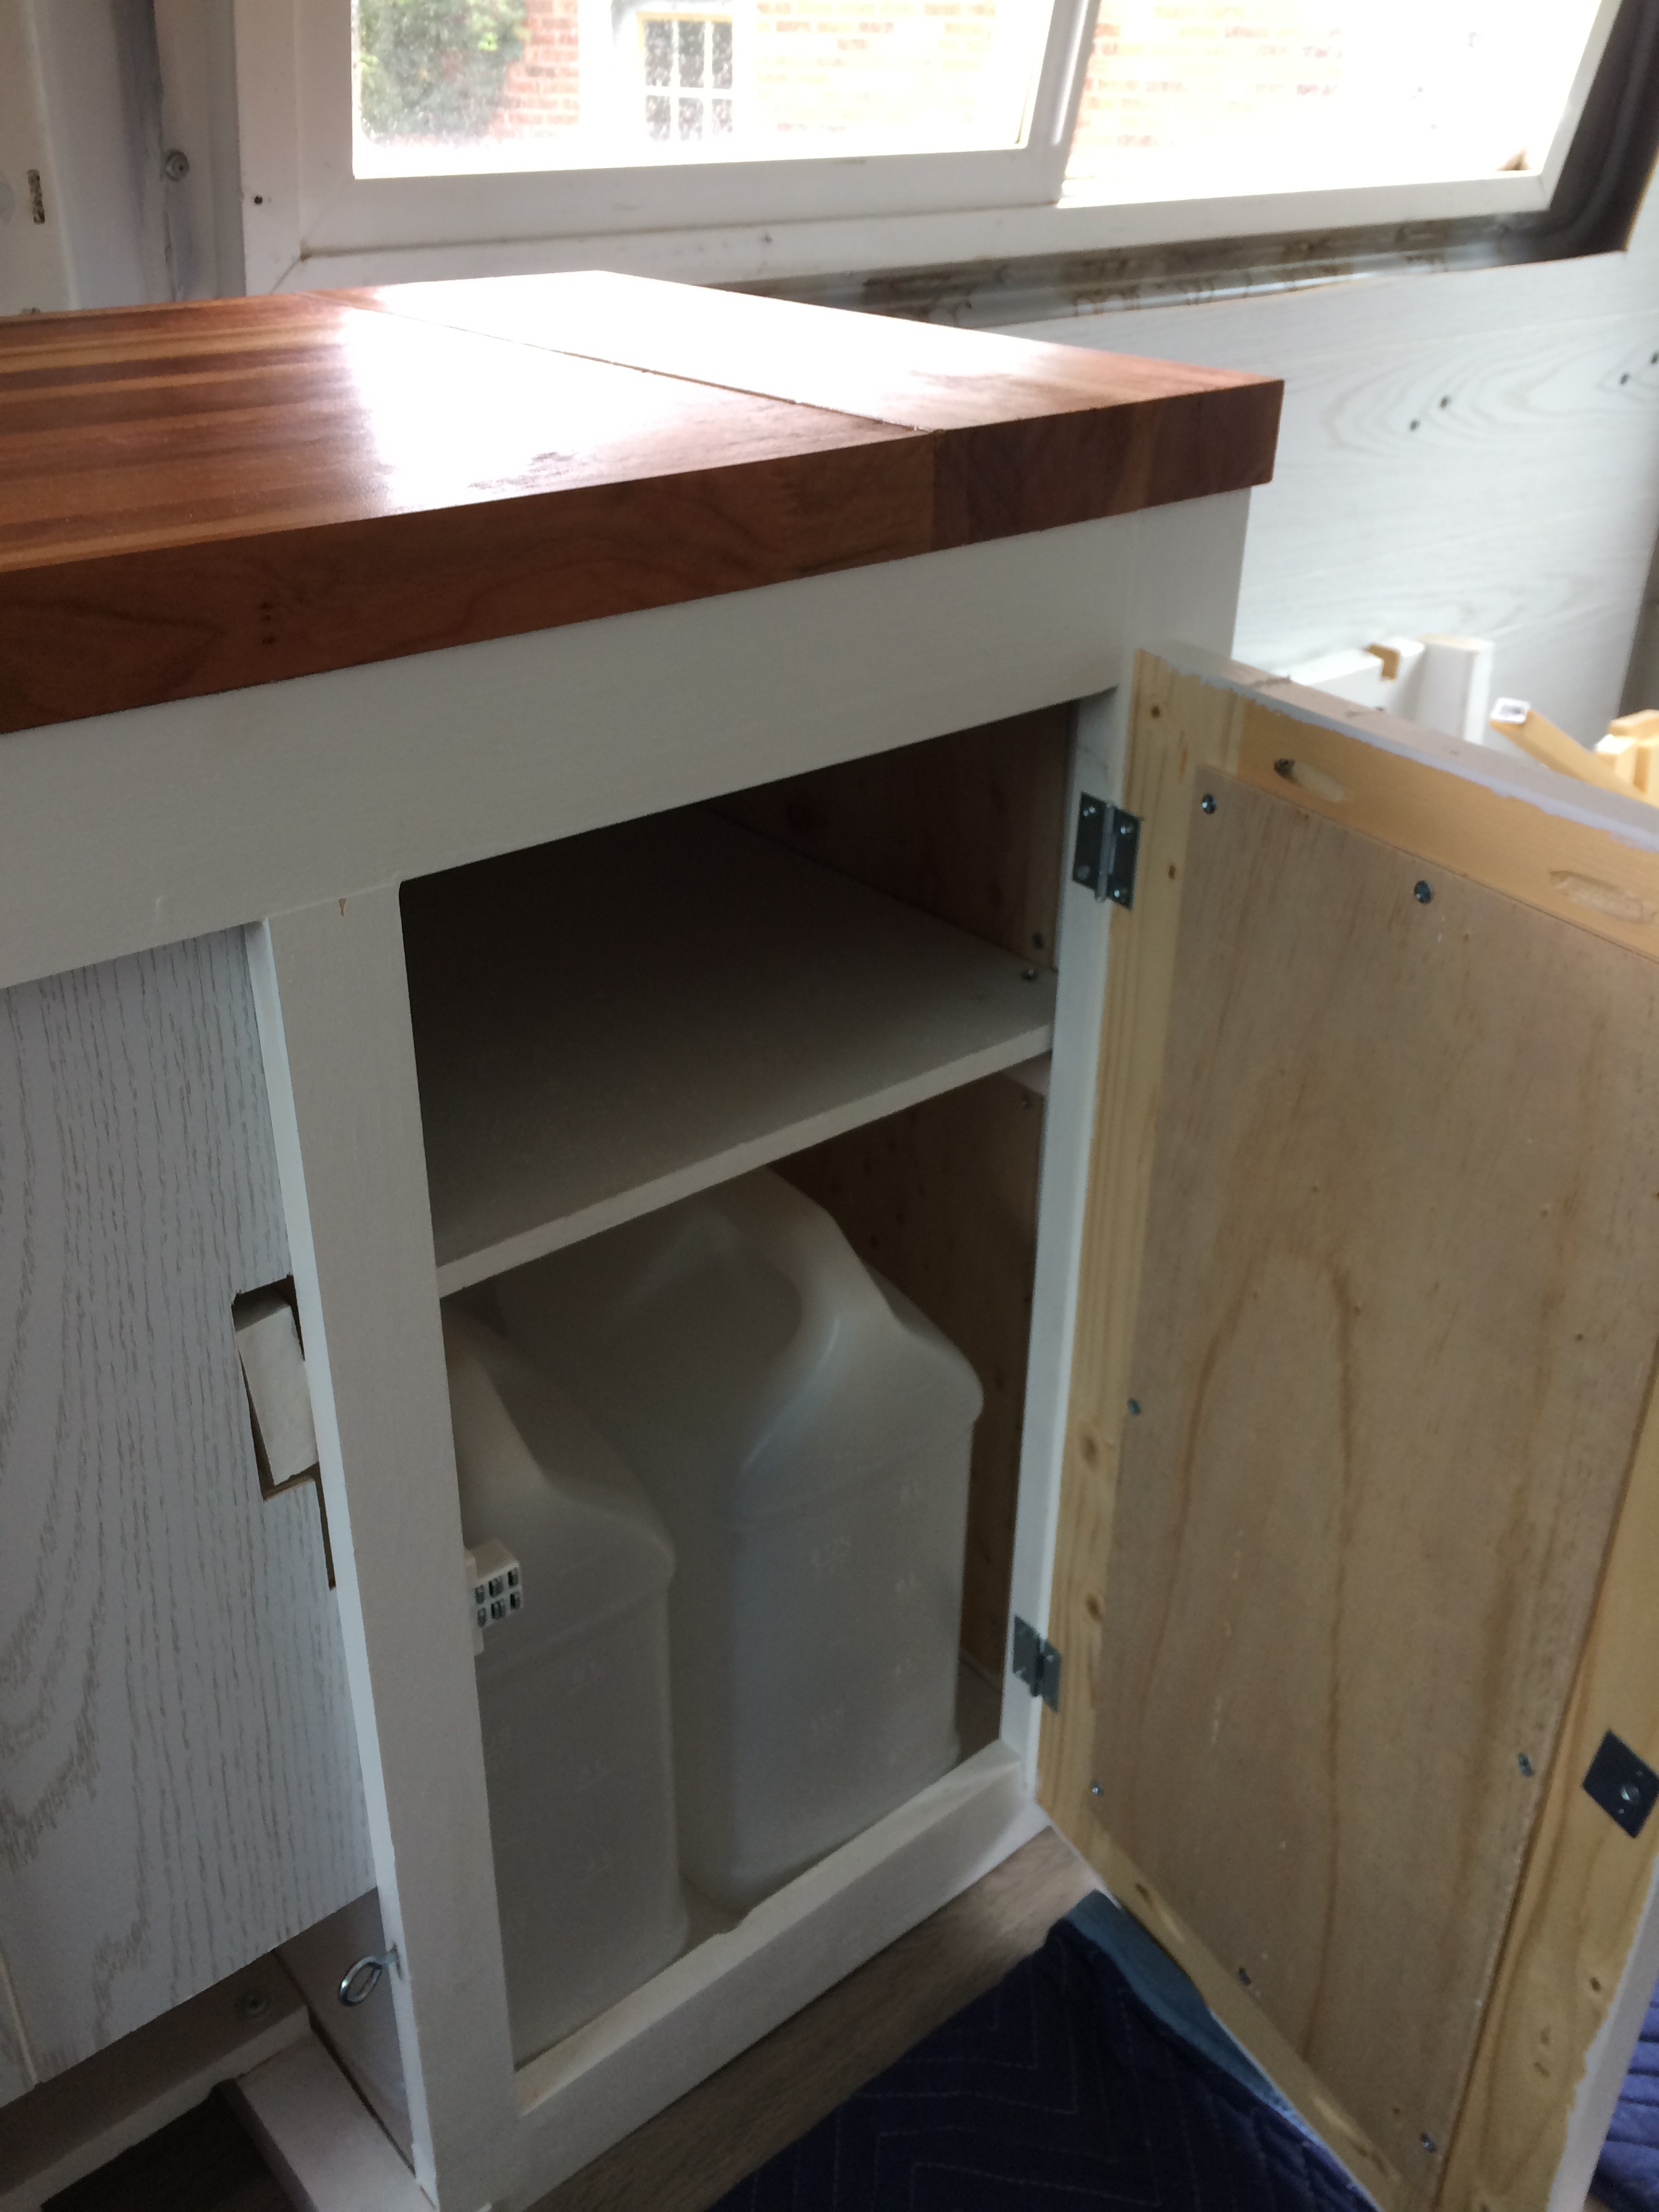
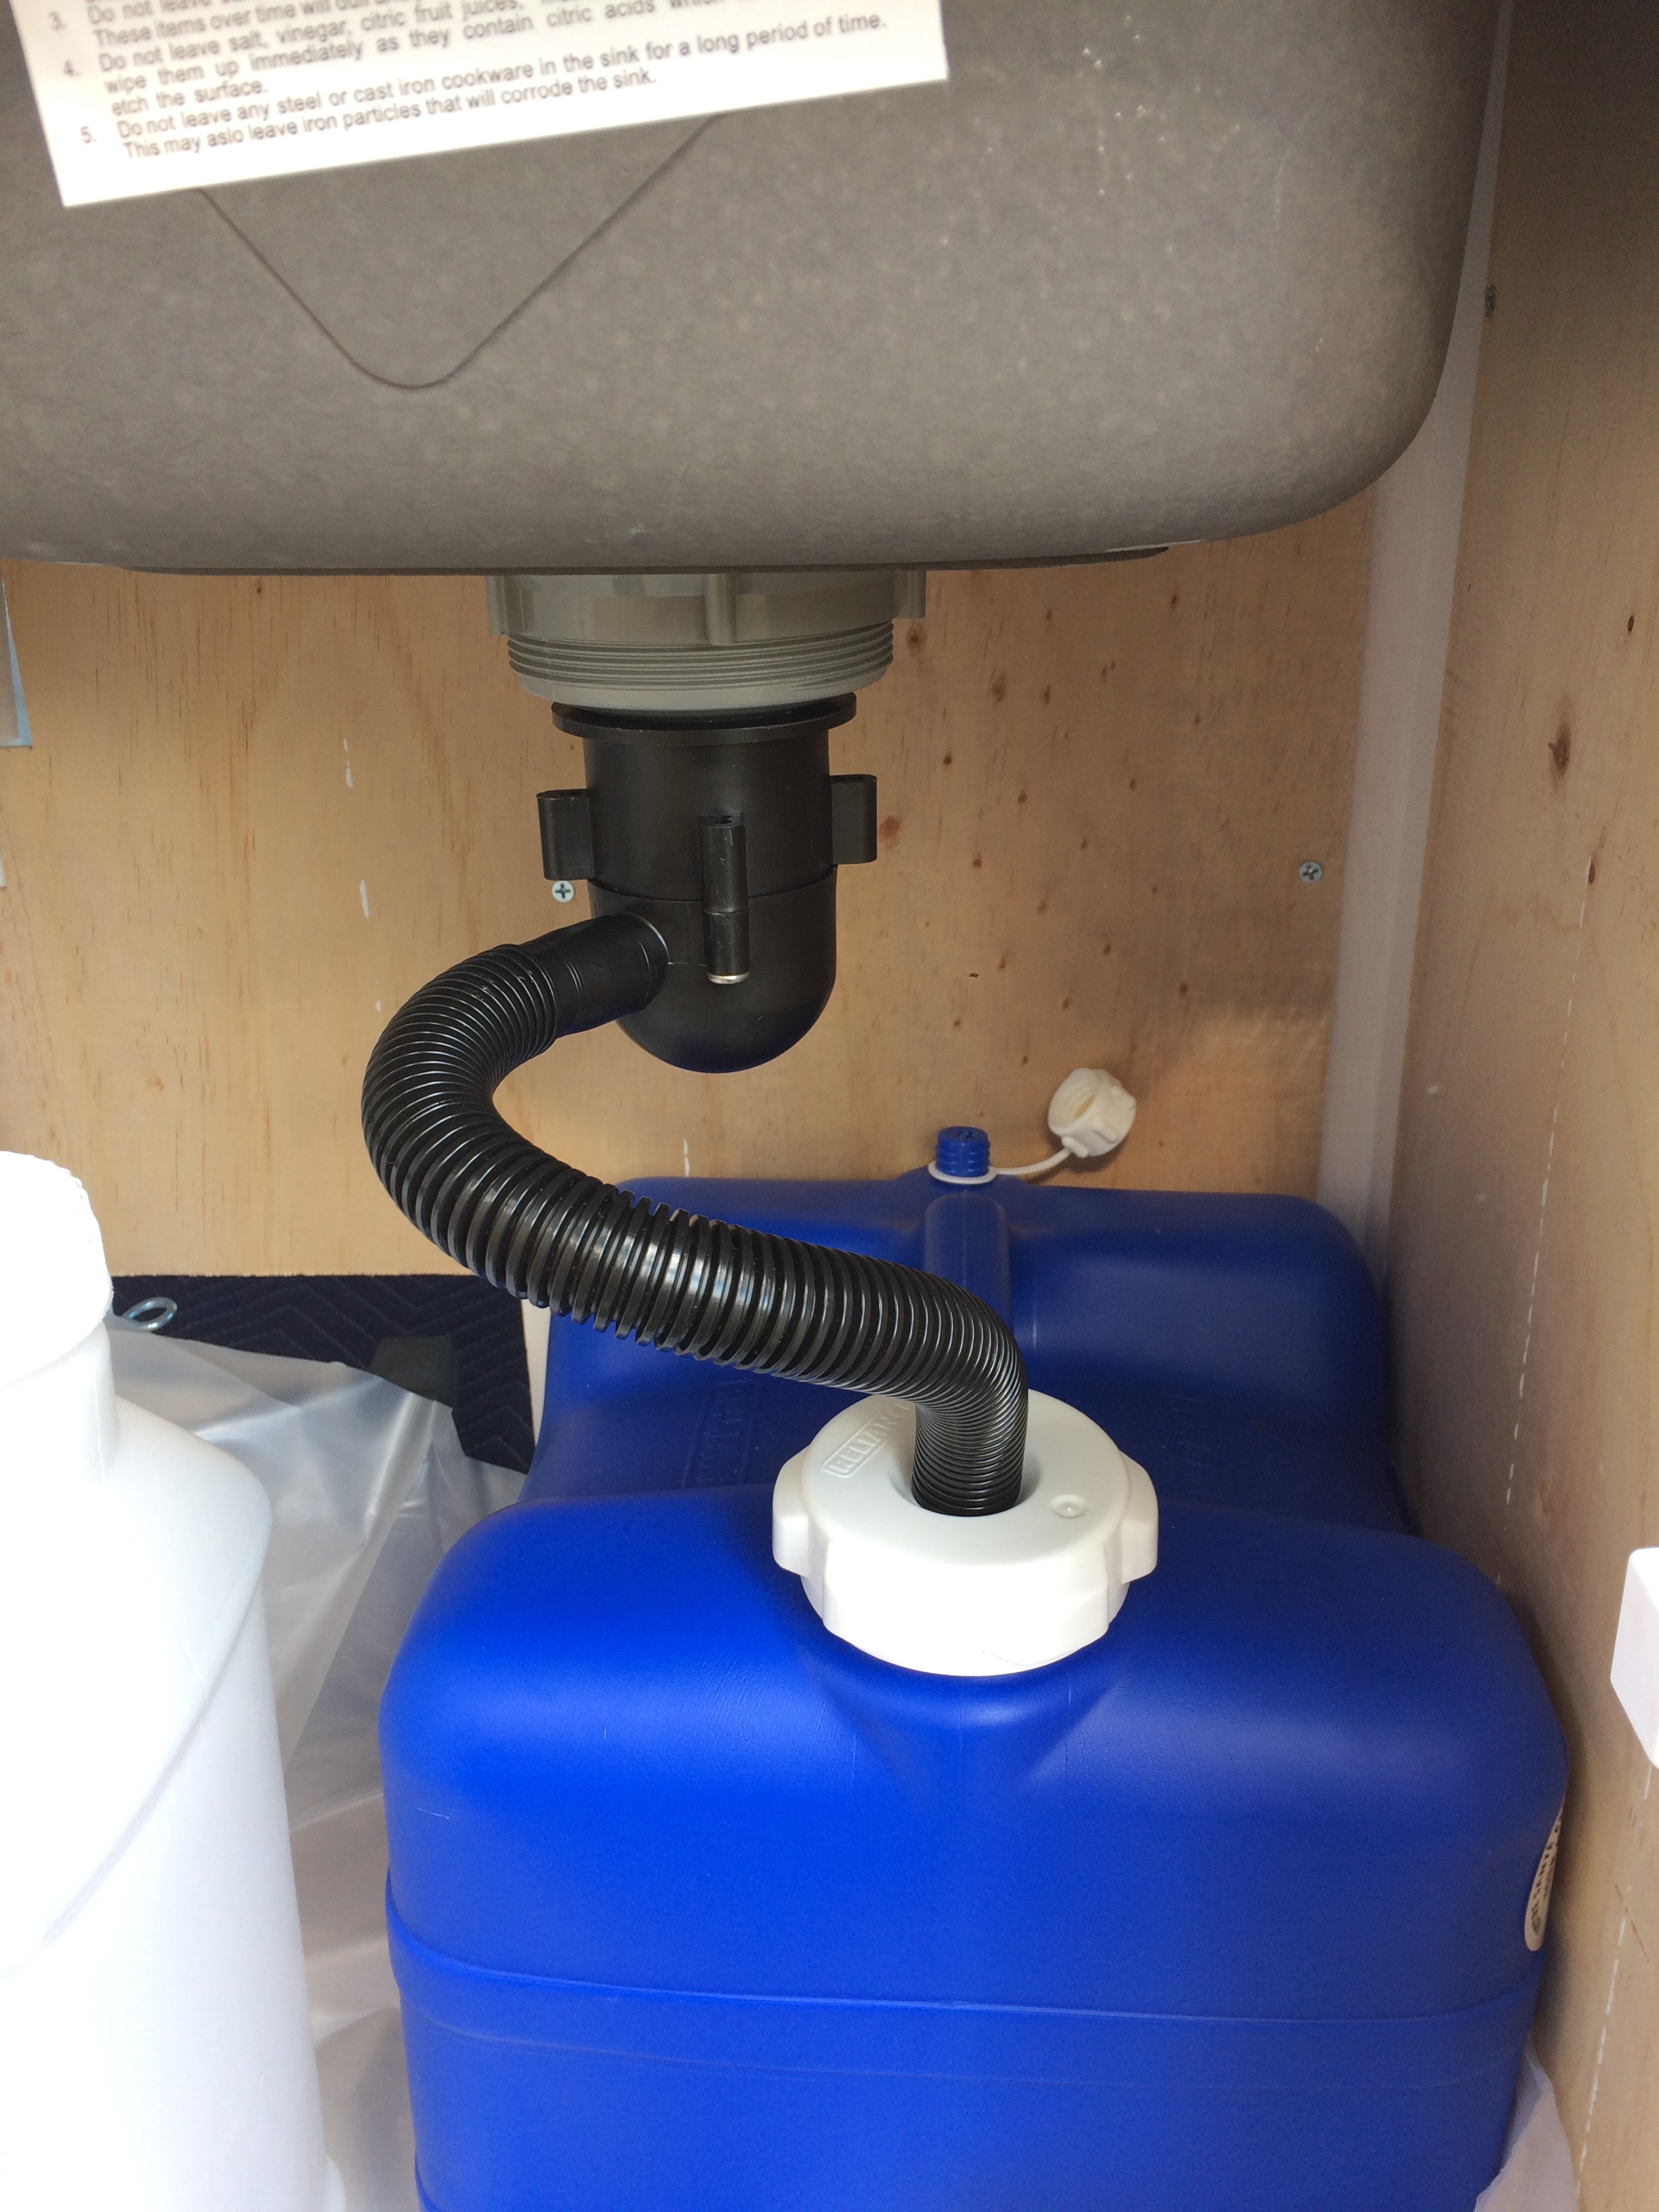
I am using 4 of the white containers shown for fresh water for a total of 10 gallons of fresh water. The blue container is for grey water, it holds a little over 3 gallons. The smaller containers are easier to fill than 5+ gallon ones are. I did have to make sure they weren’t to tall to allow for the shelf for my stove.
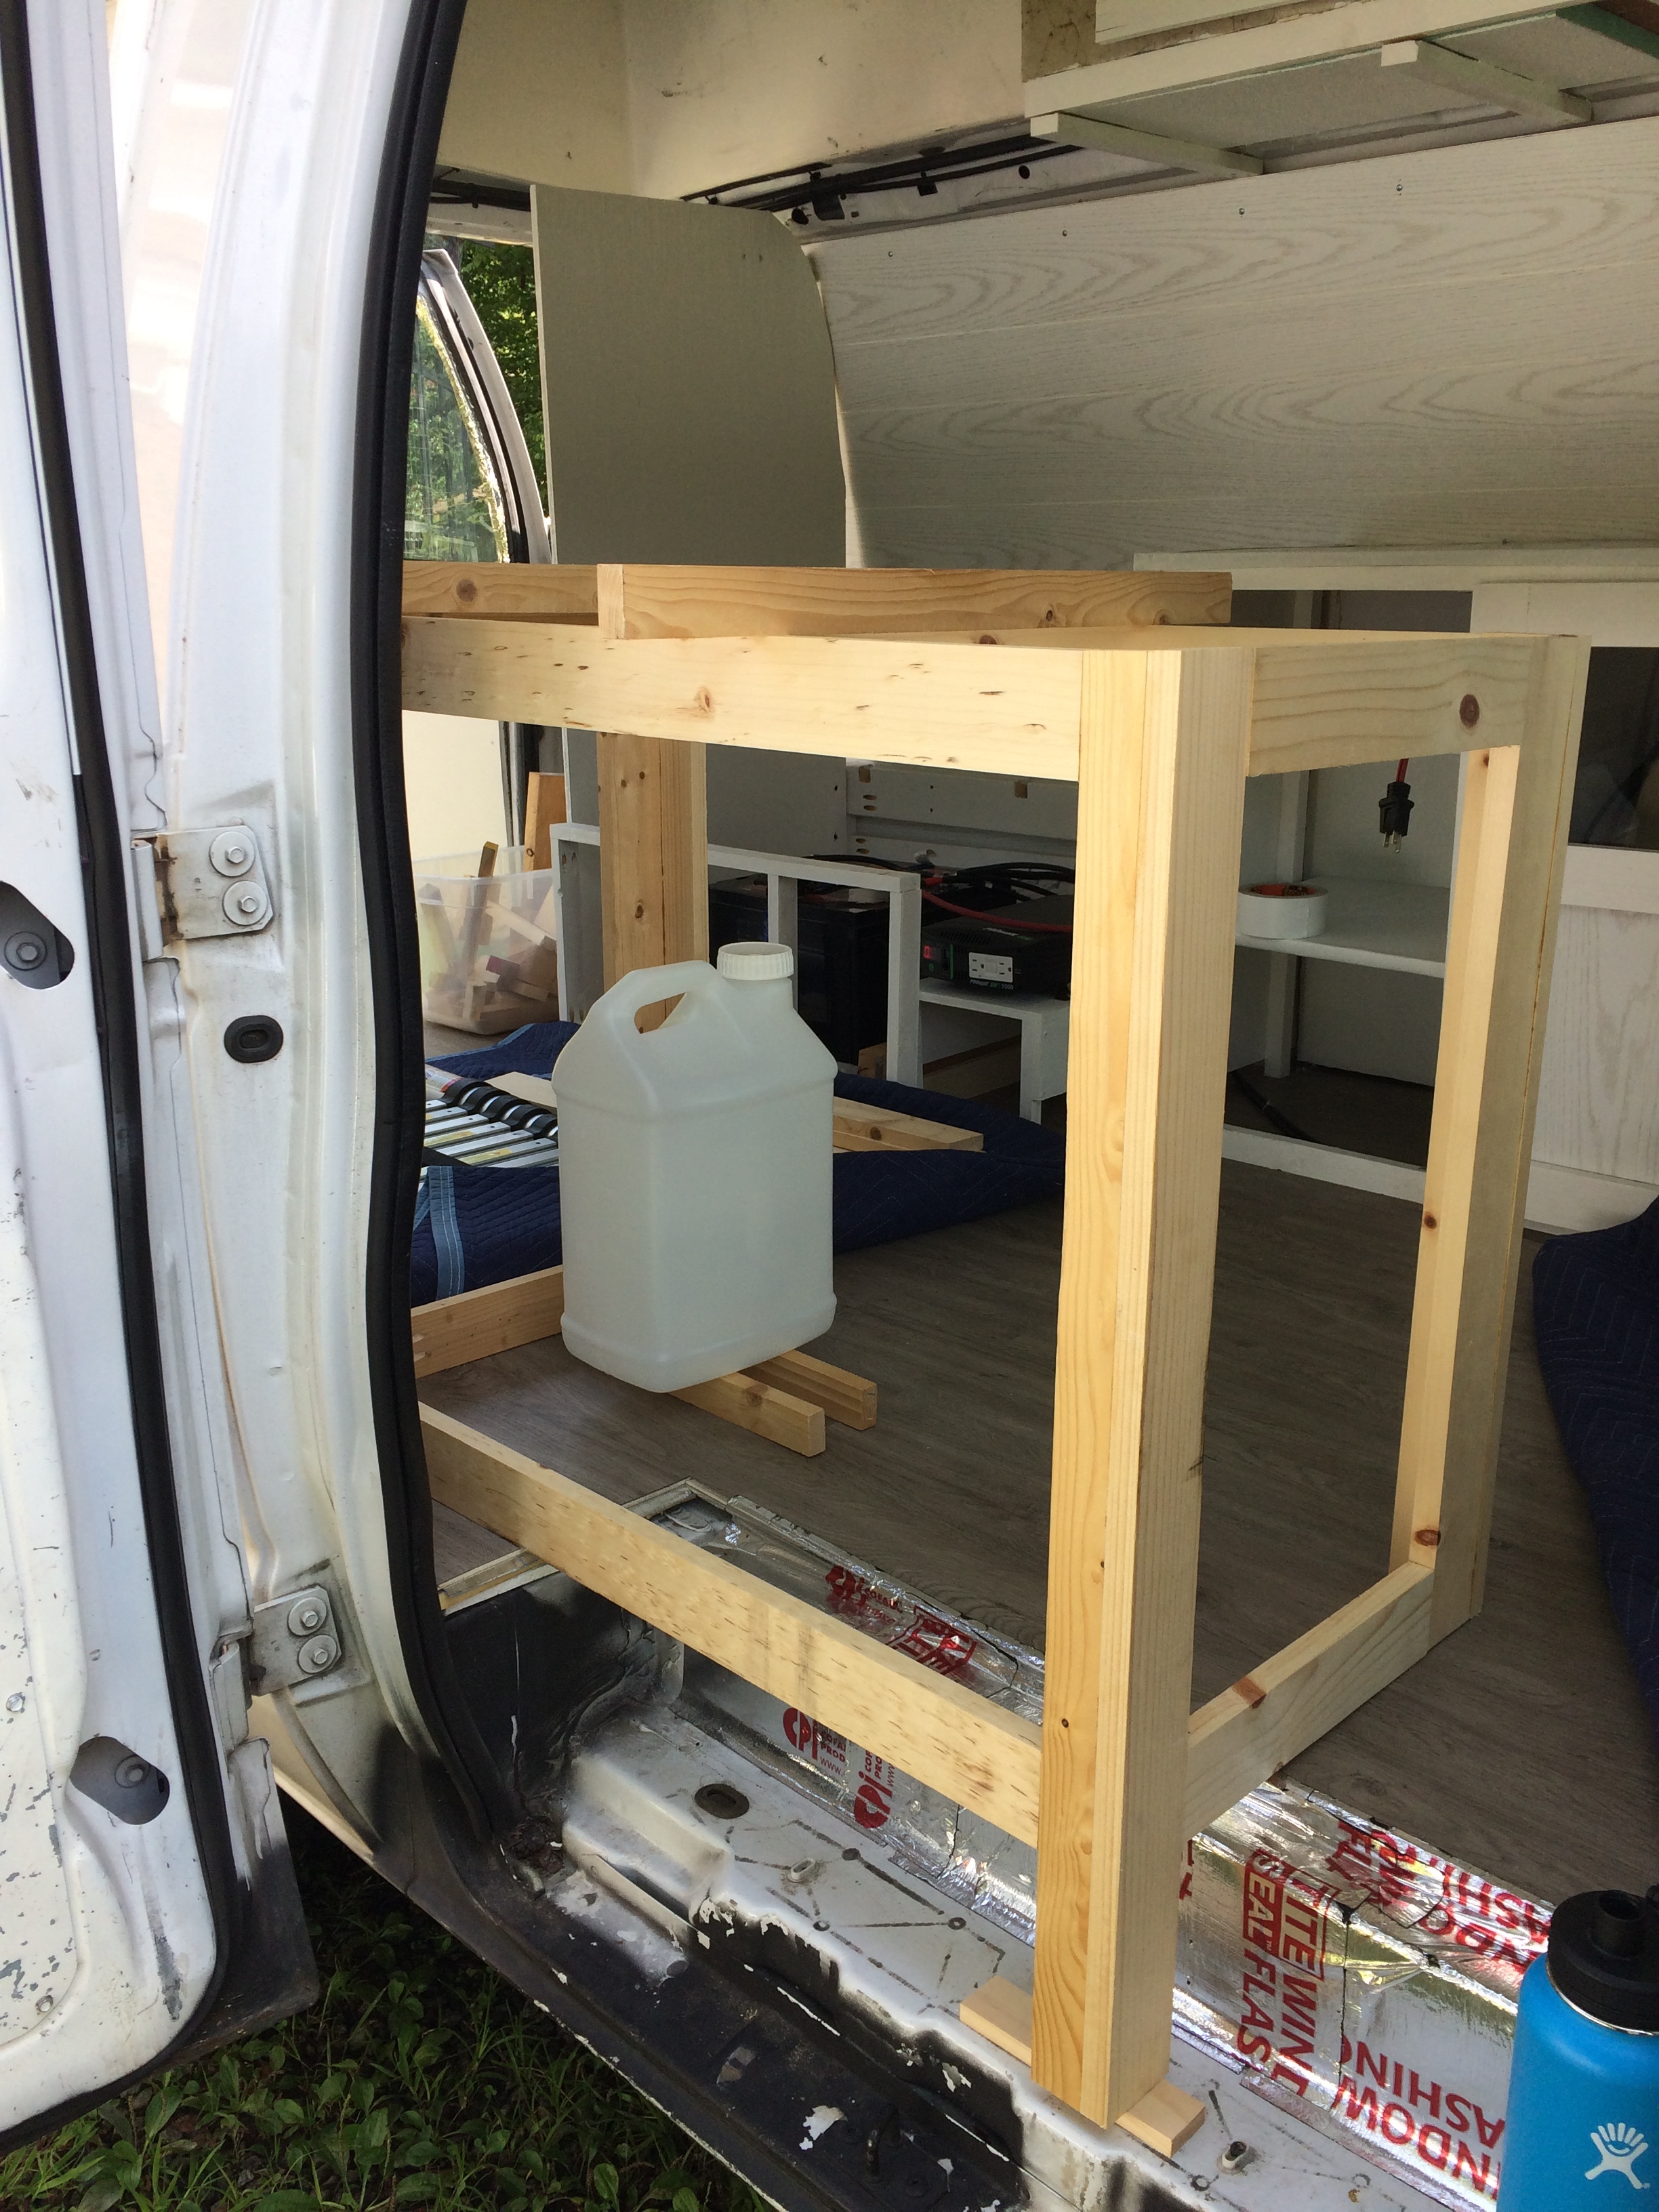
In case of leaks I did not want the water system directly on the van floor so this cabinet has a raised floor lined with plastic to protect everything from moisture. You can also see where I bolted the cabinet thru the floor here:

I used the leftover half a sheet of paneling for the sides of the cabinet. It matches (naturally) and there’s no real stress on them that would require something sturdier.

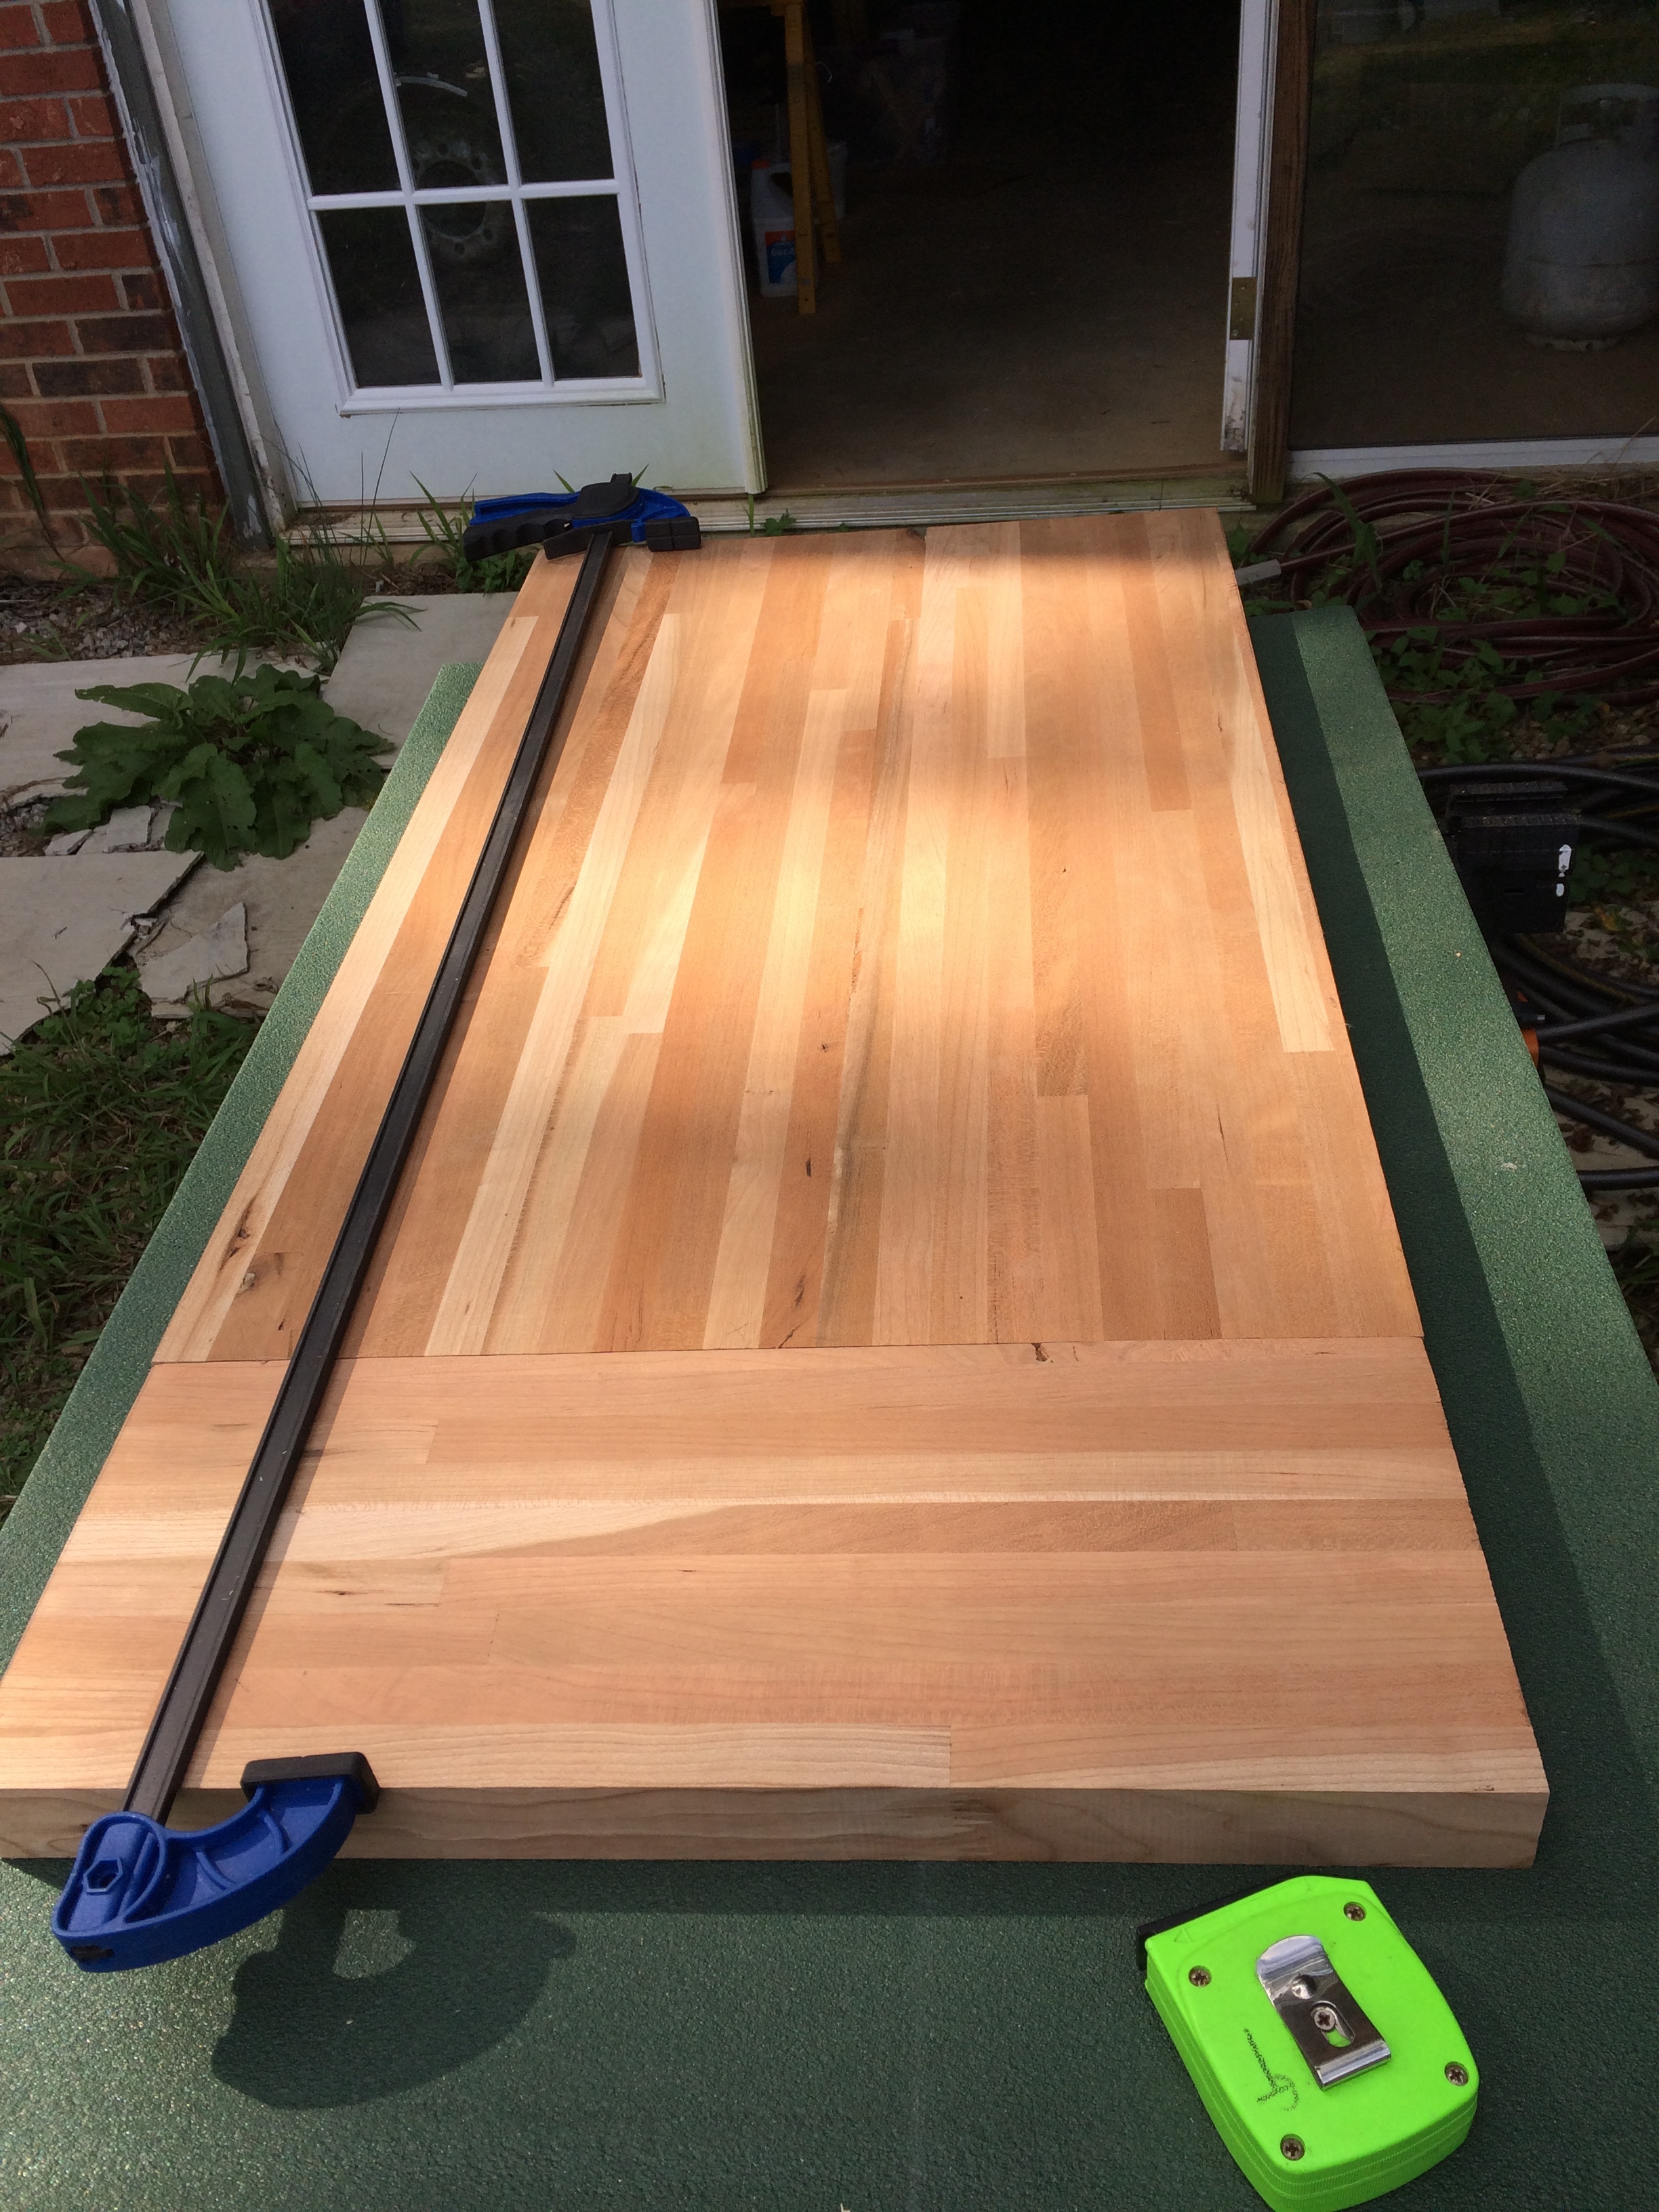
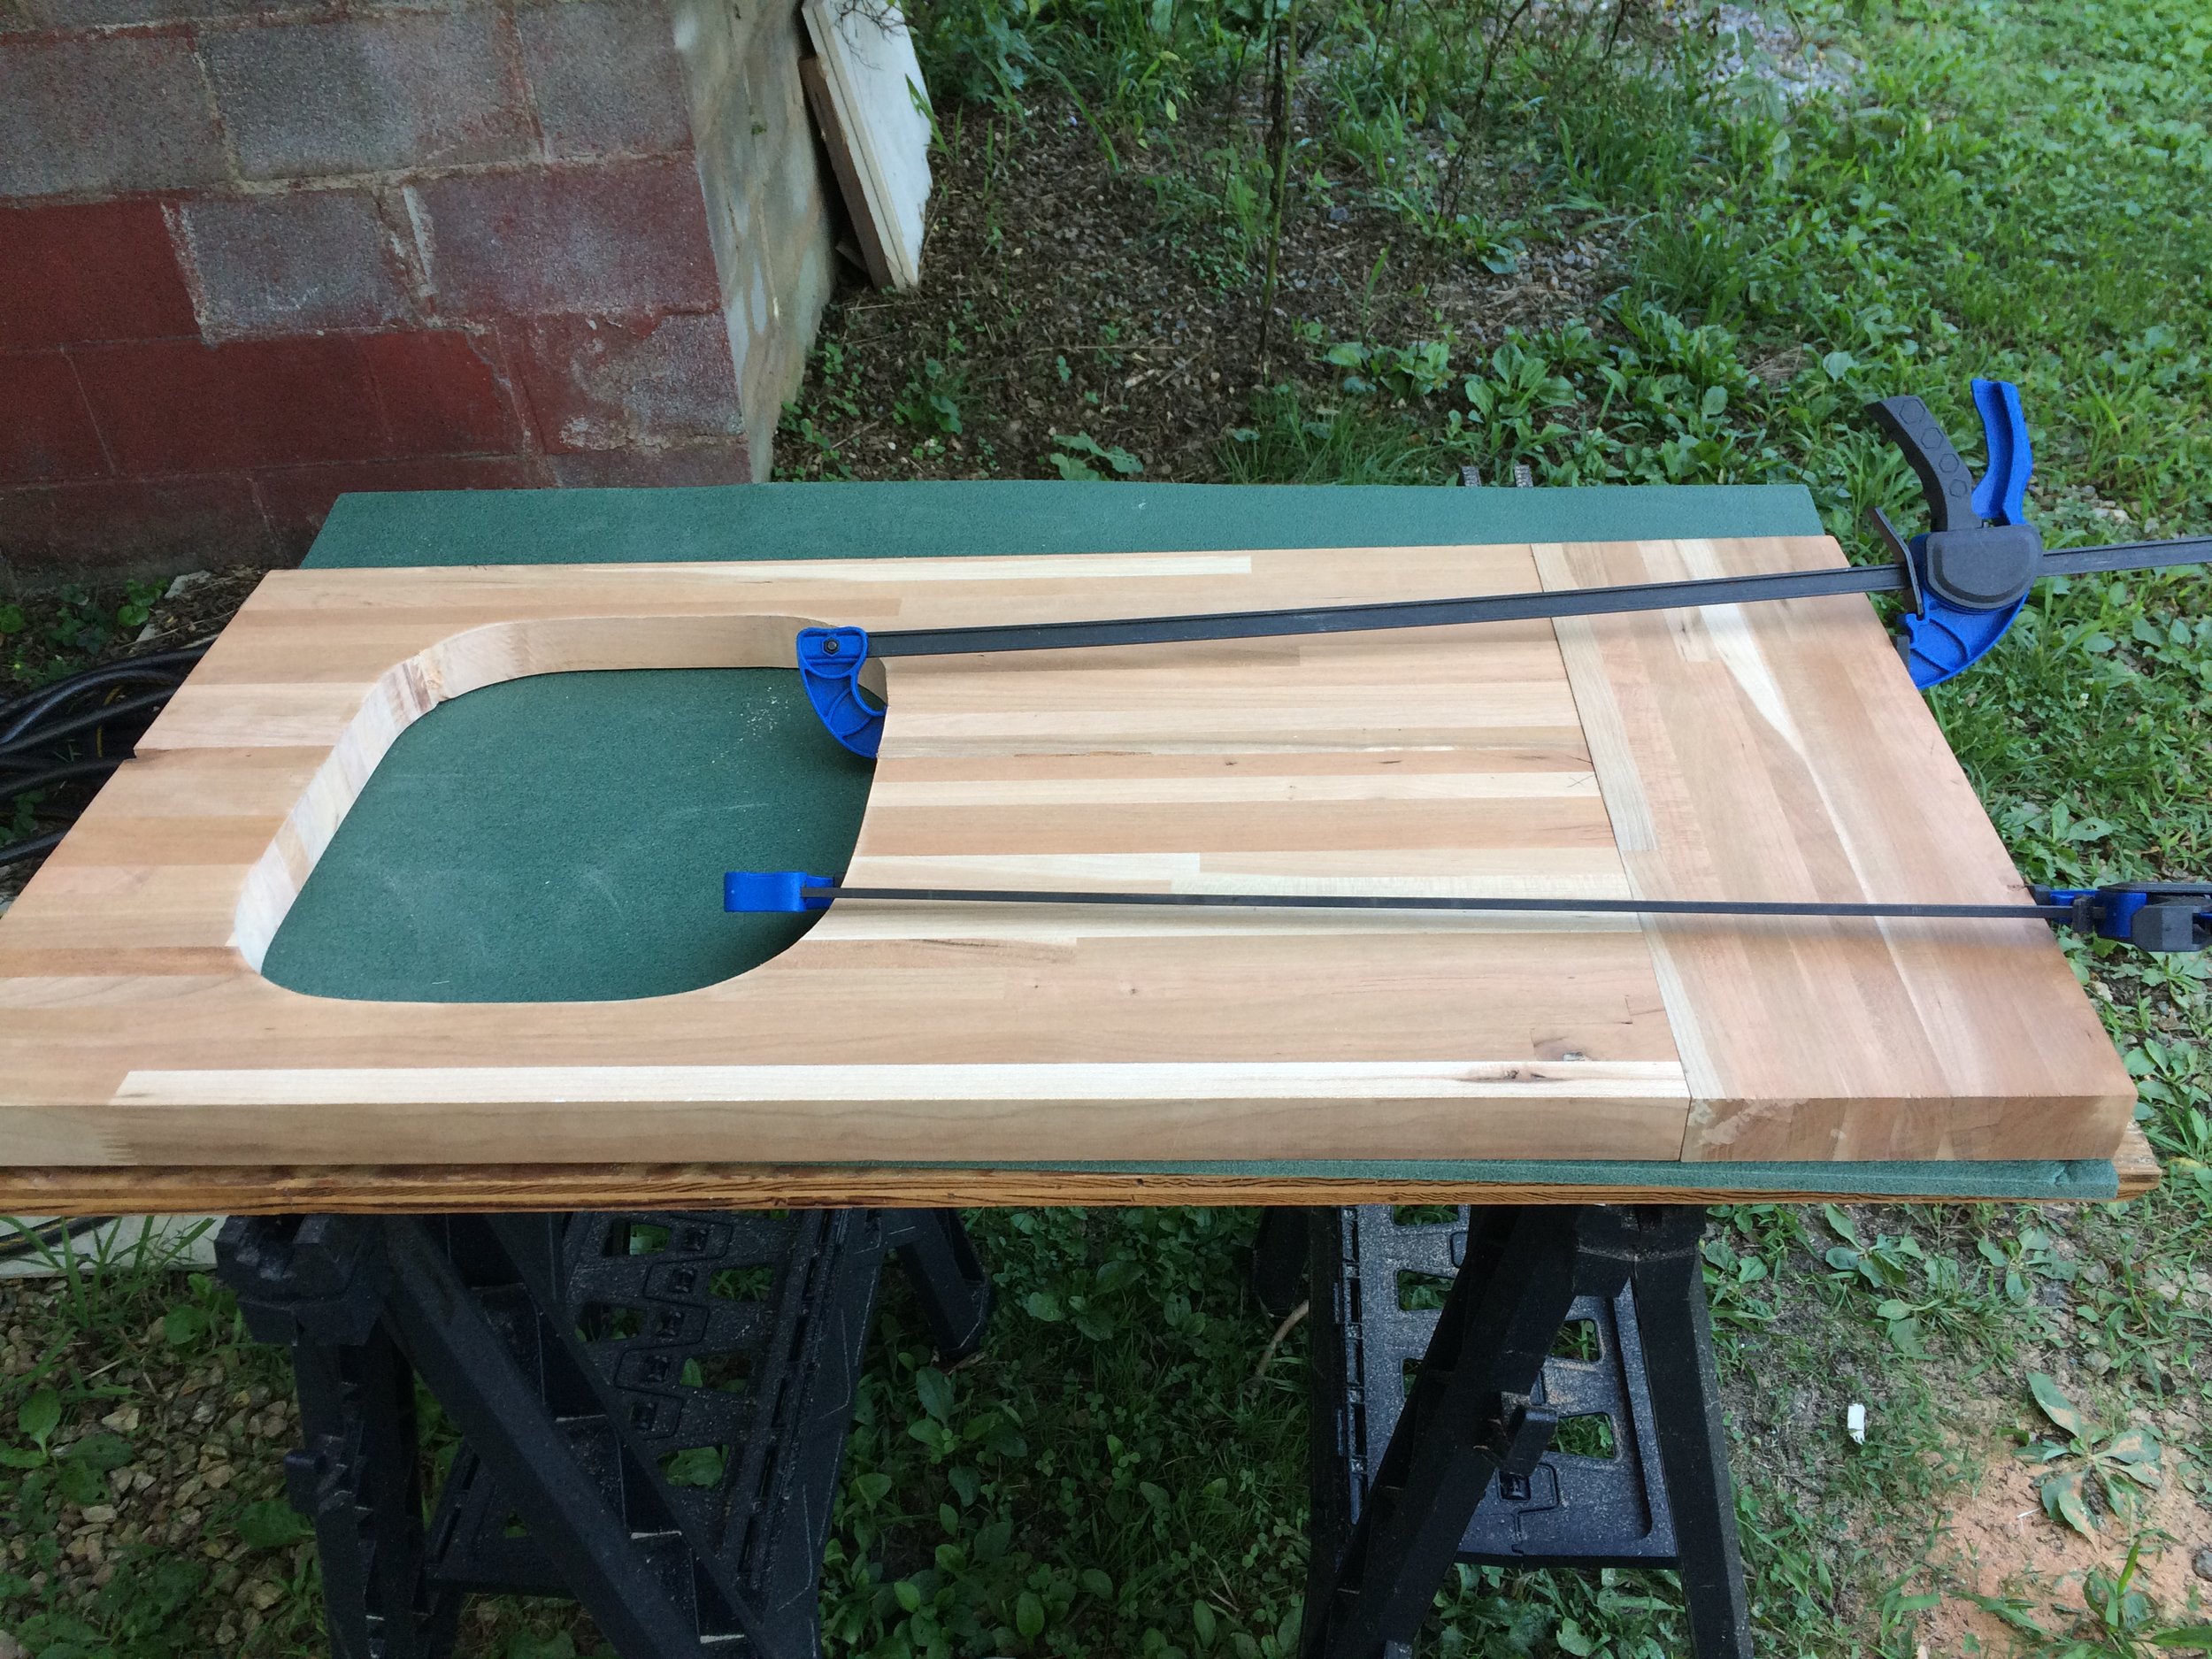
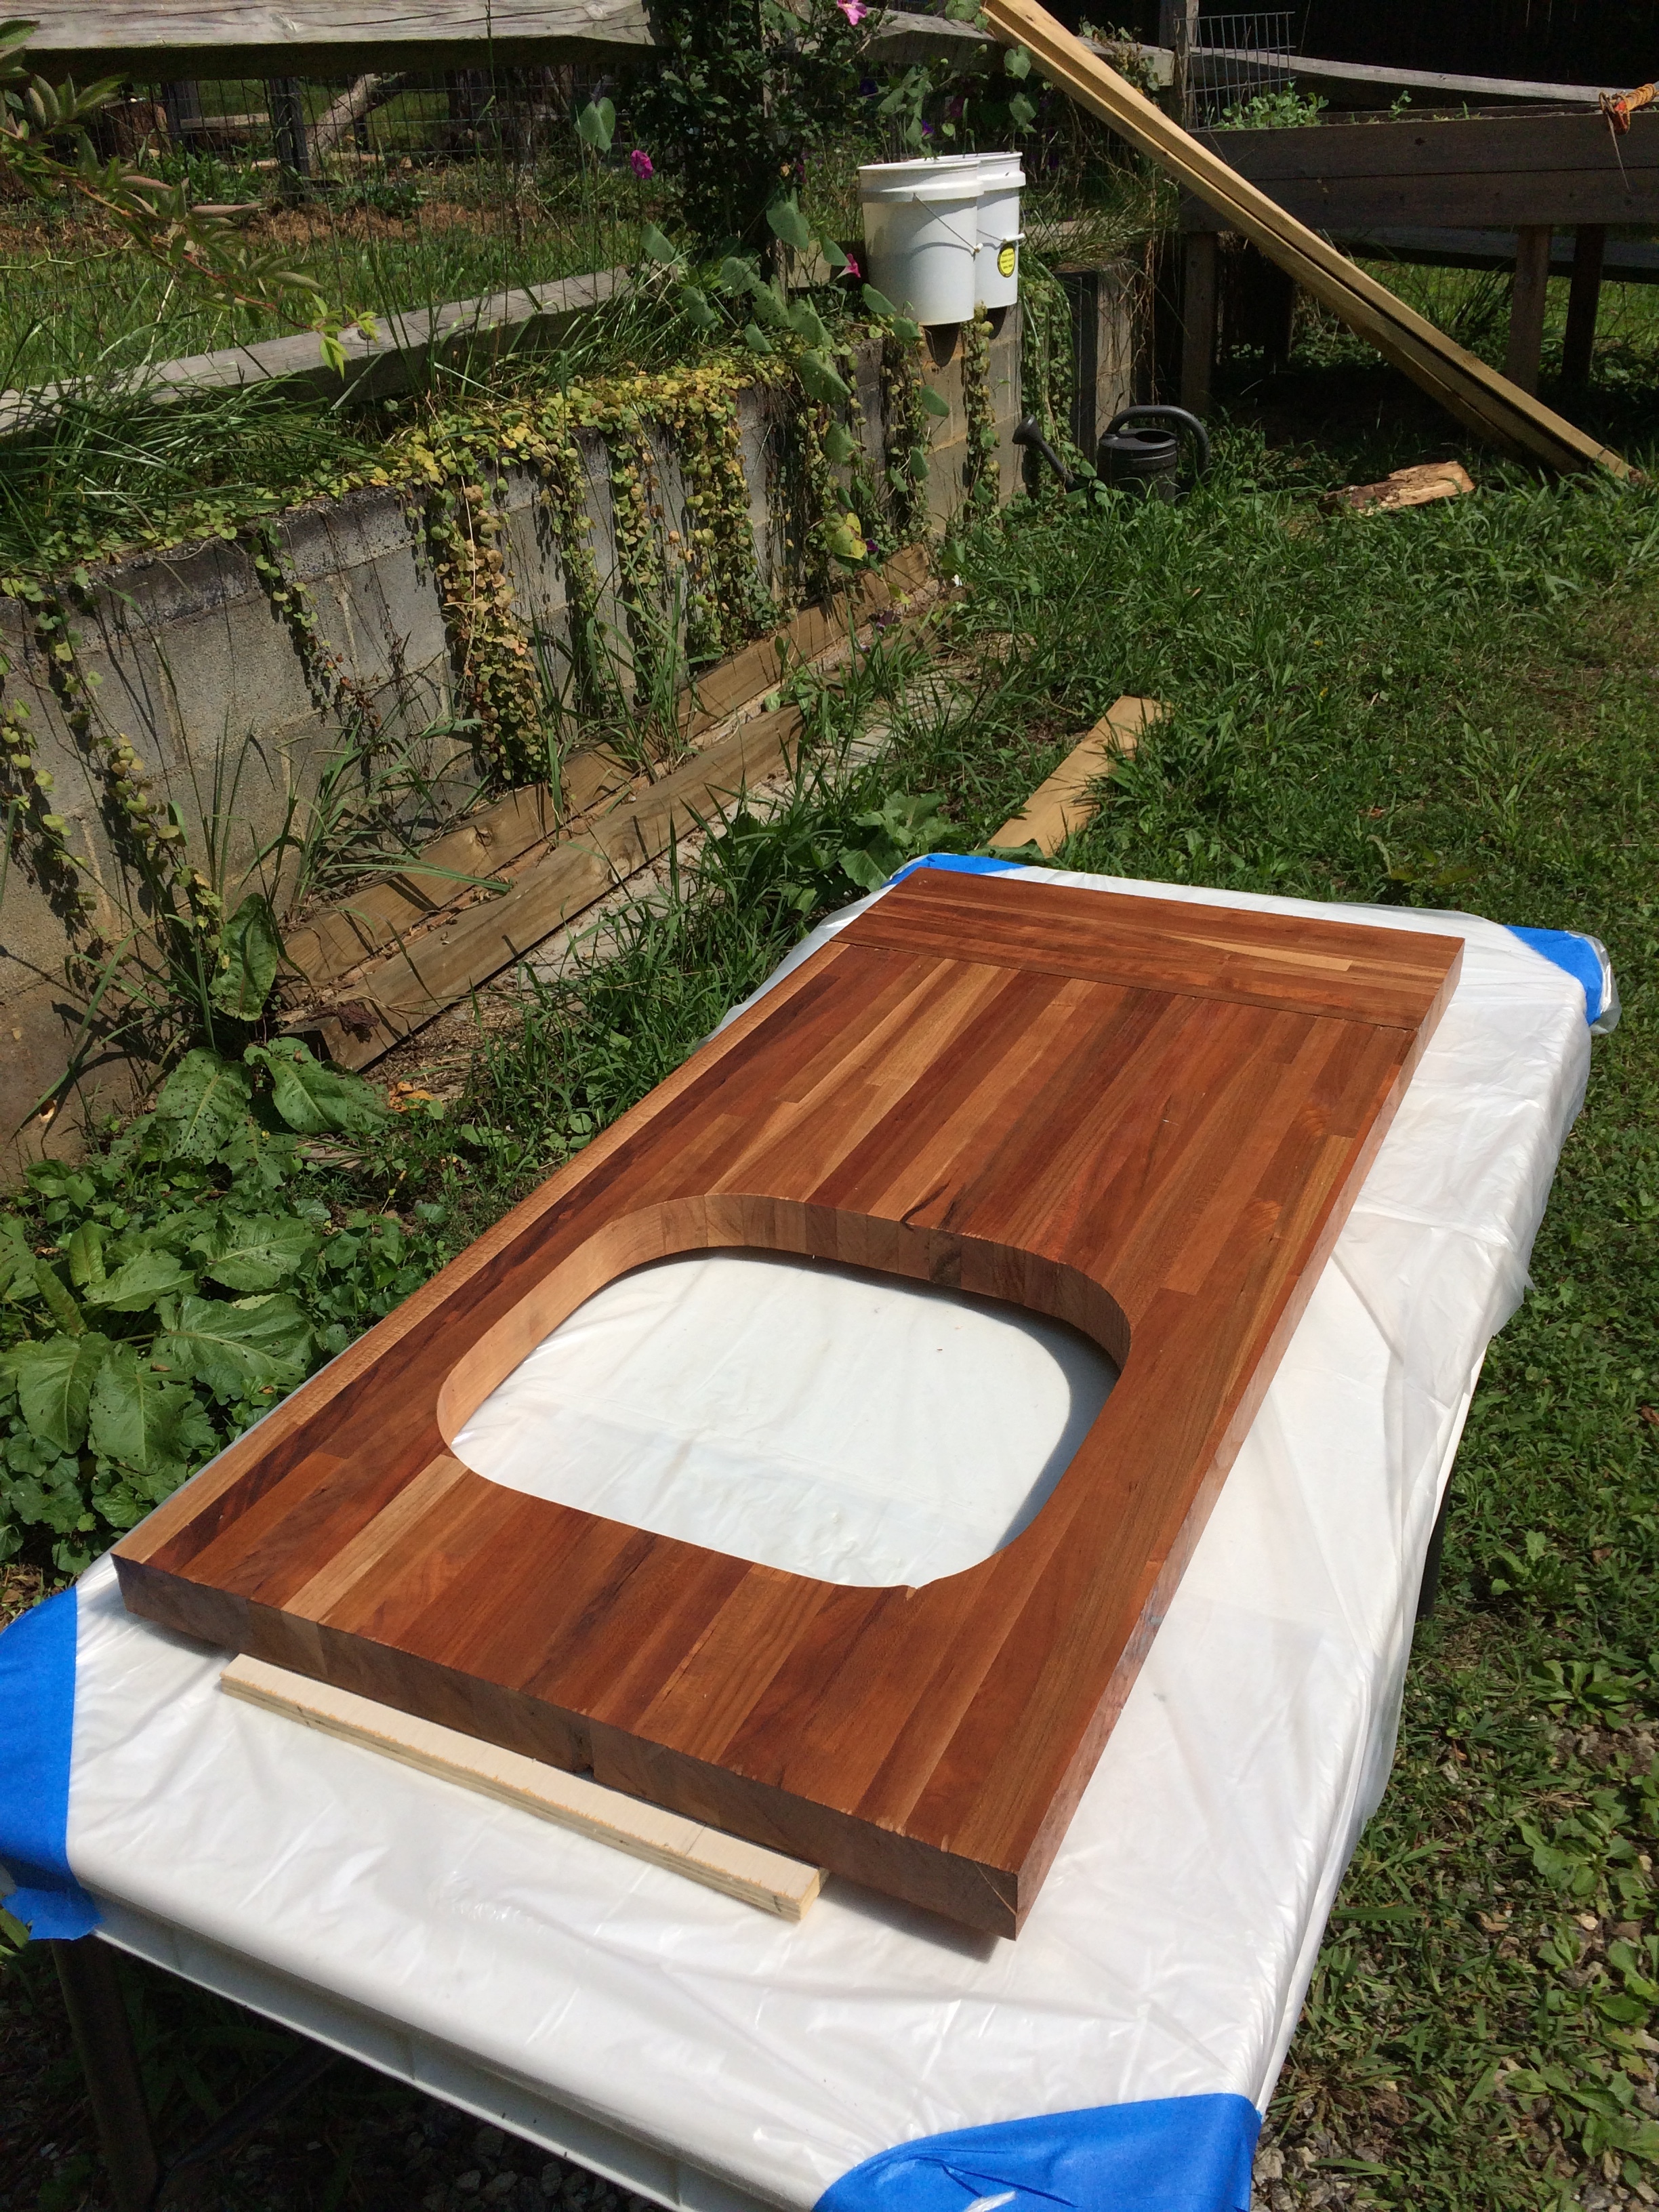
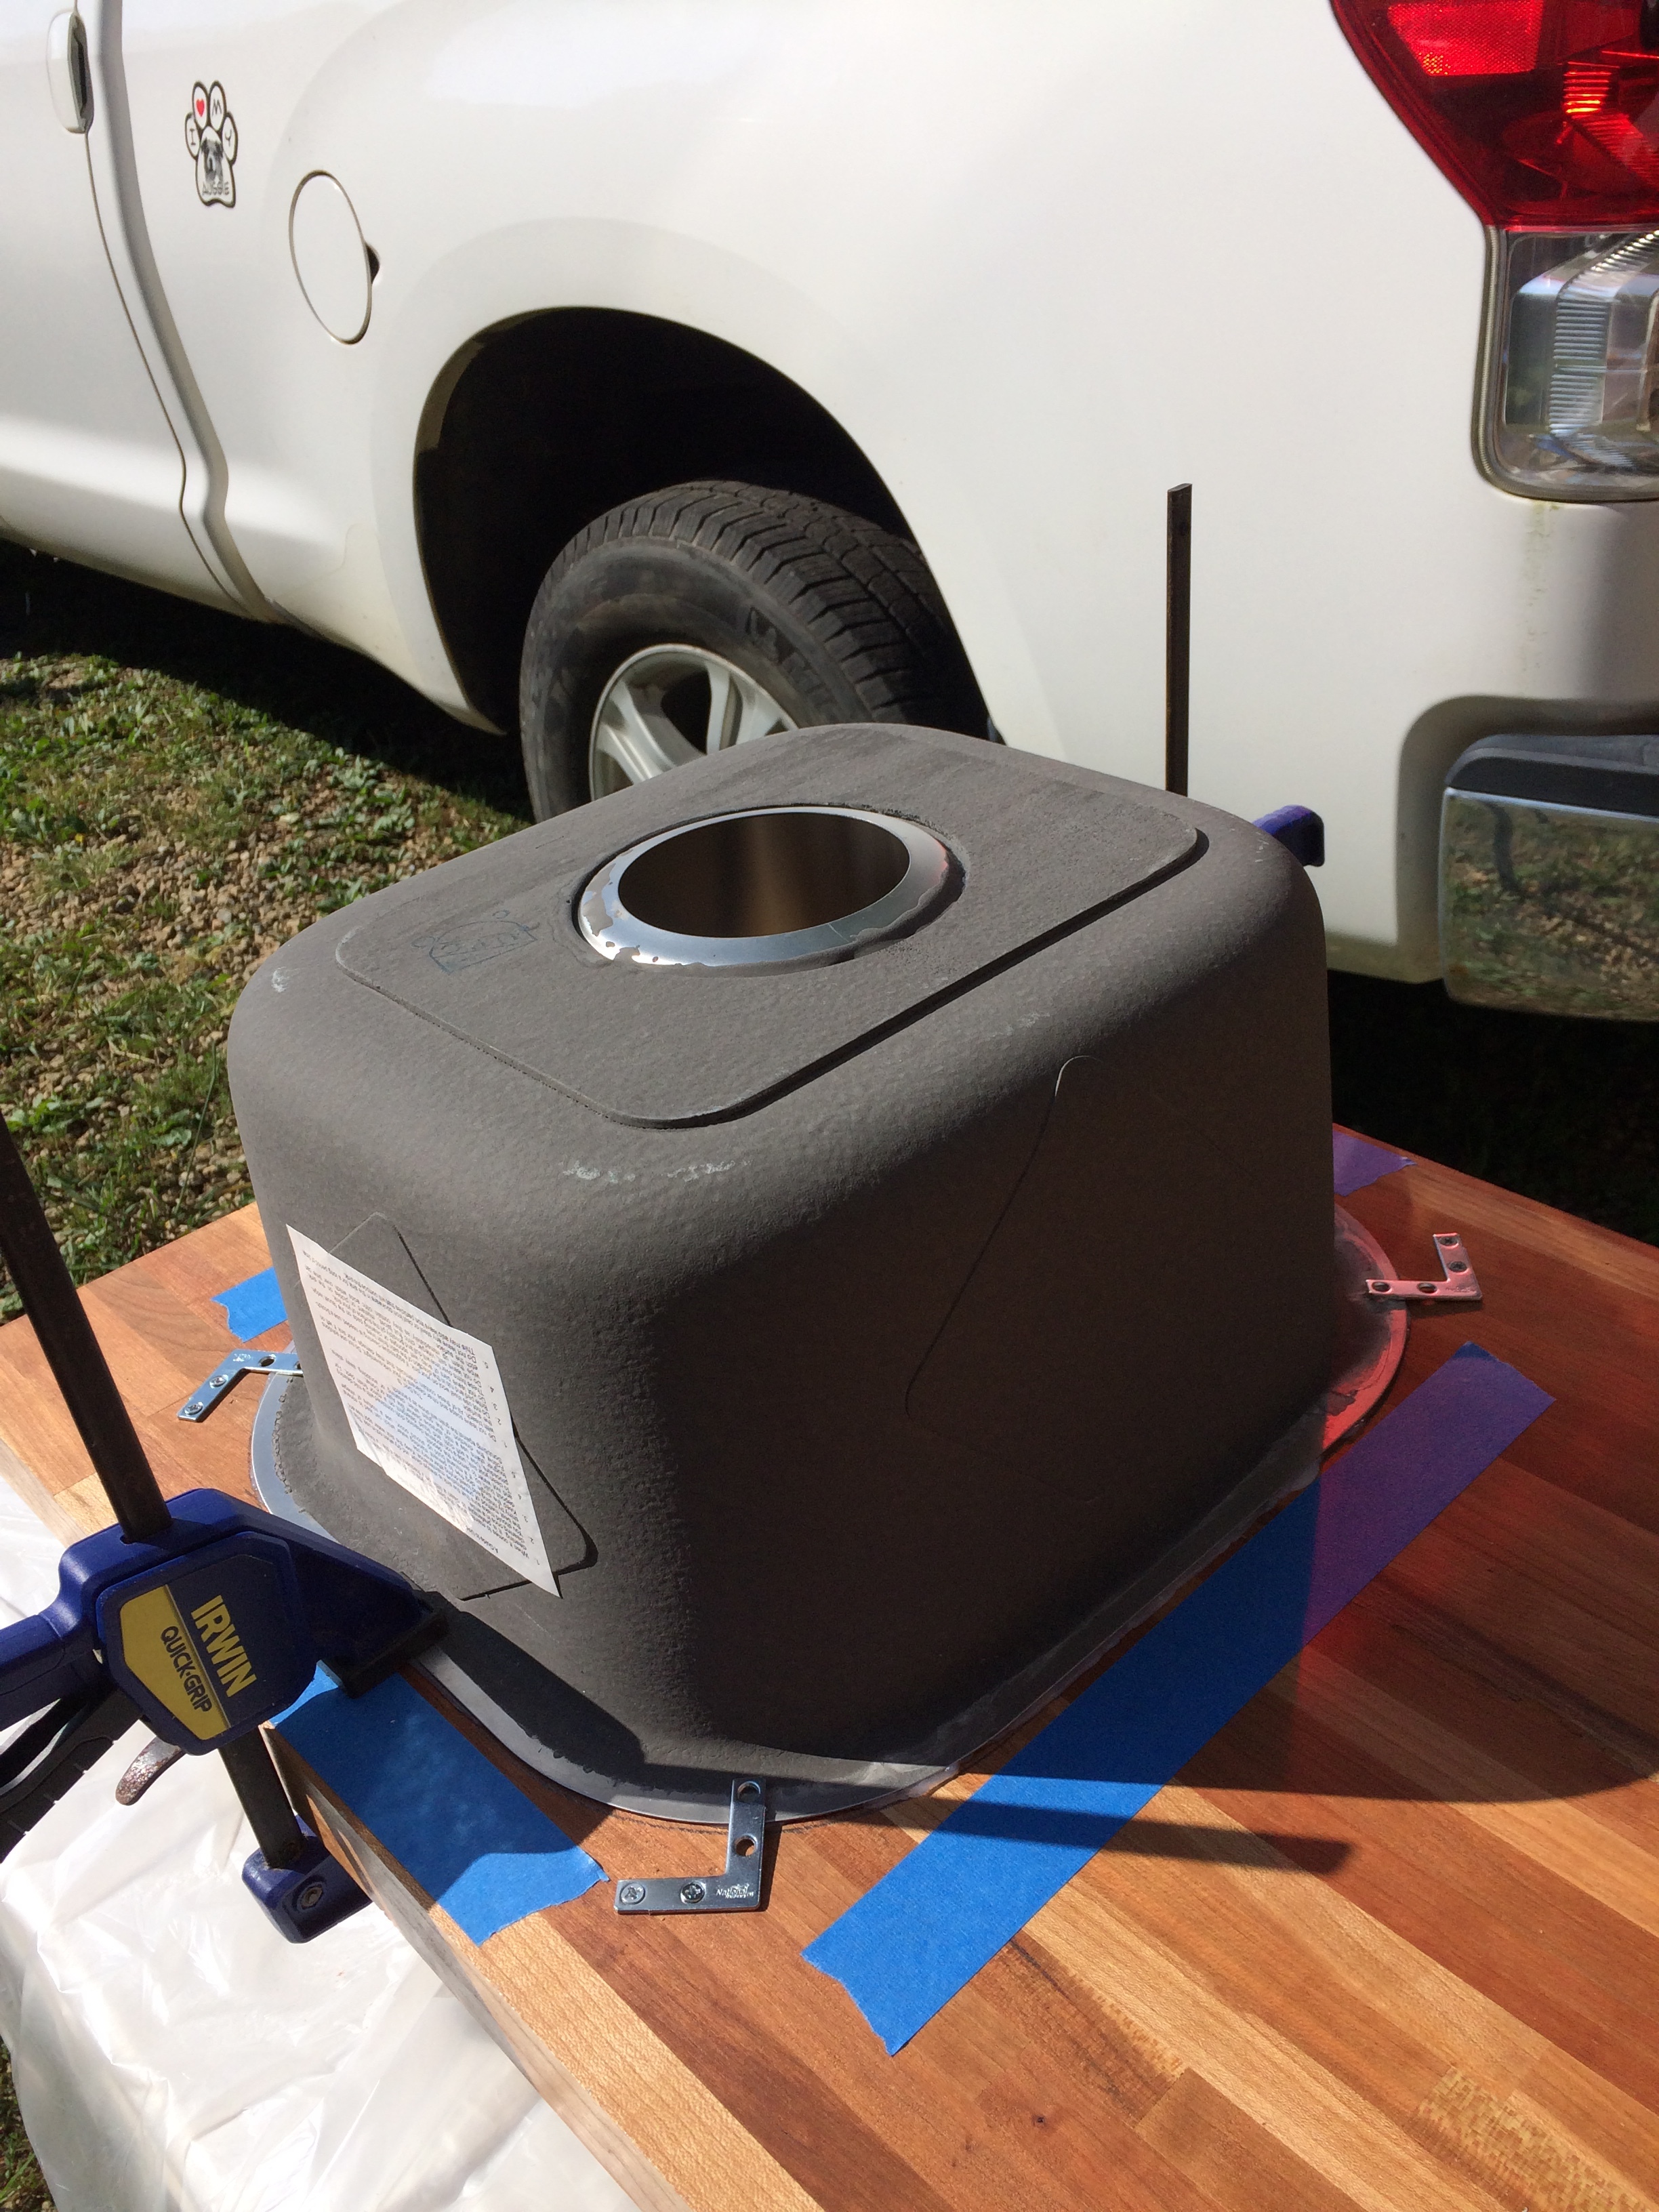
The countertop piece that was gifted to me was to wide and not long enough. One of the guys at work has a wood shop out back of his house and used his band saw to cut the countertop for me. I planned to use part of the off cut and glue it to the end to make it long enough. The problem was it turns out I didn’t have a clamp long enough (almost…but not quite). So I cut out the hole for the sink (using the supplied template) and clamped from the hole instead. I then used 4 coats of wipe-on poly to seal the whole thing. Even with the band saw cuts and super tight clamping there were still some very small gaps, I filled these with kitchen silicone to keep crumbs etc. from getting in there. I thought the difference in texture might bother me, but it doesn’t. The clips that came with the sink for attaching it to the counter would not work in the very tight confines of the cabinet so I ended up using the corner shaped pieces you see in the picture instead as they are so much smaller.
I attached the countertop with multiple corner braces and hung one door on each side for easy access to fill fresh water, empty grey water and get my stove out when I am going to cook (it sits on the shelf over the fresh water containers).
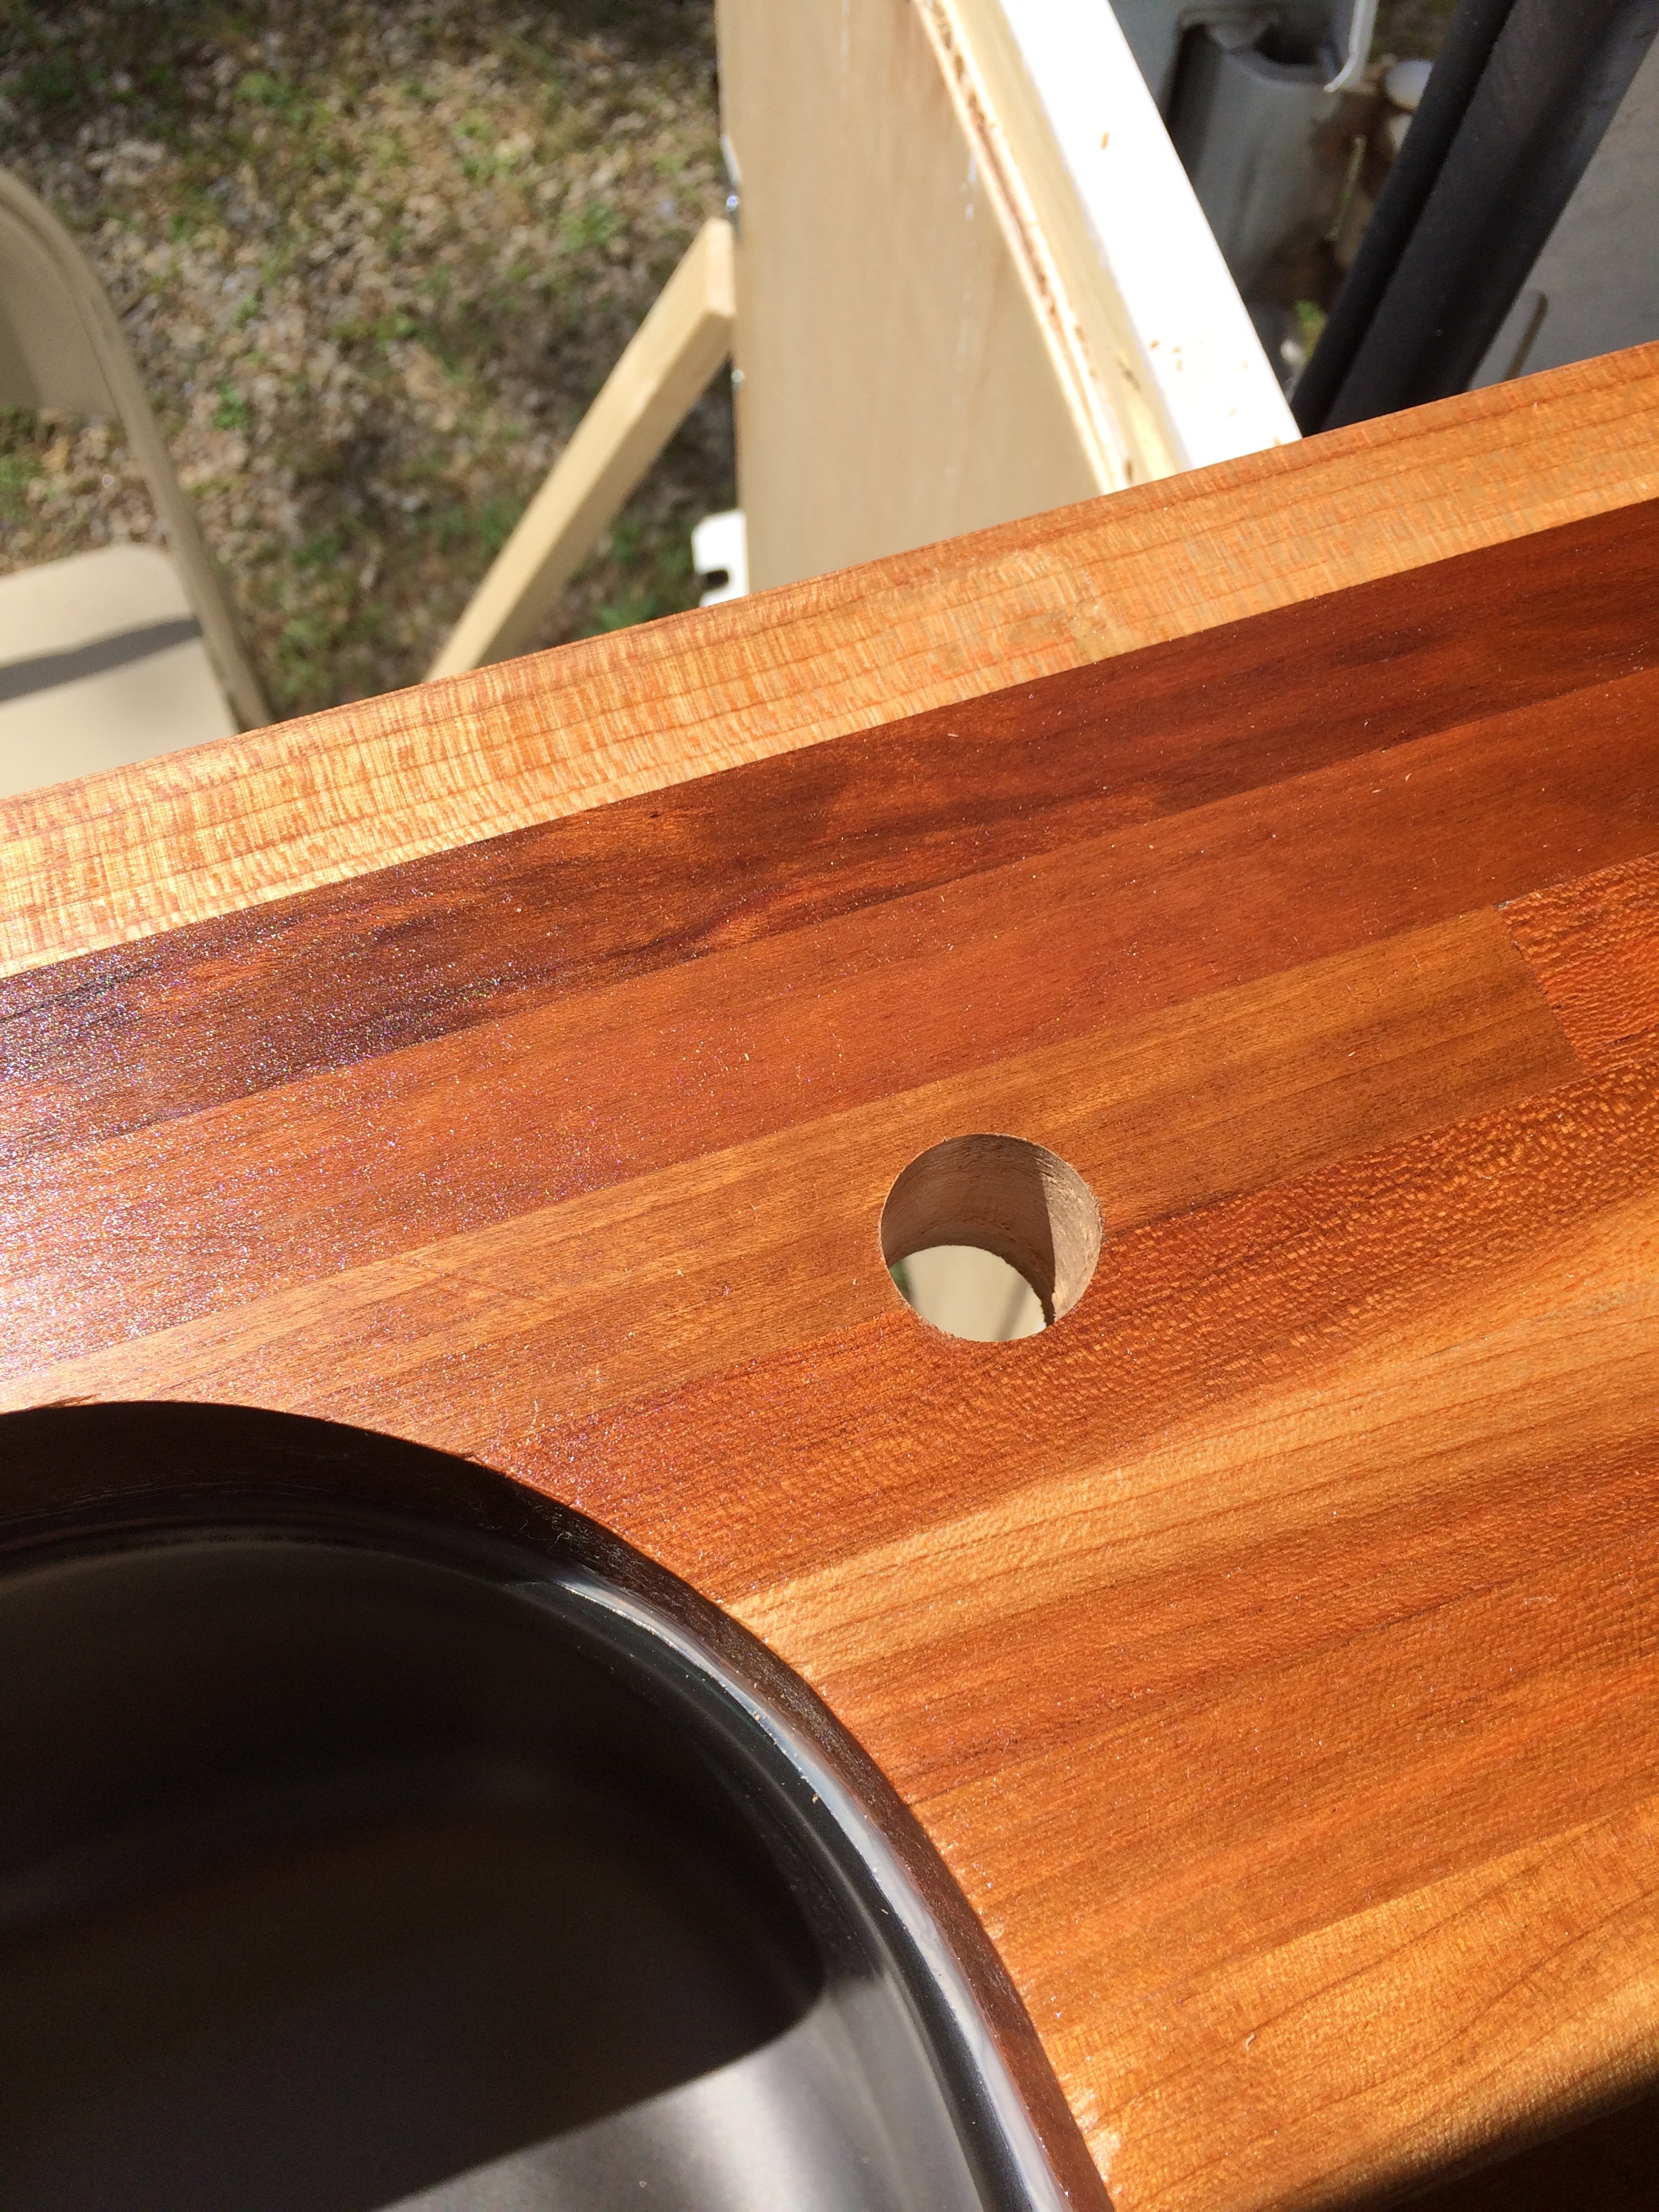
Next step was installing the faucet. Here I encountered an unexpected problem. When I ordered the faucet I had looked at the directions for installation, noted the size hole I would need to drill so that I was sure there was enough room for said hole when I cut the big hole for the sink. That part was all fine. The threaded section that is used to clamp the faucet to a countertop wasn’t long enough to clamp to my butcher block counter…

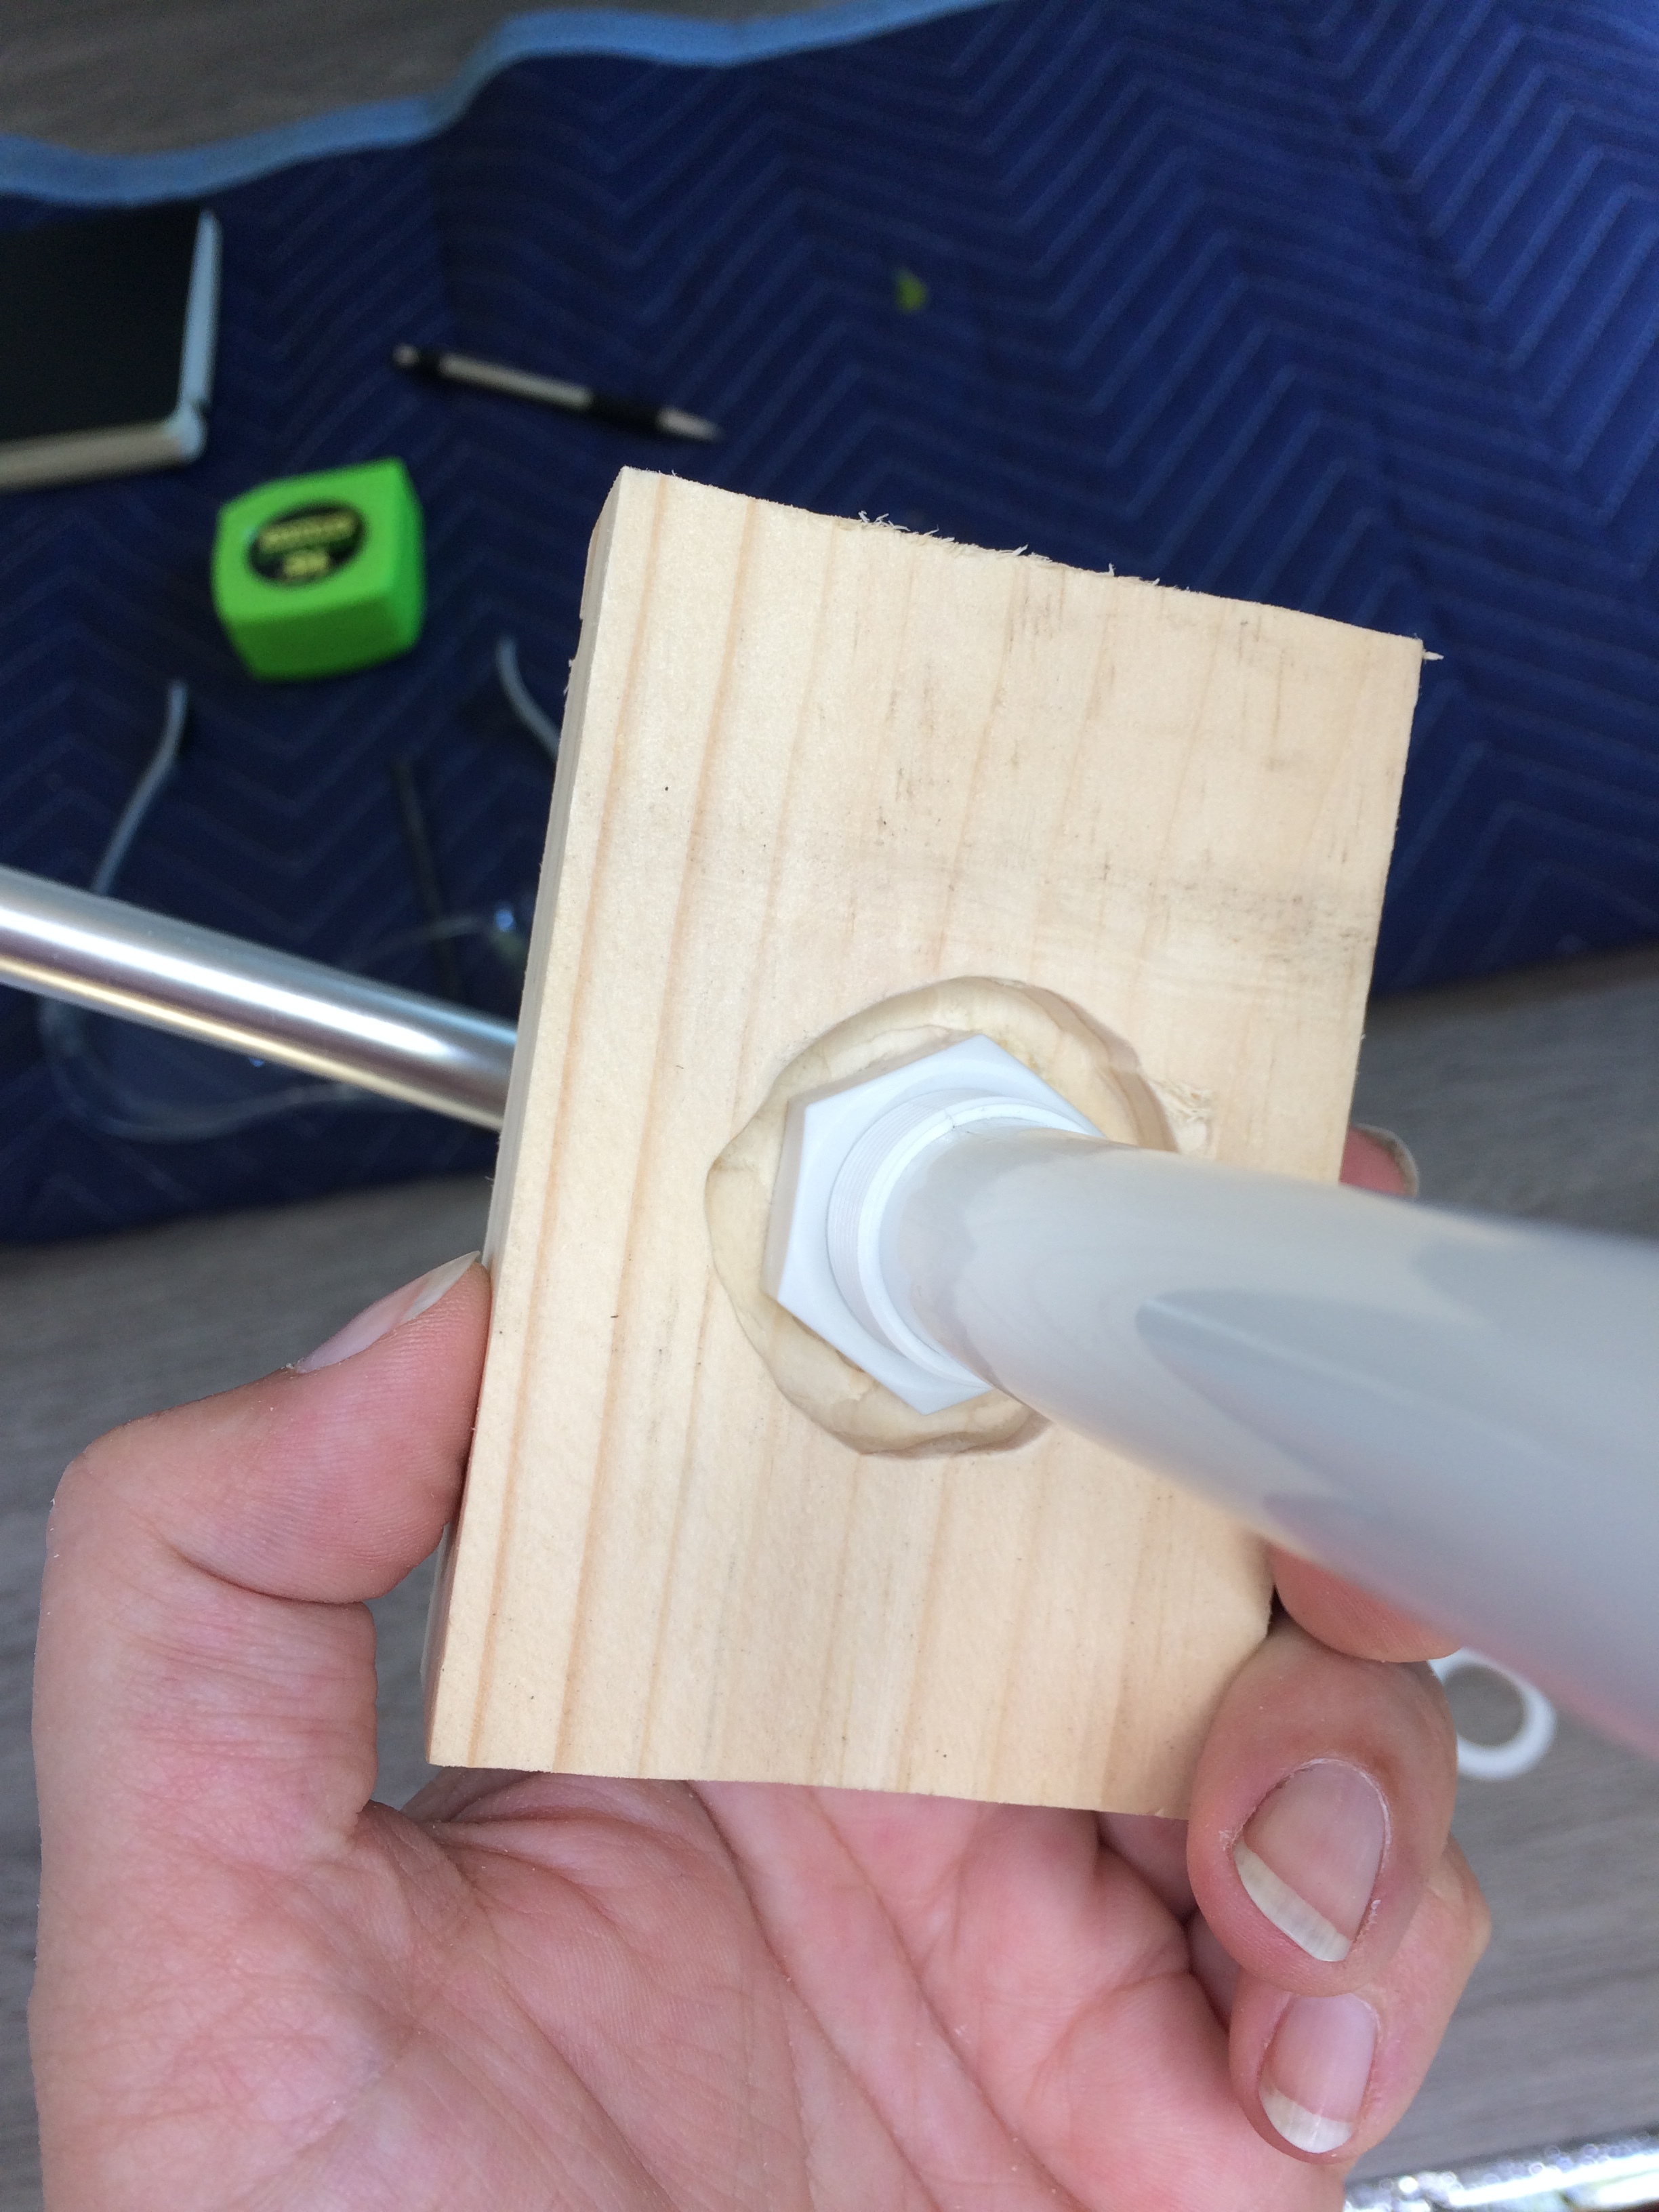
There was no longer room to use a hole saw to remove some material underneath because the sink and stove shelf had already been installed. I didn’t want to do it from the top and essentially countersink the faucet cause all kinds of crap would get down in the hole and there’s no good way to clean it out. There was un-ladylike language! There were pictures and text messages exchanged with my youngest brother to come up with possible solutions. What I ended up doing was drilling the hole where originally marked. Then I took a piece of wood, chiseled out a countersink hole in the bottom to allow room for the nut to be tightened (I couldn’t find a hole saw small enough and a forester bit of the correct size was $40 which was more than I was willing to spend for something I needed to use once). Then I essentially clamped the faucet to the piece of wood, painted the wood and then fed it down the hole and screwed the piece of wood to the countertop (I didn’t want to glue/epoxy incase I need to tighten/fix/replace the faucet). Not what I had in mind in the beginning, but it was the best solution I could come up with and it works fine.
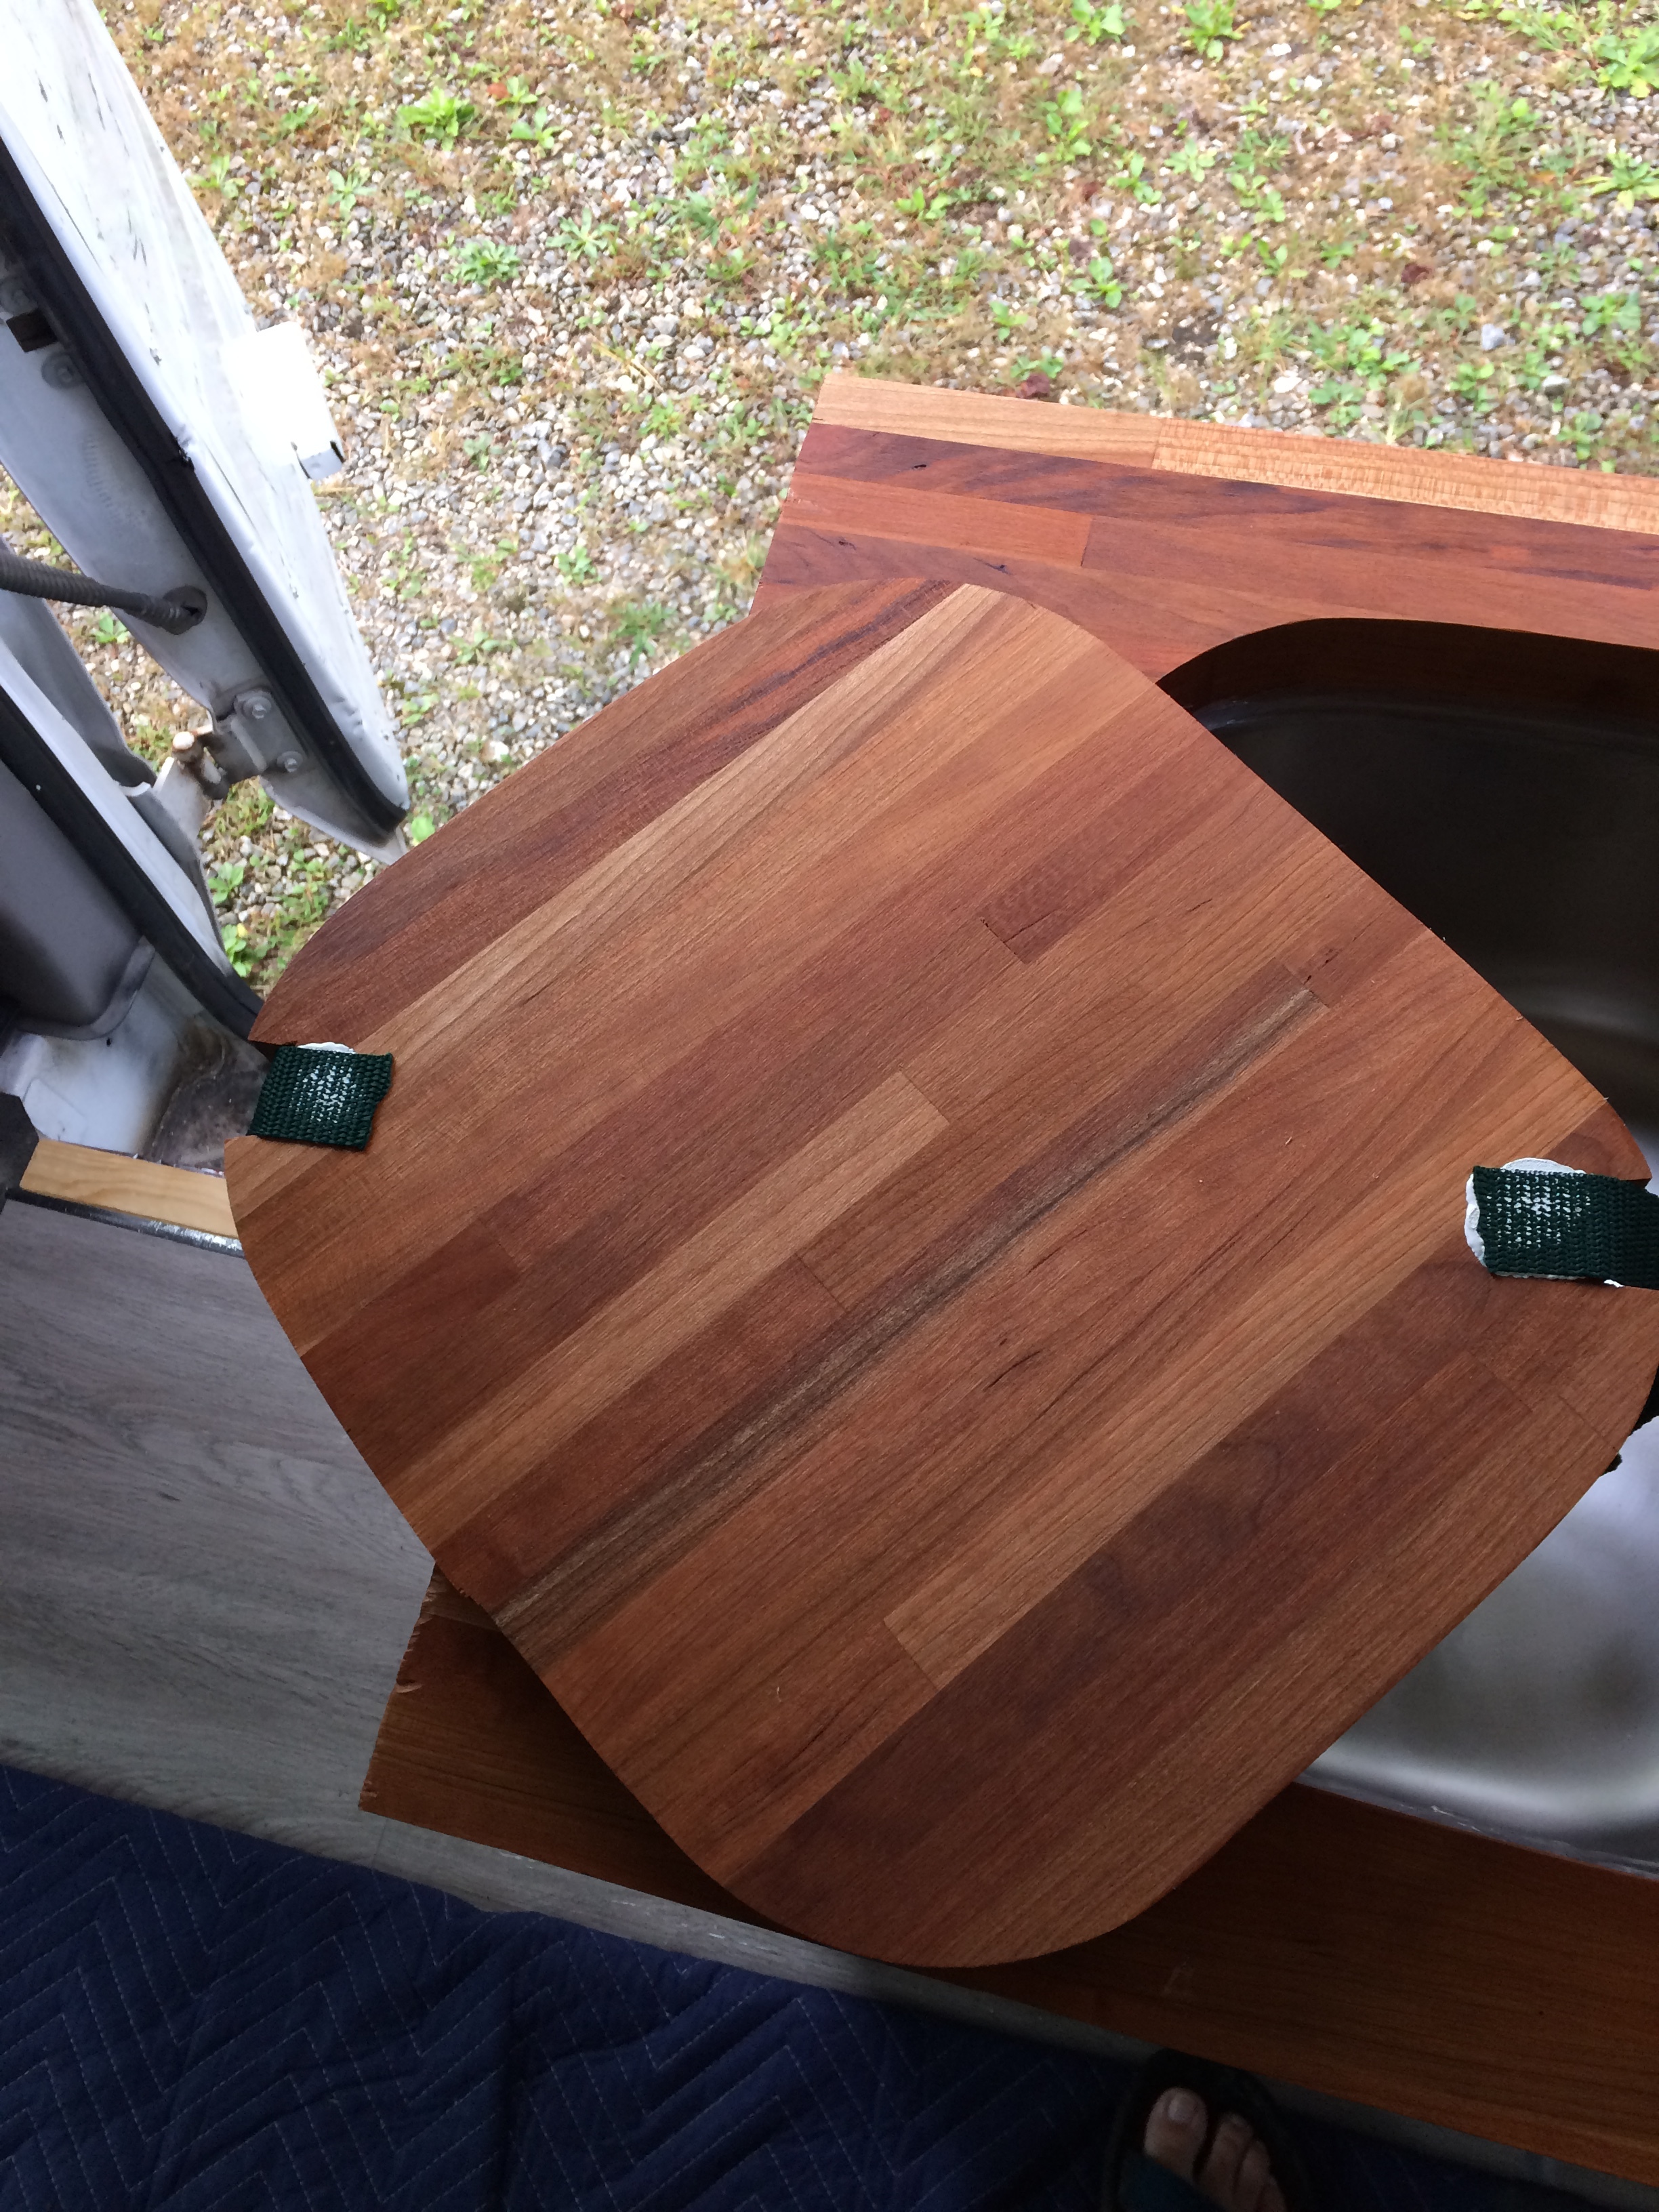
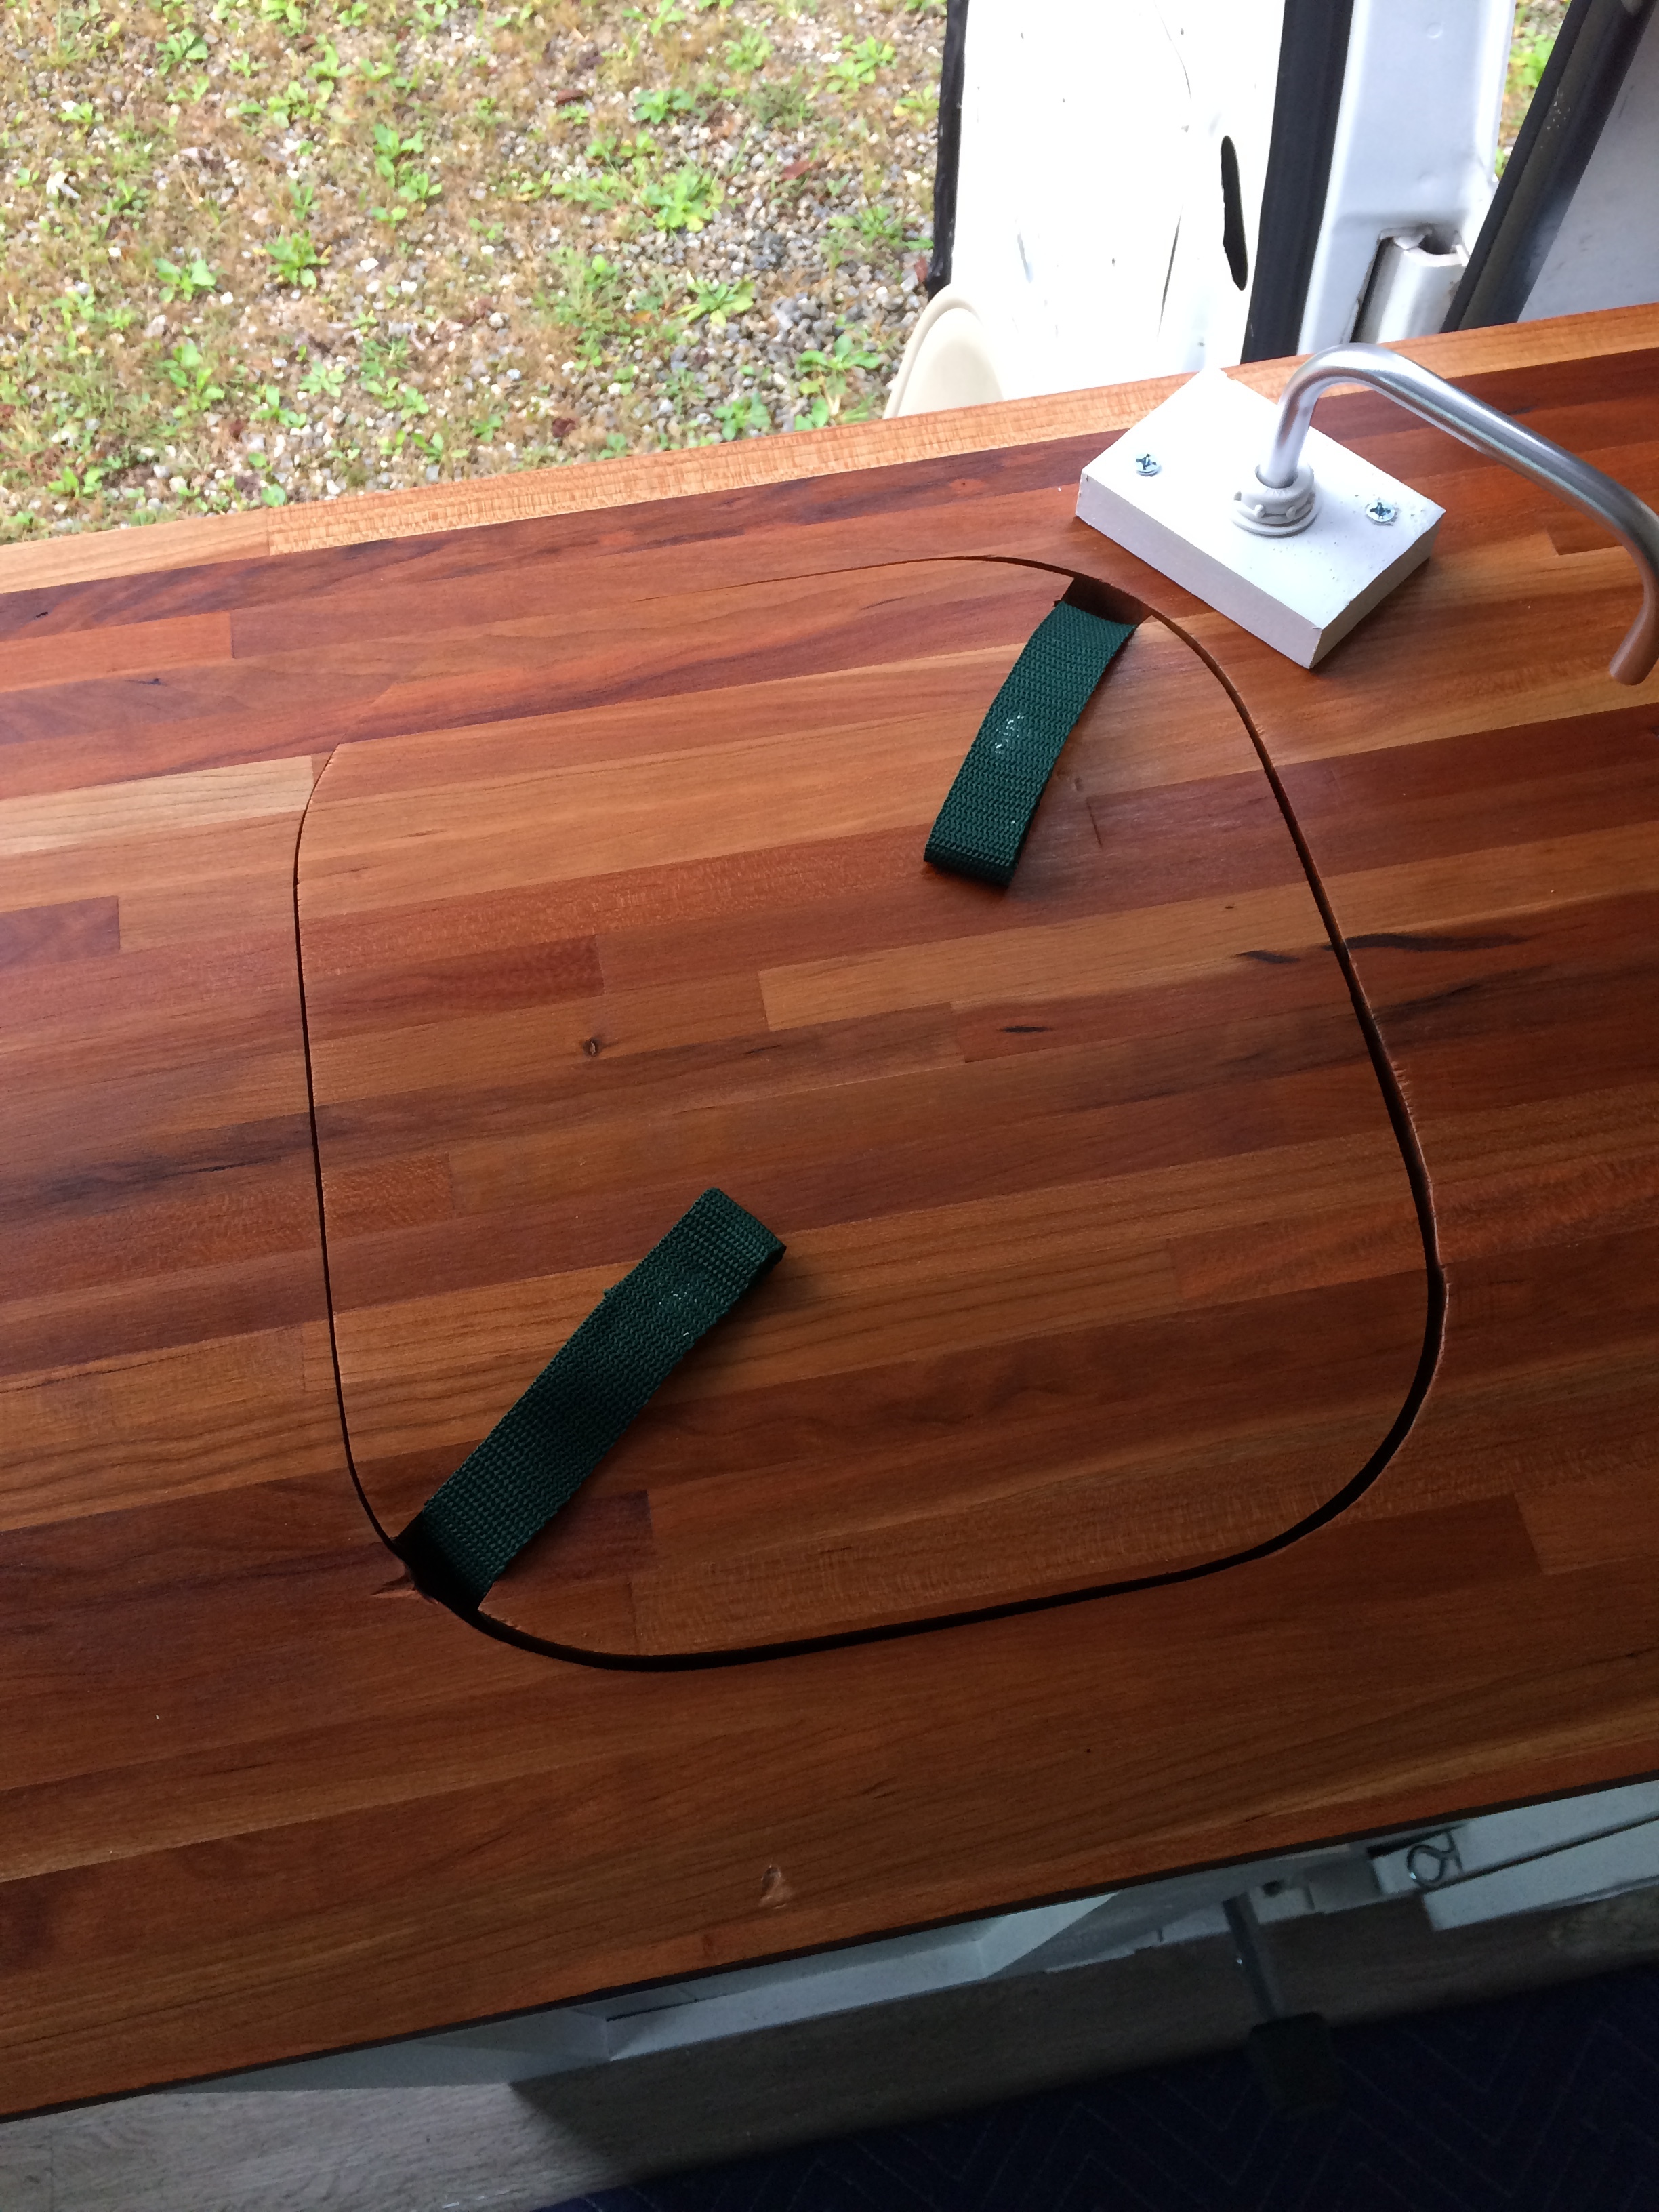
I saved the chunk I cut out for the sink and glued some pieces of old pack strap to the back, giving me a sink cover I can use when I want the counter space. The butcher block is an inch and a half thick so just finger cut outs weren’t enough to lift something that heavy out, the straps work great and aren’t in the way.
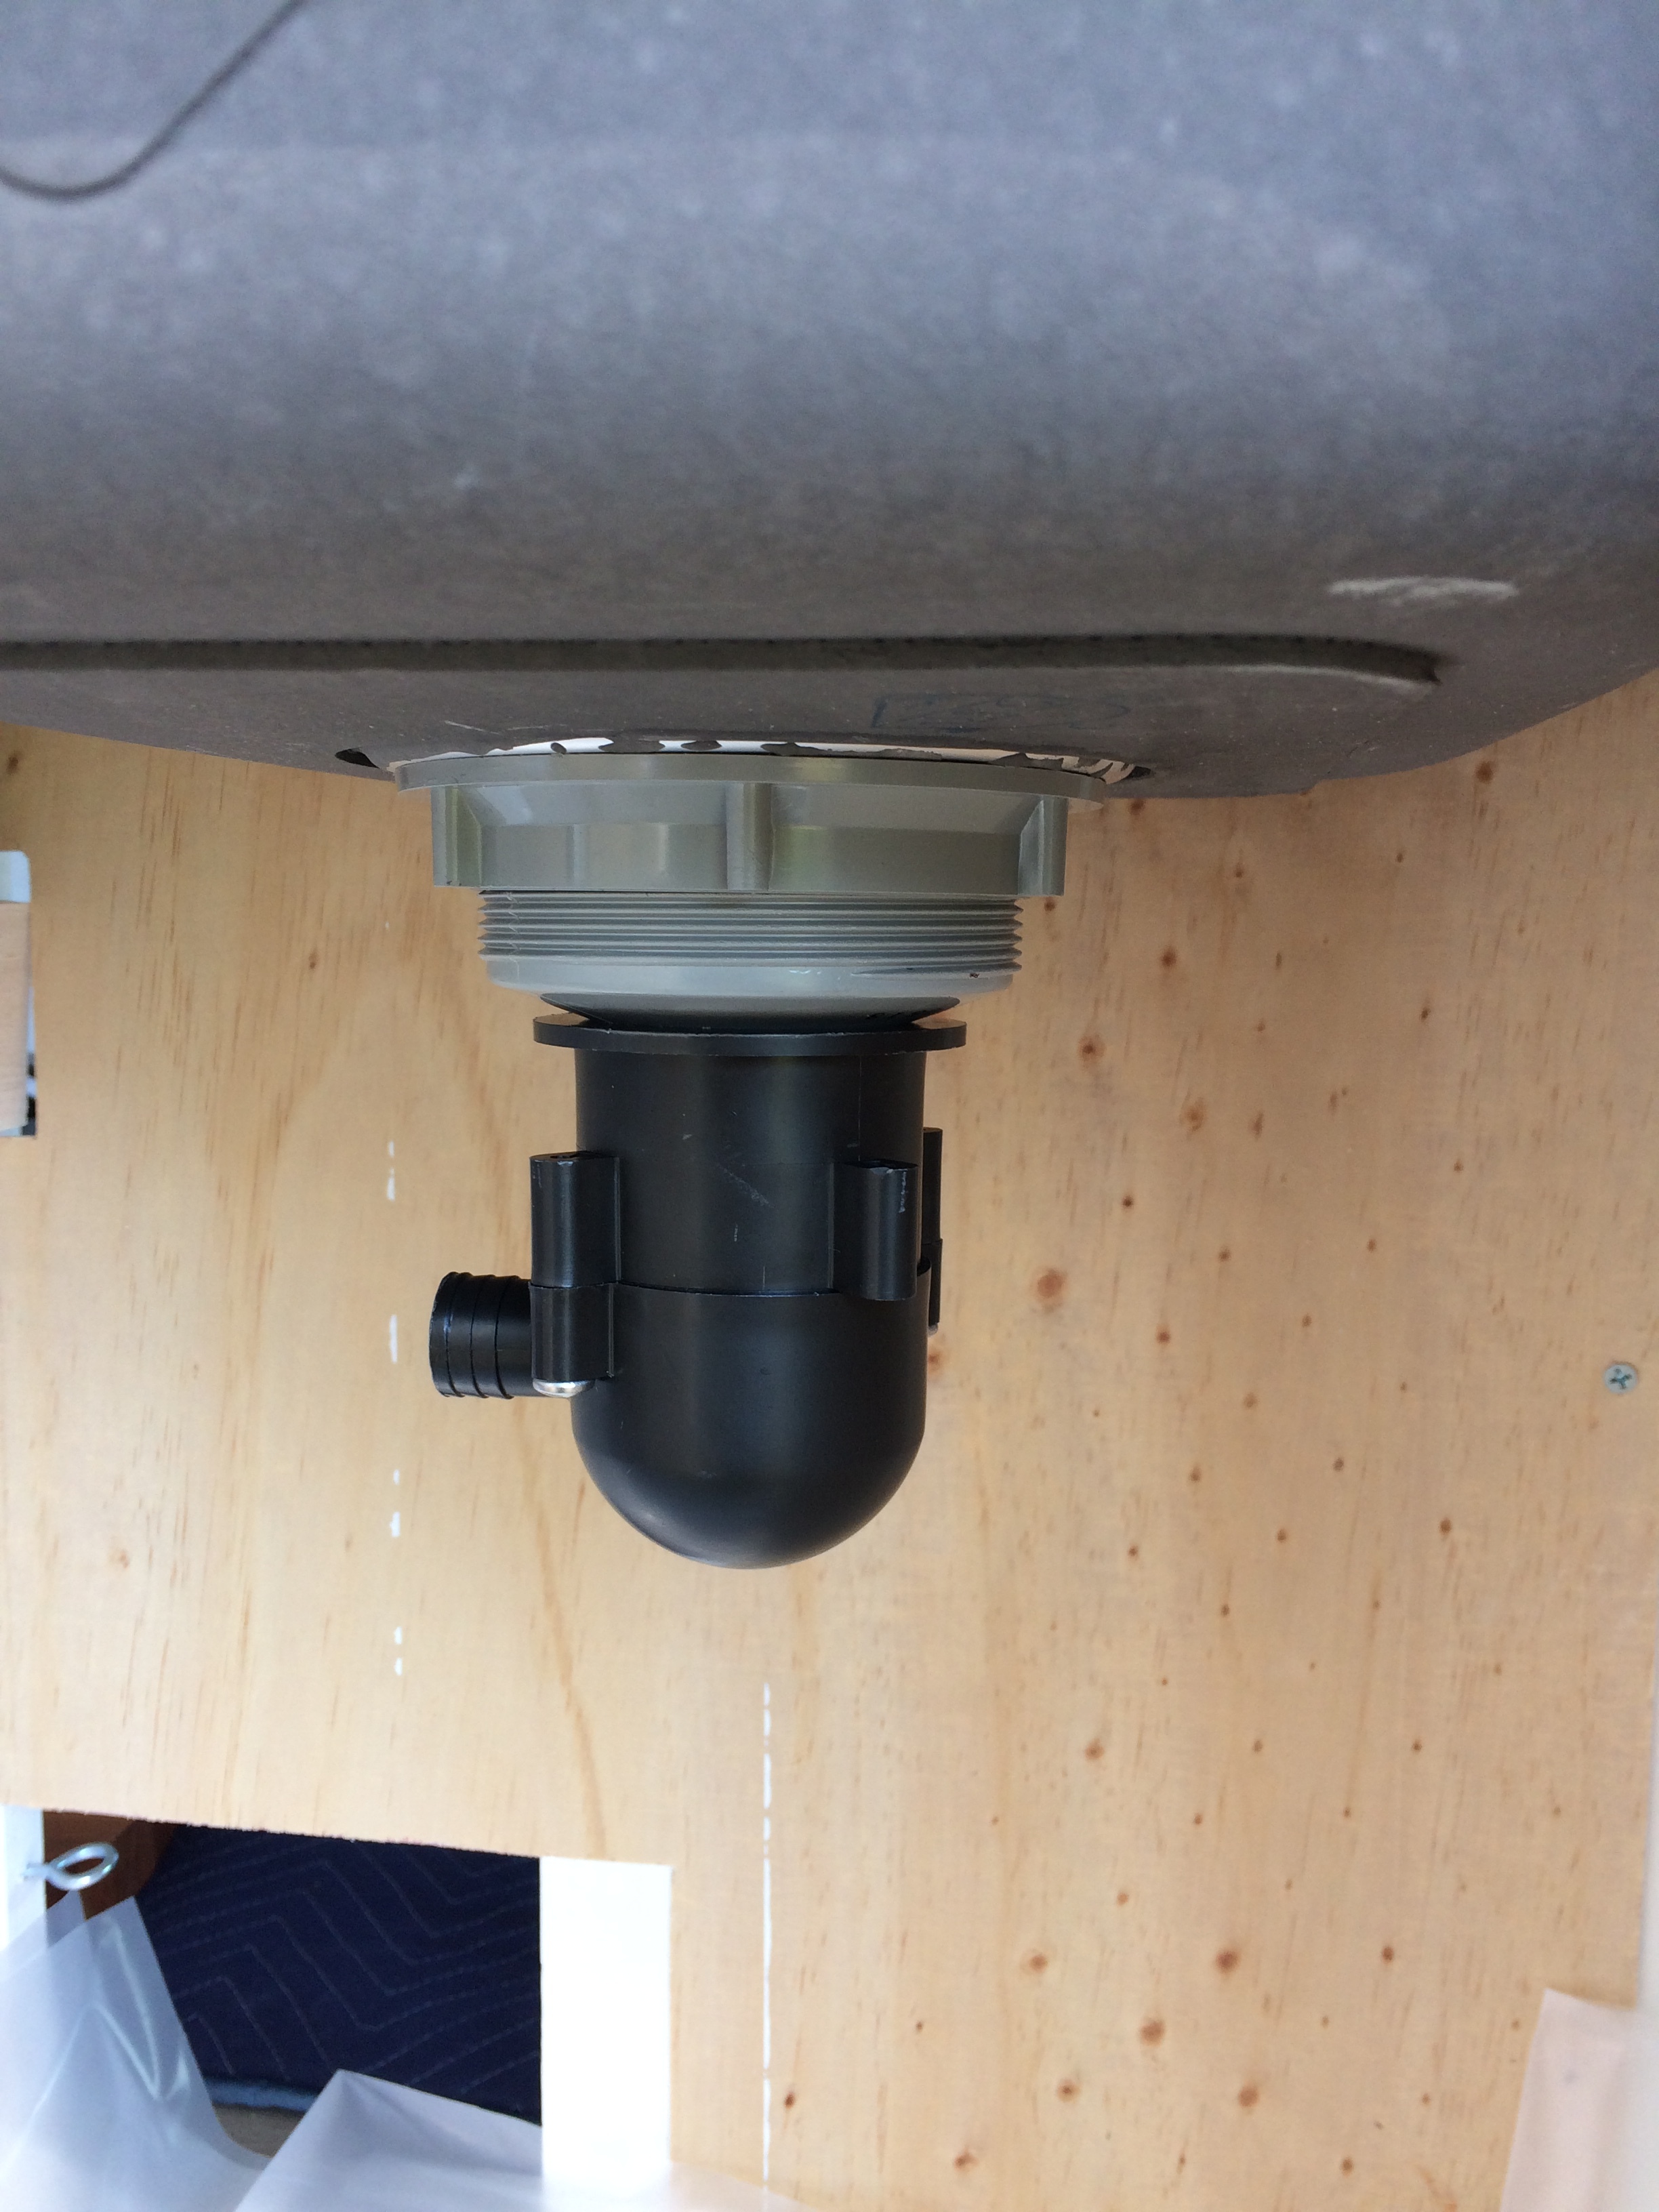
Then I just needed to plumb from the sink to the grey water container. I used this RV part to do that. I had to cut and modify it a bit, but it ended up working perfectly for super cheap!

That’s it! I have been brushing my teeth, washing my hands and dishes for months and months now. No problems, no leaks!
I put up some pegboard on the side door in front of this cabinet. I put spices (and my toothbrush) here so that when I am cooking inside Bombadil they are right there over the sink. But if I am cooking outside on my collapsible table I can open that door and have the spices right there as well!